Paediatric Orthopaedic Specialist
Post-patellar dislocation
Home Exercise Program
Not every exercise listed here is suitable for every child: the selection is individual and is defined during the consultation.
For whom: After patellar dislocation and assessment of associated injuries. After surgery, select only entries compatible with the surgeon’s protocol: this catalogue does not define postoperative weight bearing, brace use or movement limits.
Dose and frequency: Perform only the exercises selected during the visit. The listed dosages are examples to adapt: follow the dose, frequency, rest and progression prescribed for age, symptoms and phase. Do not automatically perform the whole list.
Equipment and supervision: A stable, clear surface, comfortable clothing and a secure support. Check resistance-band anchors. Adult supervision; avoid marbles and small objects if the child may put them in their mouth, using a towel instead.
Avoid: Forcing a painful or unauthorised movement; Increasing load, resistance or frequency without the agreed rest periods; Doing balance exercises without stable support or supervision.
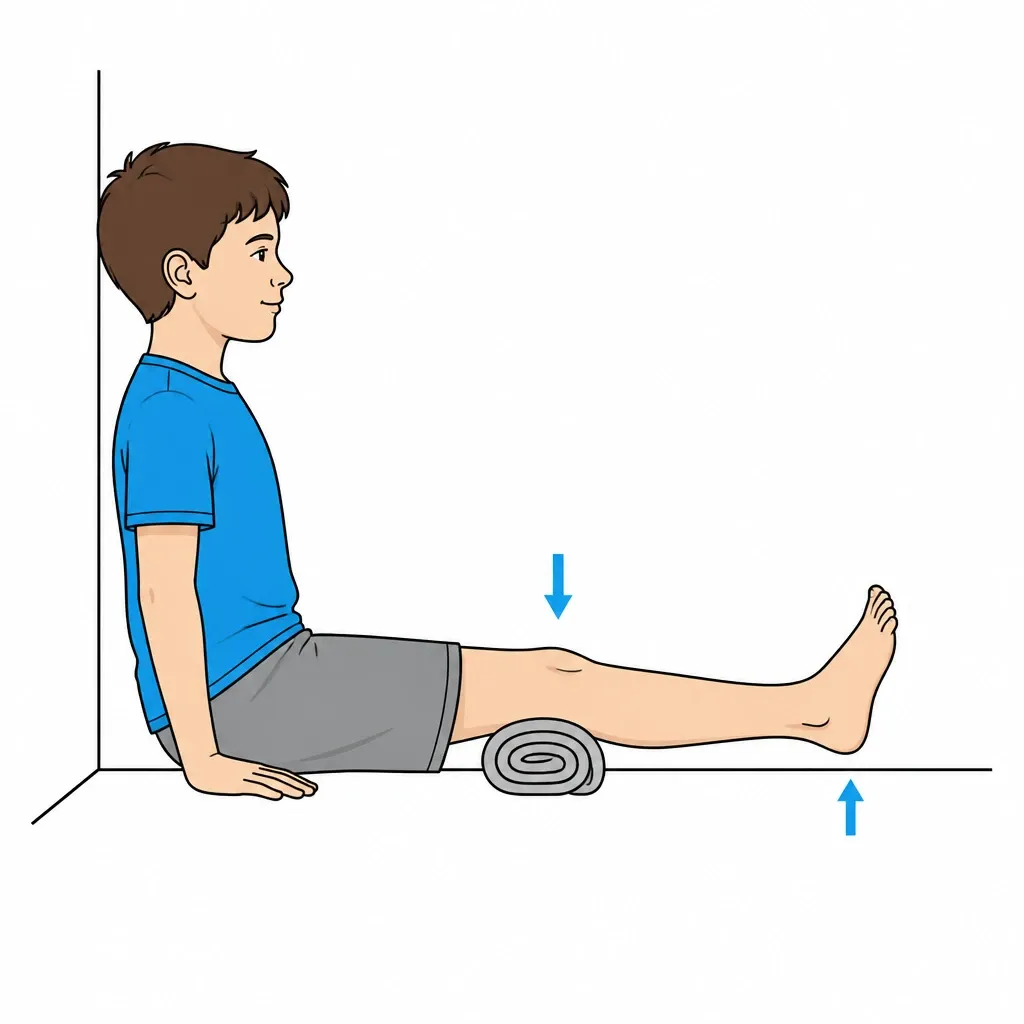
1.Quadriceps activation
Global quadriceps recovery is the basis of patellar control
Seated with leg extended, small rolled towel under knee. Press knee down (squashing towel) while slightly lifting heel off floor. Hold 5-10 seconds. Aim for a full, even contraction of the whole quadriceps, without trying to isolate a single portion of the muscle. In the early phases it is one of the most used exercises, because it reactivates the quadriceps safely; progression is based on pain control and contraction quality, not on repetition count.
3 × 15-20 repetitions, several times daily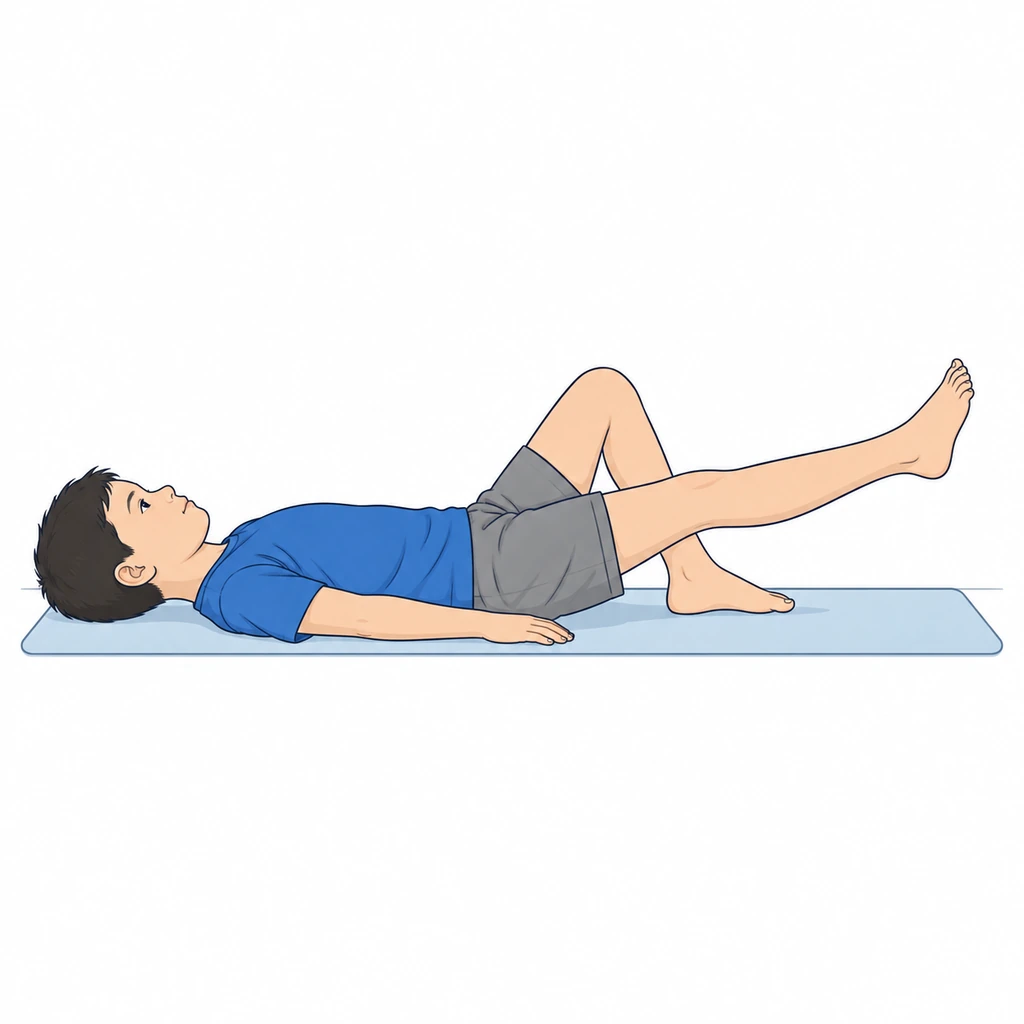
2.Straight leg raise (SLR)
Quadriceps strengthening without bending knee
Only when permitted in your pathway. Lying on your back, contract the quadriceps with the knee straight, then slowly raise the leg to the taught height. If the knee bends during the lift (extension lag), stop and have quadriceps activation, assistance or bracing reassessed by the physiotherapist; do not compensate by increasing effort. After surgery follow the specific restrictions.
3 × 15-20 reps, 2-3 times daily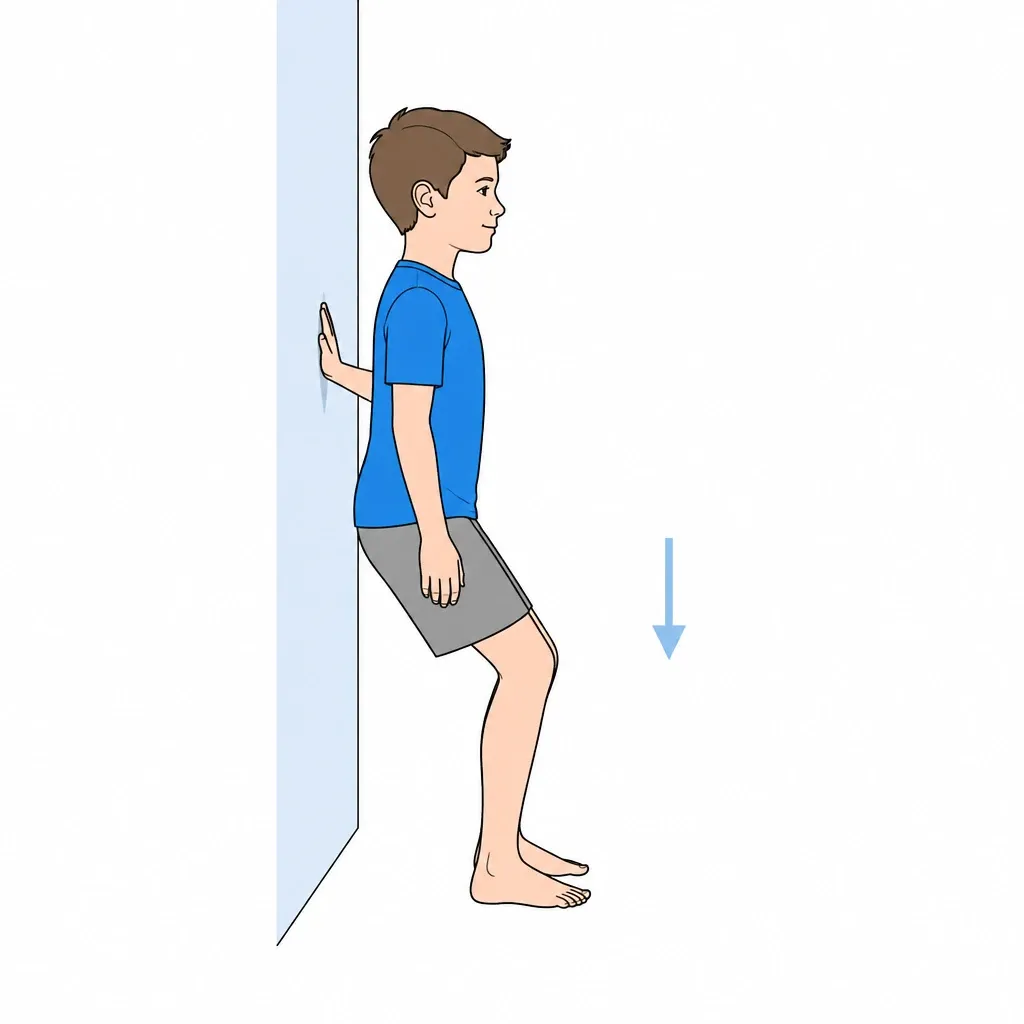
3.Controlled mini-squat (0-30°)
Shallow squat at the authorised stage and range; patellofemoral loading varies with angle, technique and resistance.
Standing with back to wall or holding support. Descend ONLY 20-30° knee flexion (very shallow squat). Patella is under more stress at greater flexion degrees, so limiting movement is protective. Rise slowly. Feet shoulder-width, weight evenly distributed.
3 × 10-15 reps, slow movement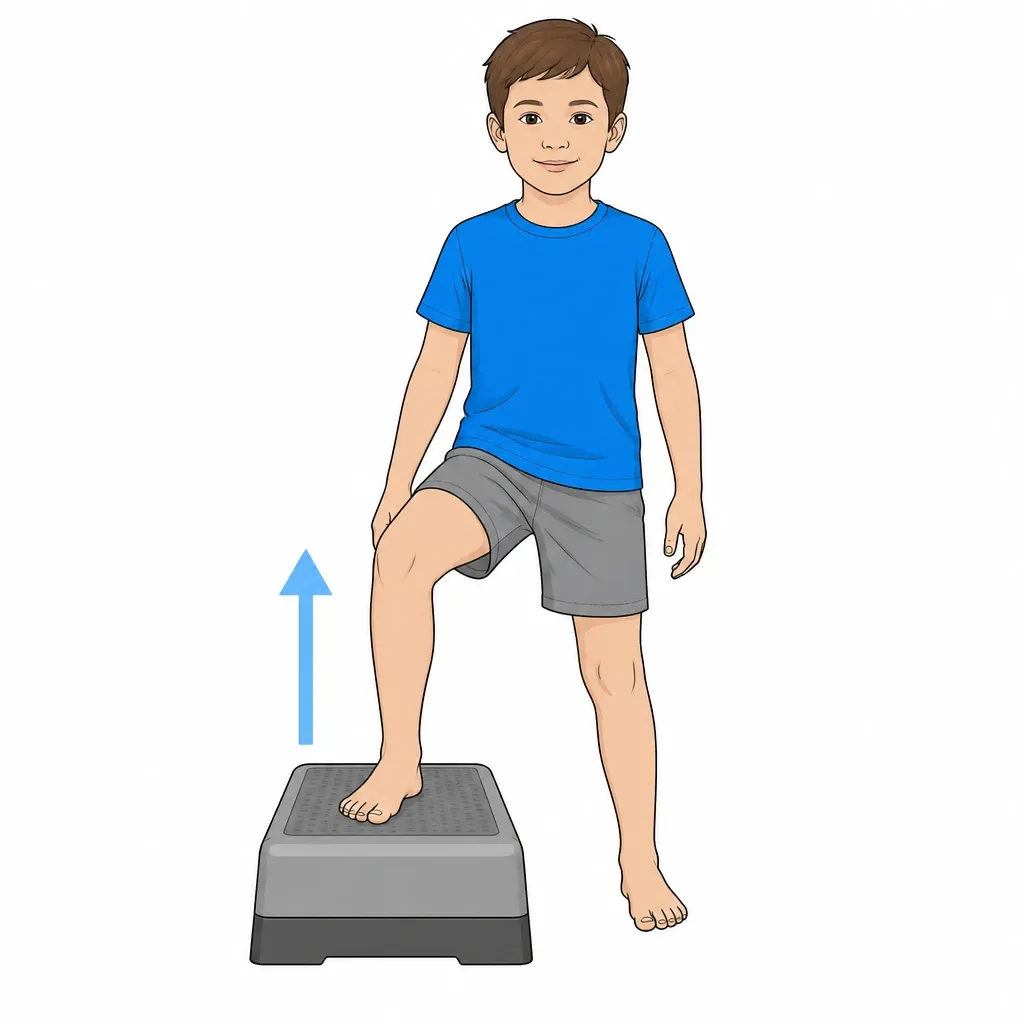
4.Lateral step-up
Strengthens lateral patellar control
Standing sideways to low step (10-15 cm). Step up with affected leg, then lower controlling movement. Observe that knee doesn't "collapse" inward during rise. If it does, lower step. Progress to higher step only when control is excellent.
3 × 10 per leg, progressive height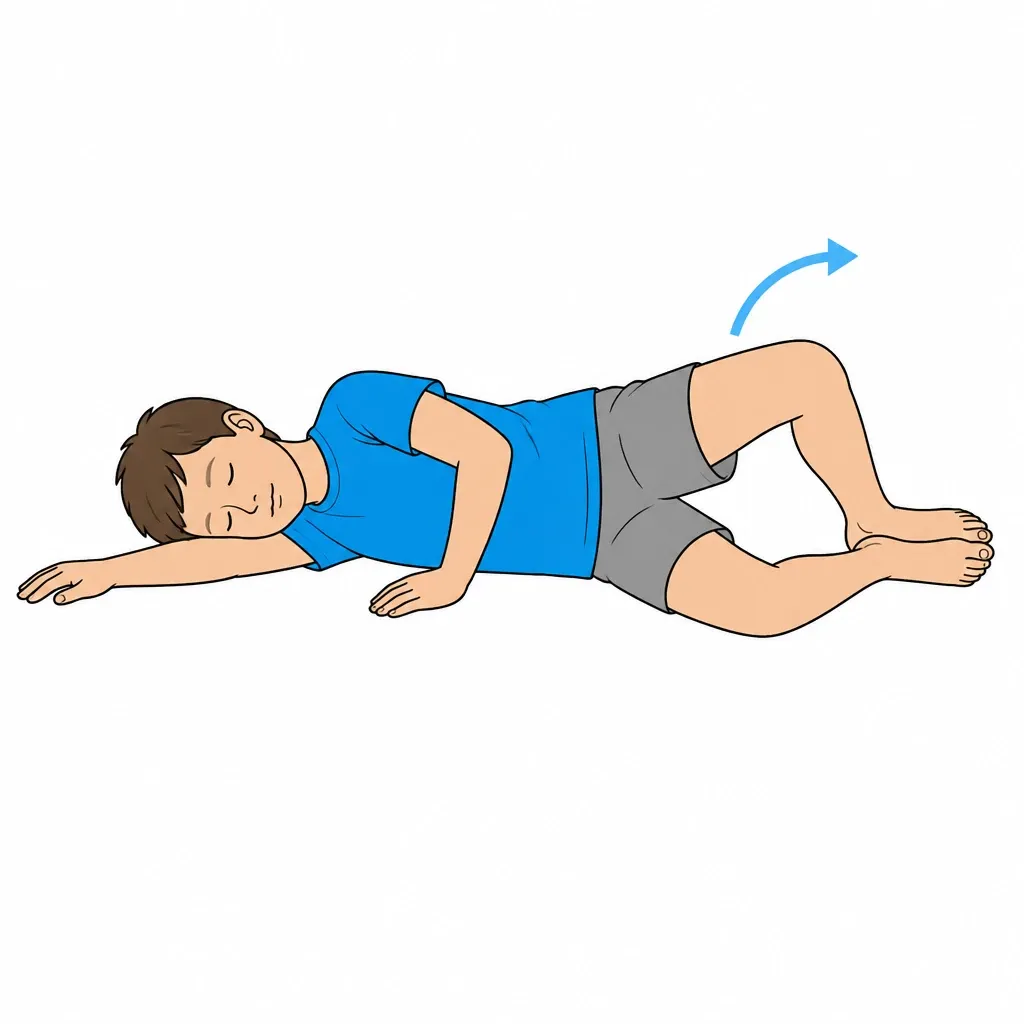
5.Gluteus medius and maximus strengthening
Hip strengthening for strength and control; patellar instability is multifactorial and is not simply caused by “weak glutes”.
Use the selected versions: a side-lying clamshell without rolling the pelvis, a supine bridge or side-lying hip abduction. Agree range and resistance at the authorised stage. Hip work supports limb strength and control; patellar instability also depends on anatomy and associated injuries, not only gluteal strength.
3 × 15 for each exercise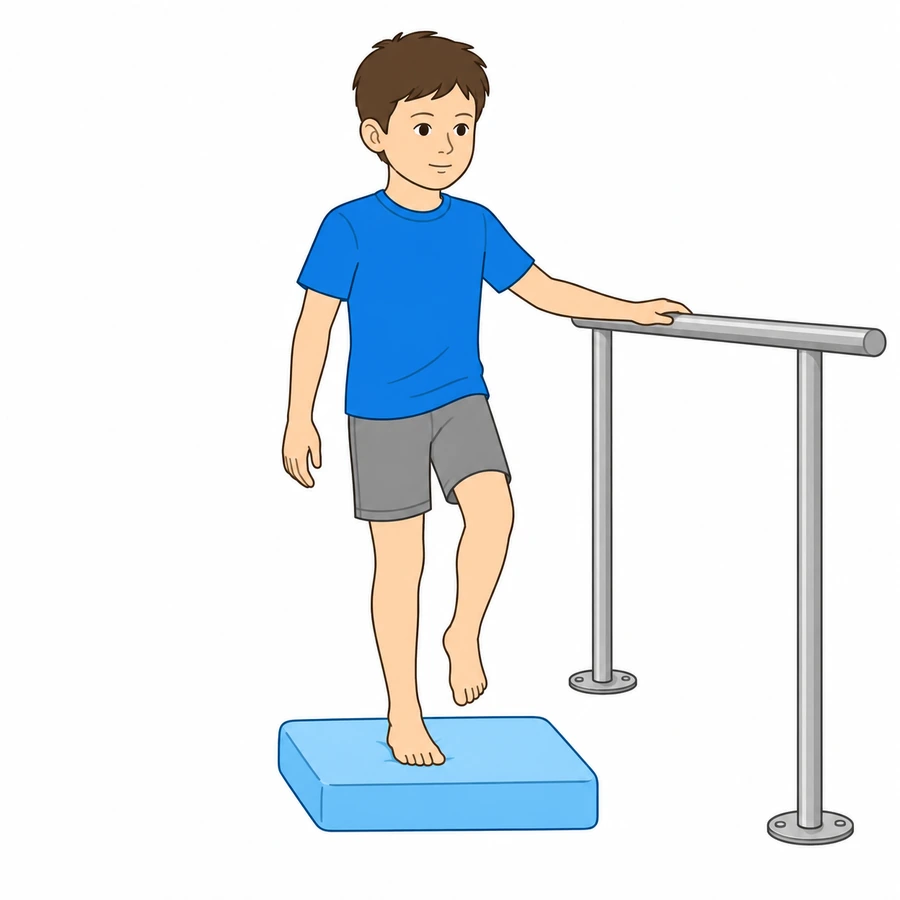
6.Proprioception and balance
Recover knee position sense
After clearance for weight bearing, start on firm ground with eyes open, next to a secure support and with adult supervision. Place the other foot down before losing balance. Progress to an unstable surface or eyes-closed work only under direct professional supervision; do not add these challenges independently. Stop for pain or instability.
3 × 30 seconds per level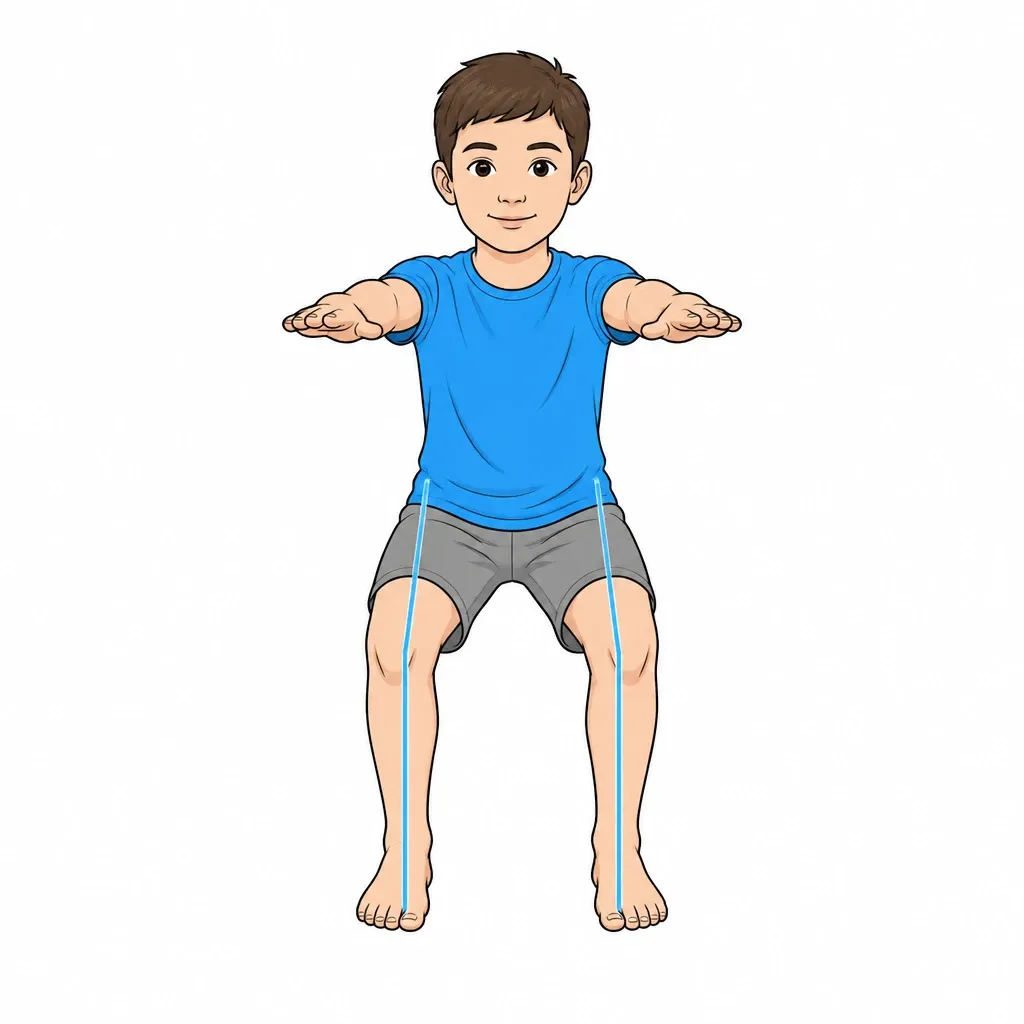
7.Motor control with visual feedback
Learn to control knee during movements
In front of mirror, perform squats, step-ups and lunges checking that the knee stays aligned over the 2nd toe throughout the movement. Knee must NOT "collapse" inward. If it does, actively correct or reduce range of motion. This motor-control retraining is one of the elements associated with a lower risk of recurrence and is a useful criterion before return to sport.
Integrate control into ALL exercises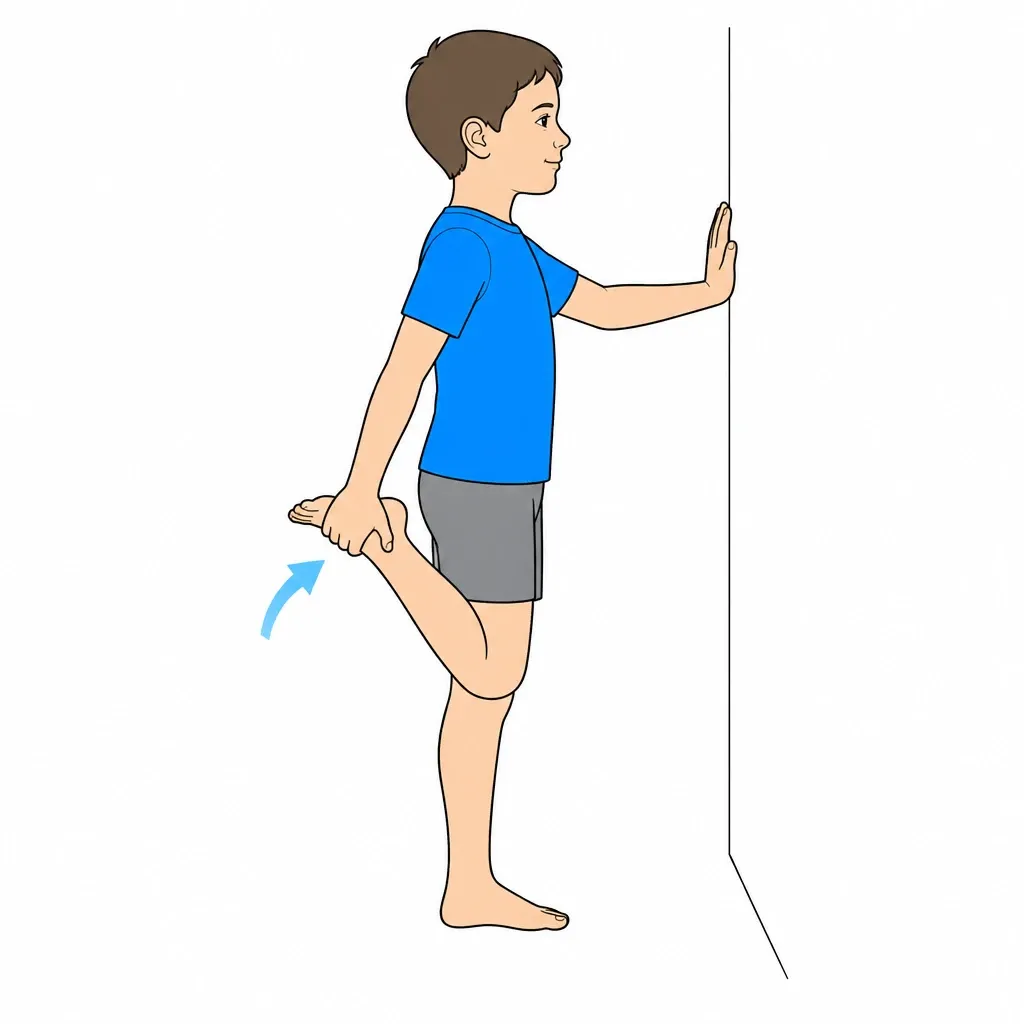
8.Quadriceps and lateral chain stretch
Soft-tissue mobility when indicated; the IT band or retinaculum are not assumed to “push” the patella laterally by themselves.
QUADRICEPS: standing with support, pull the heel toward the buttock keeping knees together and pelvis tucked, 30 seconds. LATERAL CHAIN: standing, cross the affected leg behind the other and lean the trunk to the opposite side, feeling the stretch along the side and outer thigh. You can add foam-roller self-massage on the outer thigh, avoiding the painful area of the kneecap.
3 × 30 seconds per exercise, daily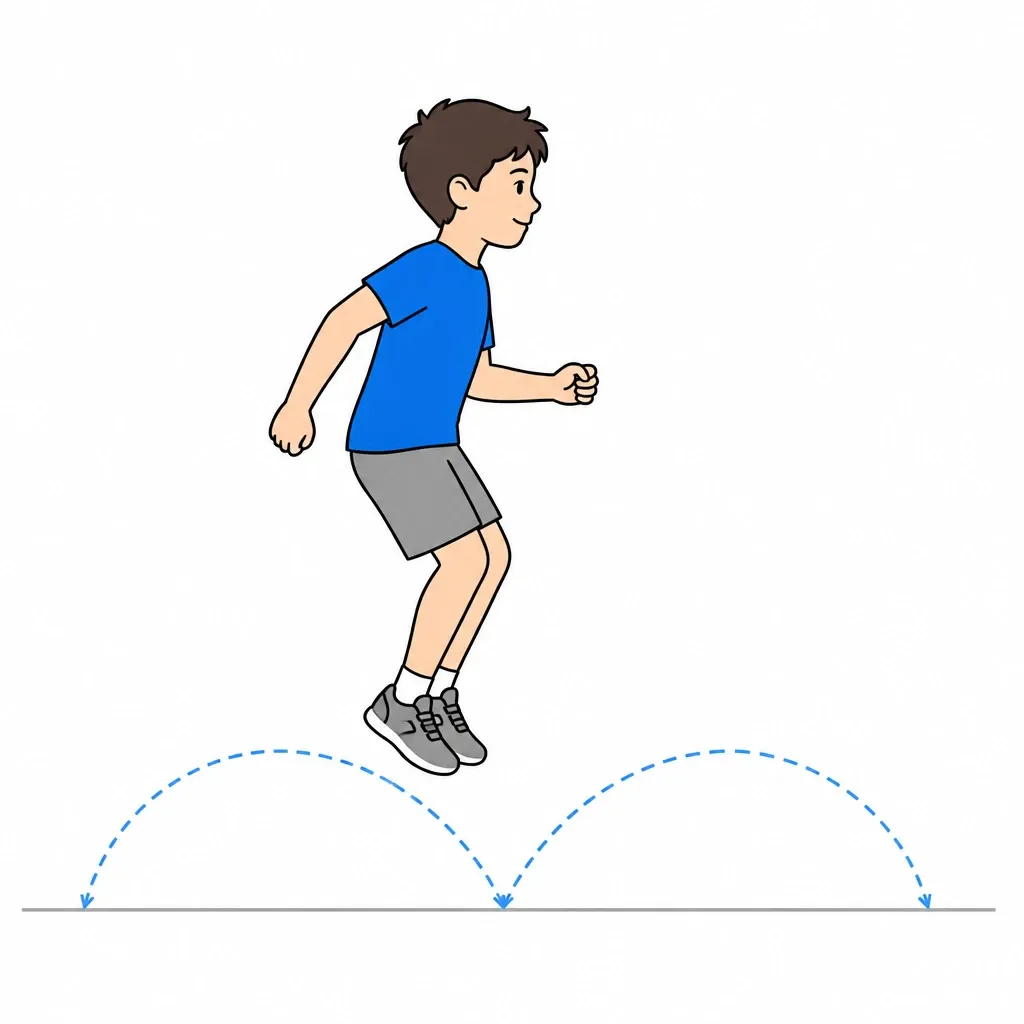
9.Controlled landing and progressive plyometrics
Plyometrics and landing work in the advanced phase after recovery of strength and control; there is no universal starting week.
Only from the advanced phase (usually after 10-12 weeks) and with specialist clearance. Start by stepping down from a low step and landing on two feet with soft knees, aligned over the feet and silent. Progress to: hops in place, forward-backward jumps, lateral jumps, single-leg landing. If the knee collapses inward or a feeling of instability appears, go back to the previous stage.
3 × 8-10 reps per level, 2-3 times a week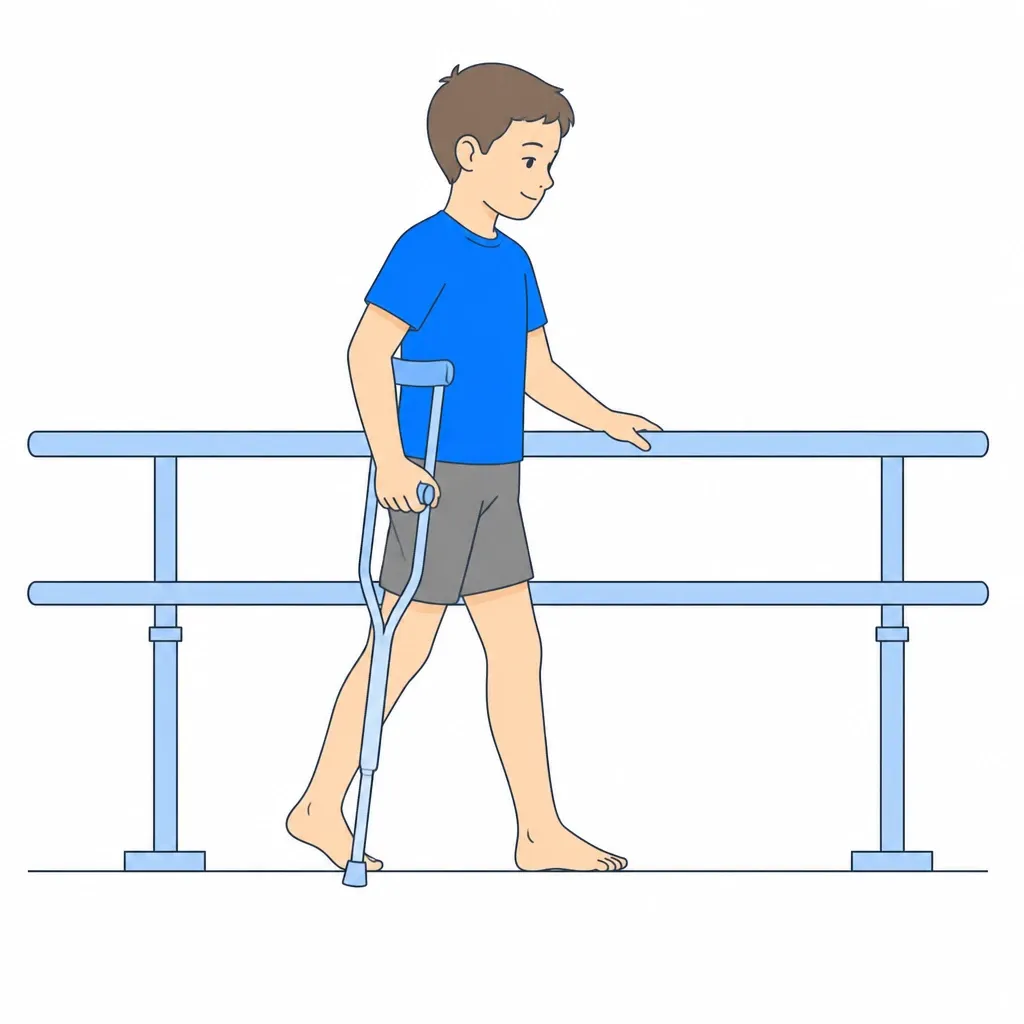
10.Gradual return to sport
Protected progression toward sports activities
Return to sport follows the pathway for the dislocation, associated injuries and any surgery. First regain movement, strength, control and confidence in the knee; then introduce straight running, direction changes, jumps and sport-specific tasks as authorised. Do not progress simply because a set week has arrived. Full-training tolerance, no subsequent worsening and clinical assessment are required. Any brace is an individual choice and does not replace rehabilitation.
Indicative timing - personalized plan with specialist
RED FLAGS - When to stop and contact the doctor immediately
Stop the exercises immediately and contact the specialist (or go to the emergency department if severe) if any of the following occur:
- Acute or sudden pain during exercise
- Significant swelling after exercises
- Pain that progressively worsens over days
- Fever or general malaise
- Difficulty walking or using the limb after exercises
- Any neurological symptoms (tingling, numbness, sudden weakness)
- A red or hot joint, or inability to bear weight: seek prompt assessment; use emergency care if severe.
In case of doubt, always prefer a check-up over continuing the exercises.
Dott. Daniele Priano
Paediatric Orthopaedics - ASST Gaetano Pini-CTO
Content version: 21 September 2026
ortopediaevolutiva.com • Printed: 18/10/2026
 Full sheet and videos
https://ortopediaevolutiva.com/en/parents-kids/exercises/knee/patellar-dislocation
Prepare the visit handout
Use the condition and phase indicated by your clinician. You can leave out individual exercises; instructions, illustrations and safety advice remain together.
Exclude exercises if needed
10 of 10 exercise cards included
The full web page remains available. Your selection is not saved or shared.
Before You Start
Who is this guide for?
After patellar dislocation and assessment of associated injuries. After surgery, select only entries compatible with the surgeon’s protocol: this catalogue does not define postoperative weight bearing, brace use or movement limits.
What you need
A stable, clear surface, comfortable clothing and a secure support. Check resistance-band anchors. Adult supervision; avoid marbles and small objects if the child may put them in their mouth, using a towel instead.
Suggested frequency
Perform only the exercises selected during the visit. The listed dosages are examples to adapt: follow the dose, frequency, rest and progression prescribed for age, symptoms and phase. Do not automatically perform the whole list.
Common mistakes to avoid
- •Forcing a painful or unauthorised movement
- •Increasing load, resistance or frequency without the agreed rest periods
- •Doing balance exercises without stable support or supervision
⚠️ Red flags — when to stop and contact the doctor immediately
Stop exercises immediately and contact the specialist if any of the following occur:
- Acute or sudden pain during exercise
- Significant swelling after exercises
- Pain that progressively worsens over days
- Fever or general malaise
- Difficulty walking or using the limb after exercises
- Any neurological symptoms (tingling, numbness, sudden weakness)
- A red or hot joint, or inability to bear weight: seek prompt assessment; use emergency care if severe.
Detailed Exercises
- 1
Quadriceps activation
Global quadriceps recovery is the basis of patellar control
Seated with leg extended, small rolled towel under knee. Press knee down (squashing towel) while slightly lifting heel off floor. Hold 5-10 seconds. Aim for a full, even contraction of the whole quadriceps, without trying to isolate a single portion of the muscle. In the early phases it is one of the most used exercises, because it reactivates the quadriceps safely; progression is based on pain control and contraction quality, not on repetition count.
3 × 15-20 repetitions, several times daily - 2
Straight leg raise (SLR)
Quadriceps strengthening without bending knee
Only when permitted in your pathway. Lying on your back, contract the quadriceps with the knee straight, then slowly raise the leg to the taught height. If the knee bends during the lift (extension lag), stop and have quadriceps activation, assistance or bracing reassessed by the physiotherapist; do not compensate by increasing effort. After surgery follow the specific restrictions.
3 × 15-20 reps, 2-3 times dailyStraight leg raise | OrtopediaEvolutiva
Illustrated video with a synthetic voice and English text in the film. Press Play to load YouTube. Follow the instructions and precautions on this exercise sheet. Open on YouTube
- 3
Controlled mini-squat (0-30°)
Shallow squat at the authorised stage and range; patellofemoral loading varies with angle, technique and resistance.
Standing with back to wall or holding support. Descend ONLY 20-30° knee flexion (very shallow squat). Patella is under more stress at greater flexion degrees, so limiting movement is protective. Rise slowly. Feet shoulder-width, weight evenly distributed.
3 × 10-15 reps, slow movement - 4
Lateral step-up
Strengthens lateral patellar control
Standing sideways to low step (10-15 cm). Step up with affected leg, then lower controlling movement. Observe that knee doesn't "collapse" inward during rise. If it does, lower step. Progress to higher step only when control is excellent.
3 × 10 per leg, progressive height - 5
Gluteus medius and maximus strengthening
Hip strengthening for strength and control; patellar instability is multifactorial and is not simply caused by “weak glutes”.
Use the selected versions: a side-lying clamshell without rolling the pelvis, a supine bridge or side-lying hip abduction. Agree range and resistance at the authorised stage. Hip work supports limb strength and control; patellar instability also depends on anatomy and associated injuries, not only gluteal strength.
3 × 15 for each exercise - 6
Proprioception and balance
Recover knee position sense
After clearance for weight bearing, start on firm ground with eyes open, next to a secure support and with adult supervision. Place the other foot down before losing balance. Progress to an unstable surface or eyes-closed work only under direct professional supervision; do not add these challenges independently. Stop for pain or instability.
3 × 30 seconds per level - 7
Motor control with visual feedback
Learn to control knee during movements
In front of mirror, perform squats, step-ups and lunges checking that the knee stays aligned over the 2nd toe throughout the movement. Knee must NOT "collapse" inward. If it does, actively correct or reduce range of motion. This motor-control retraining is one of the elements associated with a lower risk of recurrence and is a useful criterion before return to sport.
Integrate control into ALL exercises - 8
Quadriceps and lateral chain stretch
Soft-tissue mobility when indicated; the IT band or retinaculum are not assumed to “push” the patella laterally by themselves.
QUADRICEPS: standing with support, pull the heel toward the buttock keeping knees together and pelvis tucked, 30 seconds. LATERAL CHAIN: standing, cross the affected leg behind the other and lean the trunk to the opposite side, feeling the stretch along the side and outer thigh. You can add foam-roller self-massage on the outer thigh, avoiding the painful area of the kneecap.
3 × 30 seconds per exercise, daily - 9
Controlled landing and progressive plyometrics
Plyometrics and landing work in the advanced phase after recovery of strength and control; there is no universal starting week.
Only from the advanced phase (usually after 10-12 weeks) and with specialist clearance. Start by stepping down from a low step and landing on two feet with soft knees, aligned over the feet and silent. Progress to: hops in place, forward-backward jumps, lateral jumps, single-leg landing. If the knee collapses inward or a feeling of instability appears, go back to the previous stage.
3 × 8-10 reps per level, 2-3 times a week - 10
Gradual return to sport
Protected progression toward sports activities
Return to sport follows the pathway for the dislocation, associated injuries and any surgery. First regain movement, strength, control and confidence in the knee; then introduce straight running, direction changes, jumps and sport-specific tasks as authorised. Do not progress simply because a set week has arrived. Full-training tolerance, no subsequent worsening and clinical assessment are required. Any brace is an individual choice and does not replace rehabilitation.
Indicative timing - personalized plan with specialist
Frequently Asked Questions
How long does recovery take after a patellar dislocation?
Recovery often takes several months; 3-6 months is an approximate reference, not a promise or a rule for every operation. Bracing, protection and mobilisation depend on stability, associated injuries and treatment. Return to sport requires clinical and functional assessment, rather than the passage of weeks alone.
Can it happen again?
Unfortunately yes, recurrence risk after first dislocation is significant (15-40%). Global quadriceps recovery, hip strength and neuromuscular control are essential to reduce this risk. In some cases surgery may be indicated.
When can I return to sports?
The decision considers pain and effusion, motion, strength, single-leg control, the quality of jumping and changes of direction when appropriate, and confidence in the knee. Comparison with the other leg is useful but can mask weakness in both legs: an isolated percentage, such as 85%, is not enough. The team interprets tests according to age, treatment and sport and plans a gradual return; associated injuries or surgery change the pathway.