Paediatric Orthopaedic Specialist
Osgood-Schlatter disease
Home Exercise Program
Not every exercise listed here is suitable for every child: the selection is individual and is defined during the consultation.
For whom: Diagnosed apophysitis: adapt activity and strengthening to irritability. Do not automatically apply adult tendinopathy protocols or use temporary relief to play through pain.
Dose and frequency: Perform only the exercises selected during the visit. The listed dosages are examples to adapt: follow the dose, frequency, rest and progression prescribed for age, symptoms and phase. Do not automatically perform the whole list.
Equipment and supervision: A stable, clear surface, comfortable clothing and a secure support. Check resistance-band anchors. Adult supervision; avoid marbles and small objects if the child may put them in their mouth, using a towel instead.
Avoid: Forcing a painful or unauthorised movement; Increasing load, resistance or frequency without the agreed rest periods; Doing balance exercises without stable support or supervision.
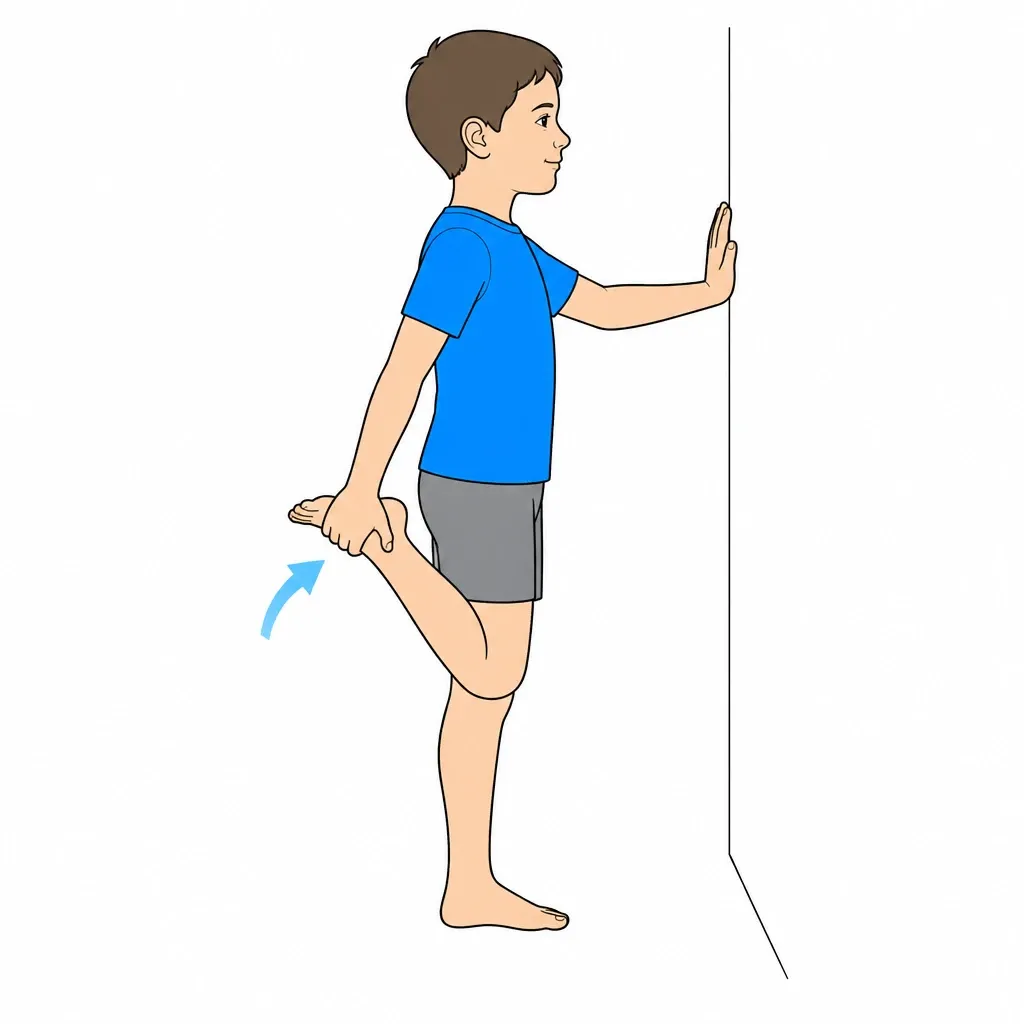
1.Quadriceps and hip-flexor stretch, when indicated
An option when tightness is present or when selected in the programme; it is not mandatory for everyone.
QUADRICEPS: Standing, heel toward buttock, knees together. Feel stretch in front of thigh. ILIOPSOAS: Lunge with back knee on ground. Squeeze glute of back leg and push hips forward. Stretch felt in front of back leg's hip. Don't arch back!
3 × 30 seconds each side, 2-3 times daily (morning, evening, after sports)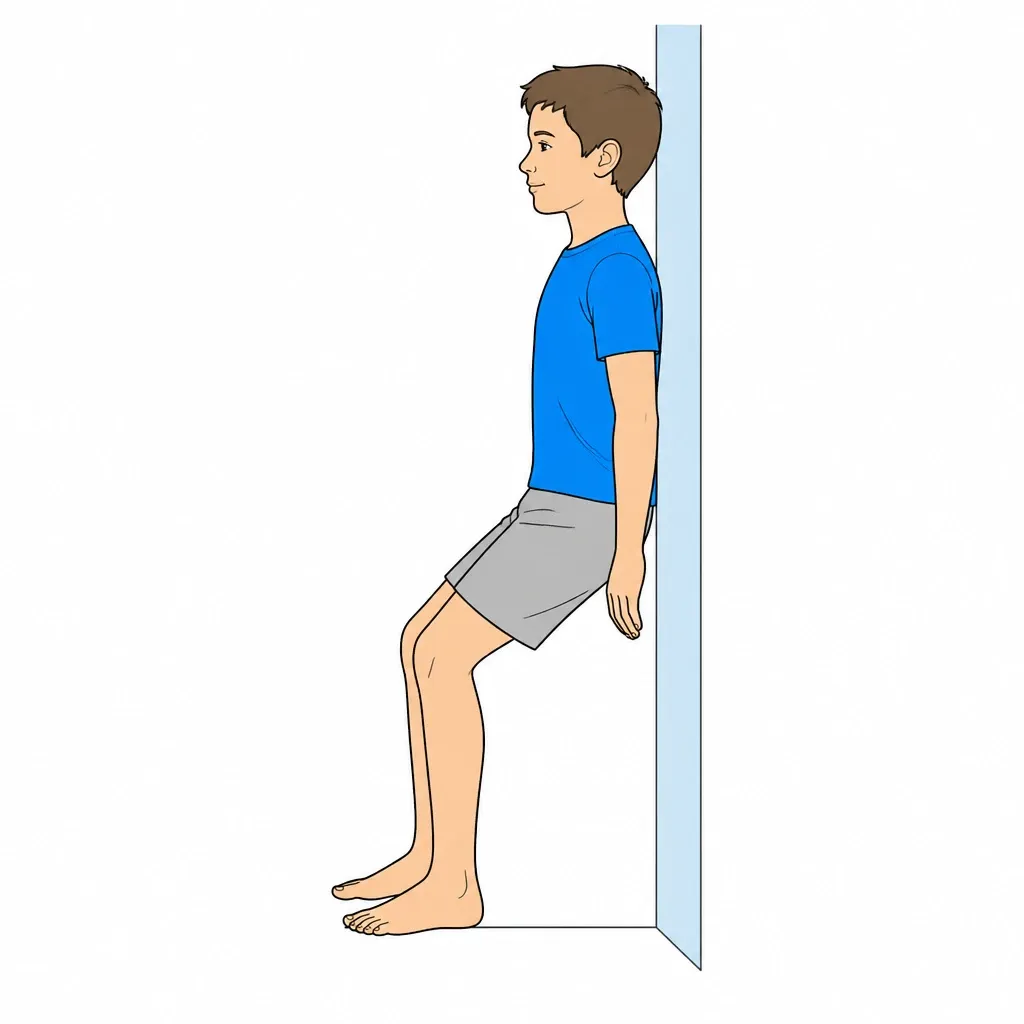
2.Isometric wall sit (low range)
A static contraction at a tolerated angle; not necessarily suitable during the acute phase.
Back to wall, slide down to 30-45° (NOT too deep!). Higher position = less stress on tibial tuberosity. Hold position without moving. If knee hurts, go higher. Exercise must be PAIN-FREE.
3-5 × 15-20 seconds. Increase duration when easy (max 45 sec)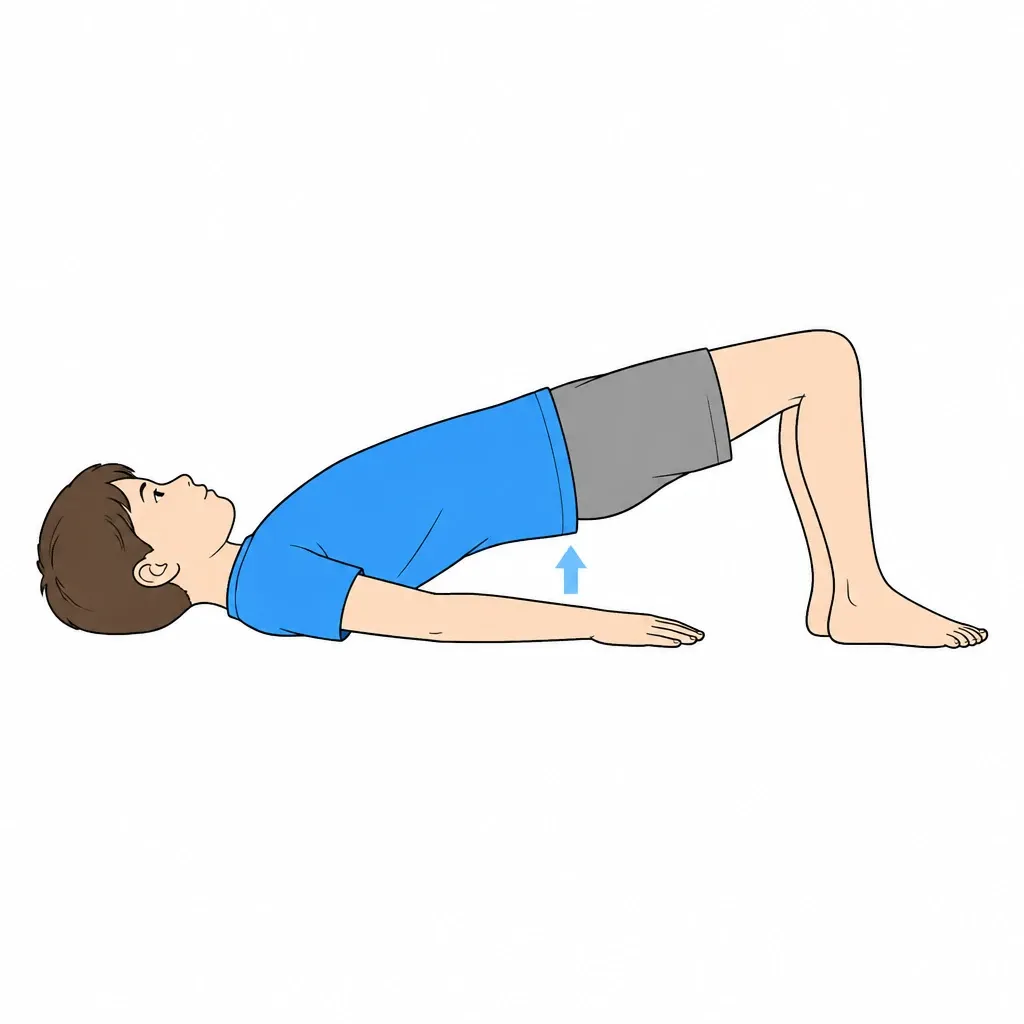
3.Progressive quadriceps and glute strengthening
Gradual progression as pain decreases
PHASE 1 (pain present): Glute bridge + low-range wall sit. PHASE 2 (decreasing pain): Add mini-squat (shallow). PHASE 3 (minimal pain): Add step-up on low step. Rule is: if exercise causes pain, return to previous phase or reduce intensity.
Bridge: 3 × 15. Wall sit: 3 × 20 sec. Squat: 3 × 10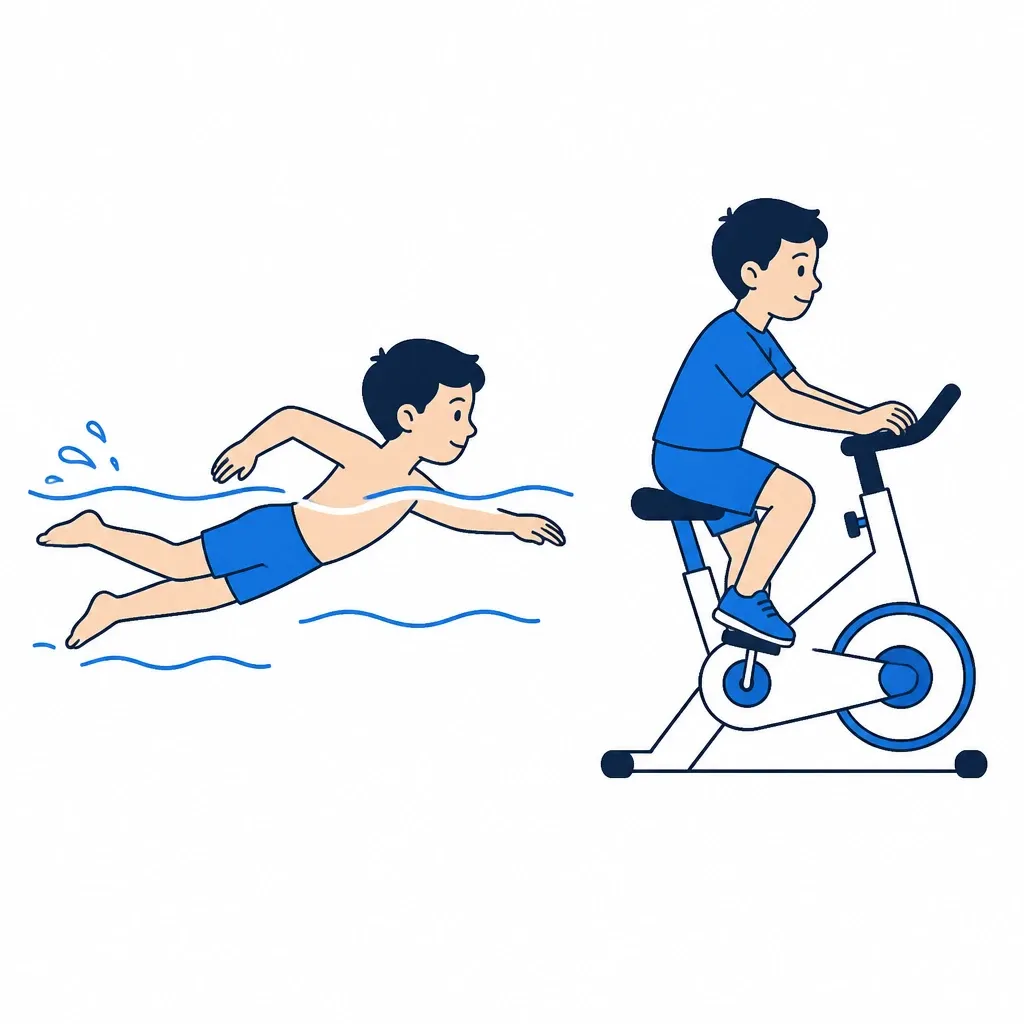
4.Sports load management
Activity modification is fundamental - not just exercises!
Reduce running, jumping and movements that provoke pain. Choose alternative activities only if tolerated: cycling and swimming may also need adaptation. Agree a gradual return of volume and then intensity, checking symptoms during, afterwards and the following morning. If limping or worsening occurs, reduce loading and reassess.
Personalized plan discussed during visit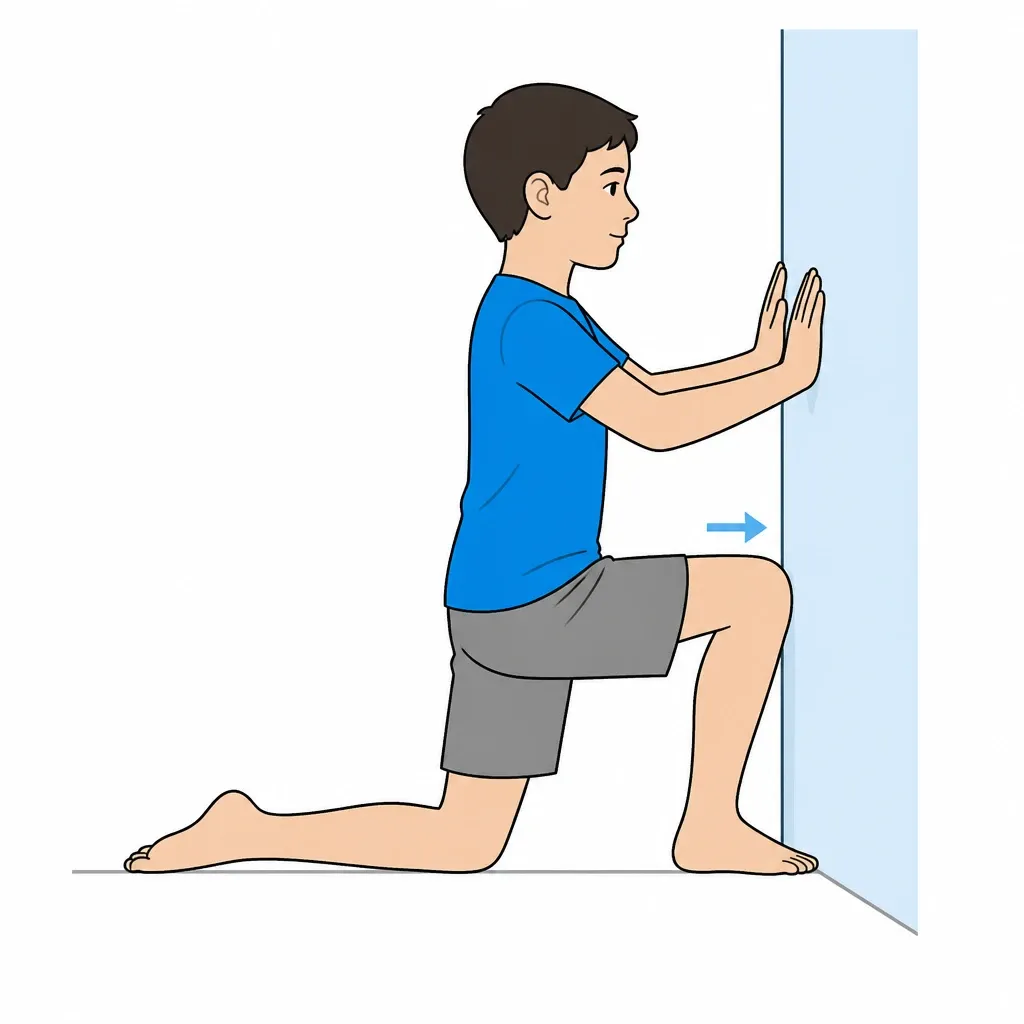
5.Hip and ankle mobility
Reduce compensations that increase knee stress
If assessment identifies a relevant limitation, use the hip or ankle mobility exercises selected by the physiotherapist without knee pain. Do not automatically attribute apophysitis to a stiff ankle or force stretching to compensate for it.
3 × 30 seconds per mobility exercise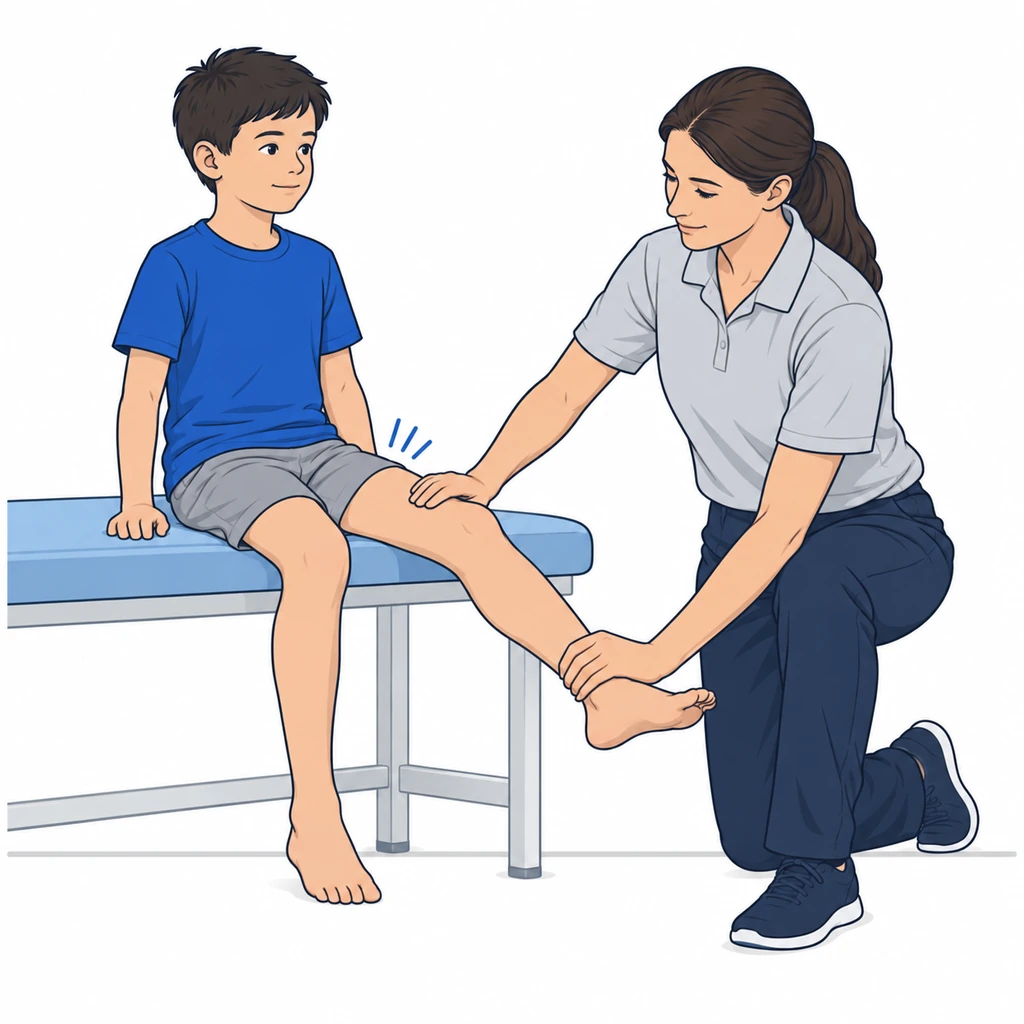
6.Quadriceps isometric, if tolerated
Loading must be adapted to apophysitis; this is not pain relief to enable playing through pain.
Sit in the position taught by the physiotherapist and tighten the thigh against stable resistance without moving the knee. Do not trap the foot under furniture. Use a comfortable effort without local pain or breath holding. Stop or reduce the effort if pain occurs; any immediate relief does not authorise return to sport.
Agree dosage according to age, strength and symptoms; start with a light effort.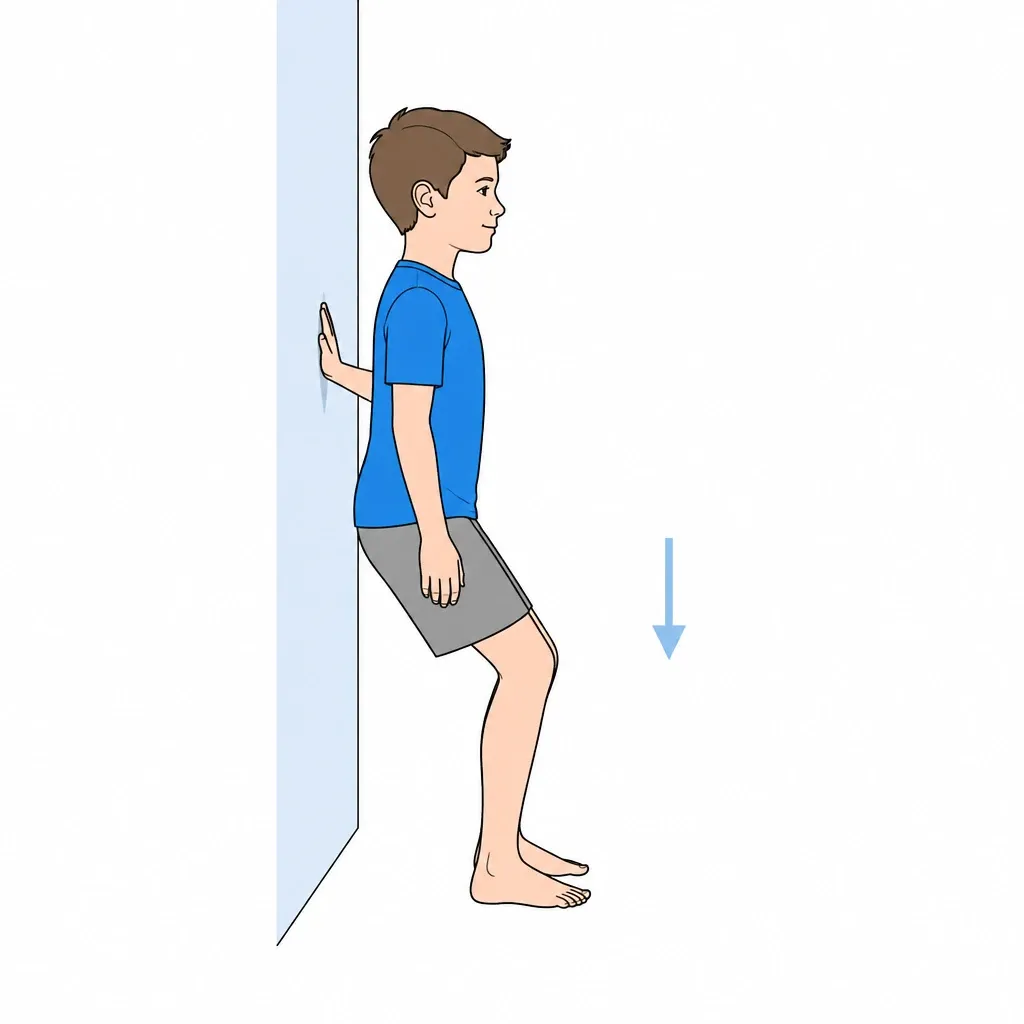
7.Slow squat with individual progression
Gradual strengthening after reducing activities that provoke pain.
Start with body weight near a stable support, using a shallow squat in the agreed pain-free range. Lower and rise slowly with controlled knees and feet. Do not add weights or depth based only on the week reached. Progress with the physiotherapist when technique is sound and there is no pain, limp or worsening the following day.
Individualise sets, repetitions and recovery days; no automatic increase in weights.8.Hamstring strengthening
Posterior-chain strengthening adapted to knee tolerance.
Begin with a bridge on both feet on a stable mat. When authorised, try the single-leg version while keeping the pelvis level and avoiding back arching. Do not use sliding chairs. Hamstring stretching is a separate activity, performed only if indicated and without knee pain.
3 × 10-12 each side + 3 × 30 second stretch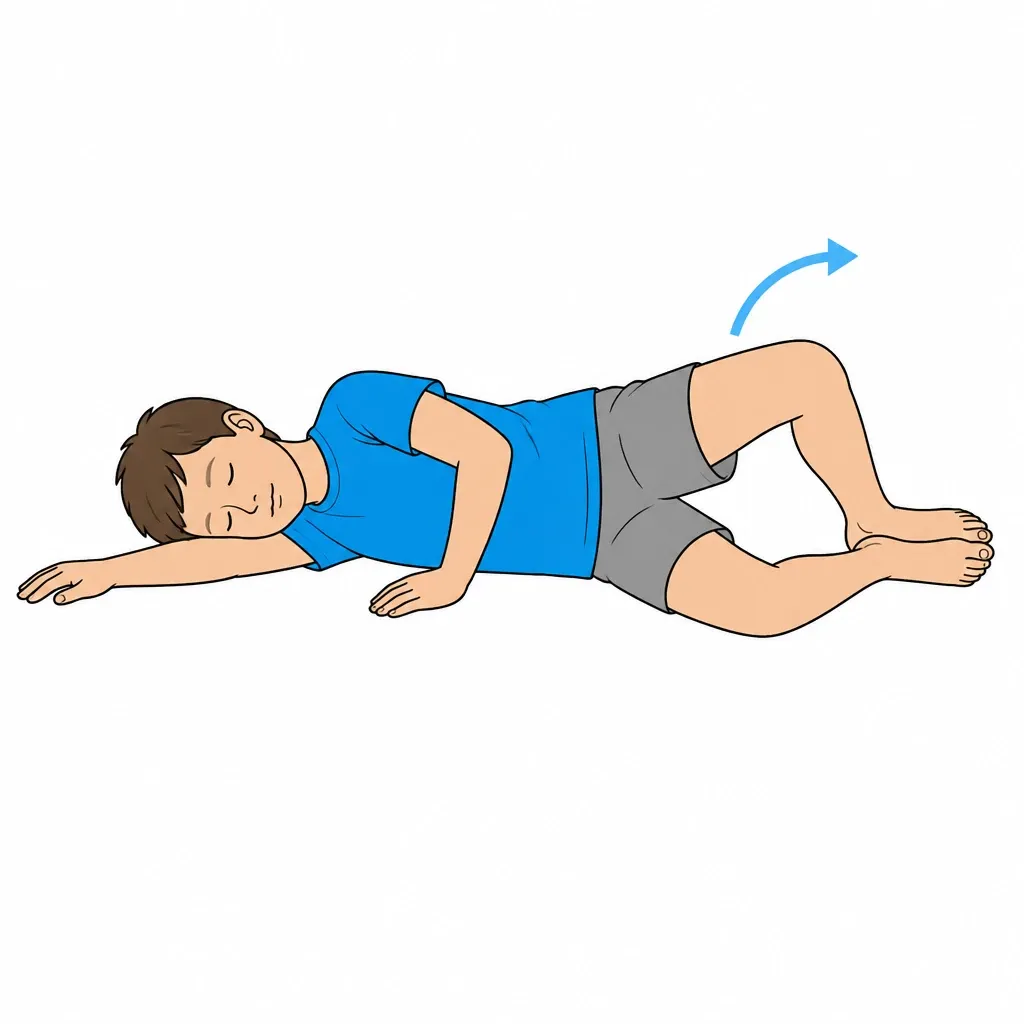
9.Gluteus medius strengthening (clamshell)
Hip control reduces the dynamic valgus that overloads the patellar tendon
Lie on your side with bent knees and feet together. Open the top knee without rolling the pelvis backwards, then return slowly. Use resistance only if prescribed. Stop if knee or hip pain occurs: an exercise without impact can still load the painful area.
3 × 15 each side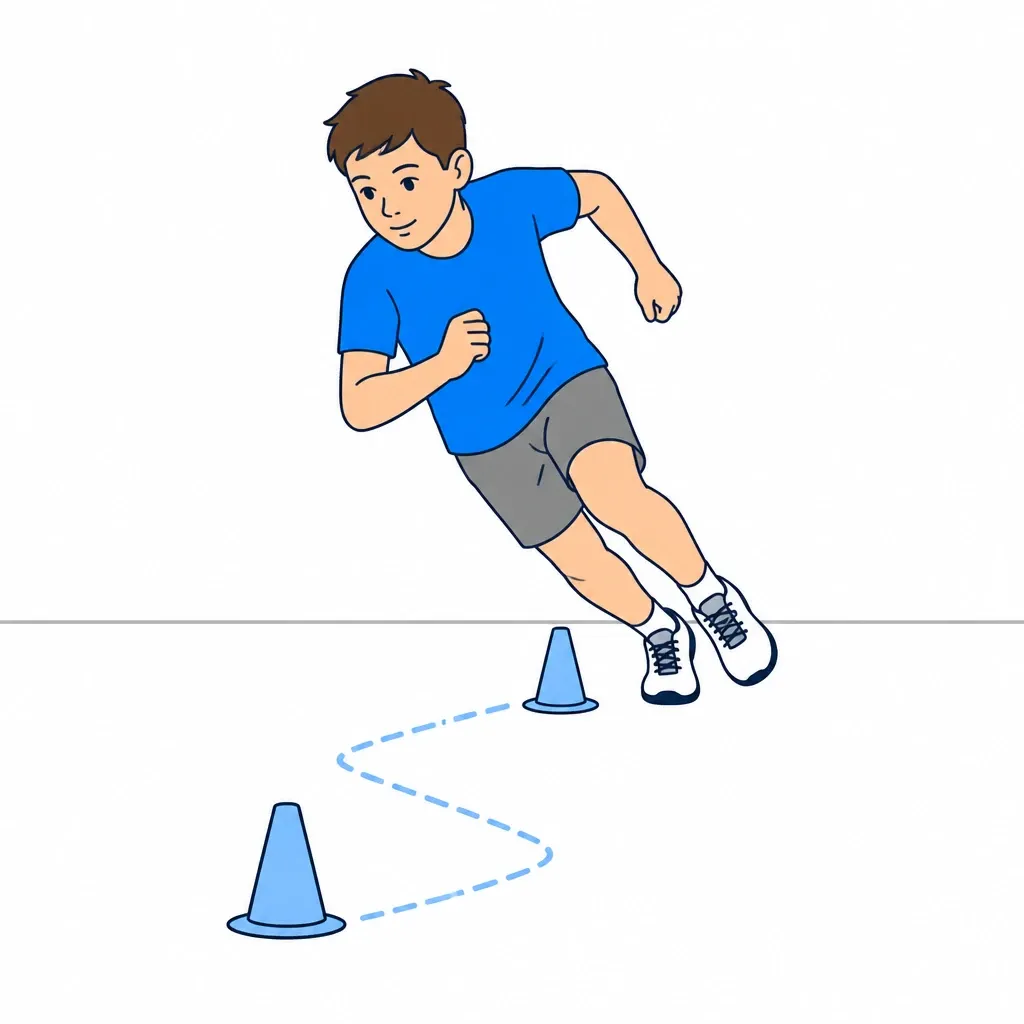
10.Return to sport with pain monitoring
Clear criteria for safely resuming training and matches
Resume when daily activities and basic exercises are pain-free without limping, and the physiotherapist confirms recovery of control and strength. Introduce straight-line running, then acceleration, jumping and direction changes according to the sport. Progression requires sound technique and no worsening the following day; elapsed weeks alone are insufficient. Complete full training before competition.
Individual progression checked with the treating clinician; reduce loading if symptoms increase.
RED FLAGS - When to stop and contact the doctor immediately
Stop the exercises immediately and contact the specialist (or go to the emergency department if severe) if any of the following occur:
- Acute or sudden pain during exercise
- Significant swelling after exercises
- Pain that progressively worsens over days
- Fever or general malaise
- Difficulty walking or using the limb after exercises
- Any neurological symptoms (tingling, numbness, sudden weakness)
- A red or hot joint, or inability to bear weight: seek prompt assessment; use emergency care if severe.
- Pain preventing normal daily activities
- Significant swelling of tibial tuberosity
- Pain present even at rest
- Obvious limitation of knee extension
In case of doubt, always prefer a check-up over continuing the exercises.
Dott. Daniele Priano
Paediatric Orthopaedics - ASST Gaetano Pini-CTO
Content version: 21 September 2026
ortopediaevolutiva.com • Printed: 18/10/2026
 Full exercise sheet
https://ortopediaevolutiva.com/en/parents-kids/exercises/knee/osgood-schlatter
Prepare the visit handout
Use the condition and phase indicated by your clinician. You can leave out individual exercises; instructions, illustrations and safety advice remain together.
Exclude exercises if needed
10 of 10 exercise cards included
The full web page remains available. Your selection is not saved or shared.
Before You Start
Who is this guide for?
Diagnosed apophysitis: adapt activity and strengthening to irritability. Do not automatically apply adult tendinopathy protocols or use temporary relief to play through pain.
What you need
A stable, clear surface, comfortable clothing and a secure support. Check resistance-band anchors. Adult supervision; avoid marbles and small objects if the child may put them in their mouth, using a towel instead.
Suggested frequency
Perform only the exercises selected during the visit. The listed dosages are examples to adapt: follow the dose, frequency, rest and progression prescribed for age, symptoms and phase. Do not automatically perform the whole list.
Common mistakes to avoid
- •Forcing a painful or unauthorised movement
- •Increasing load, resistance or frequency without the agreed rest periods
- •Doing balance exercises without stable support or supervision
⚠️ Red flags — when to stop and contact the doctor immediately
Stop exercises immediately and contact the specialist if any of the following occur:
- Acute or sudden pain during exercise
- Significant swelling after exercises
- Pain that progressively worsens over days
- Fever or general malaise
- Difficulty walking or using the limb after exercises
- Any neurological symptoms (tingling, numbness, sudden weakness)
- A red or hot joint, or inability to bear weight: seek prompt assessment; use emergency care if severe.
- Pain preventing normal daily activities
- Significant swelling of tibial tuberosity
- Pain present even at rest
- Obvious limitation of knee extension
Detailed Exercises
- 1
Quadriceps and hip-flexor stretch, when indicated
An option when tightness is present or when selected in the programme; it is not mandatory for everyone.
QUADRICEPS: Standing, heel toward buttock, knees together. Feel stretch in front of thigh. ILIOPSOAS: Lunge with back knee on ground. Squeeze glute of back leg and push hips forward. Stretch felt in front of back leg's hip. Don't arch back!
3 × 30 seconds each side, 2-3 times daily (morning, evening, after sports) - 2
Isometric wall sit (low range)
A static contraction at a tolerated angle; not necessarily suitable during the acute phase.
Back to wall, slide down to 30-45° (NOT too deep!). Higher position = less stress on tibial tuberosity. Hold position without moving. If knee hurts, go higher. Exercise must be PAIN-FREE.
3-5 × 15-20 seconds. Increase duration when easy (max 45 sec) - 3
Progressive quadriceps and glute strengthening
Gradual progression as pain decreases
PHASE 1 (pain present): Glute bridge + low-range wall sit. PHASE 2 (decreasing pain): Add mini-squat (shallow). PHASE 3 (minimal pain): Add step-up on low step. Rule is: if exercise causes pain, return to previous phase or reduce intensity.
Bridge: 3 × 15. Wall sit: 3 × 20 sec. Squat: 3 × 10 - 4
Sports load management
Activity modification is fundamental - not just exercises!
Reduce running, jumping and movements that provoke pain. Choose alternative activities only if tolerated: cycling and swimming may also need adaptation. Agree a gradual return of volume and then intensity, checking symptoms during, afterwards and the following morning. If limping or worsening occurs, reduce loading and reassess.
Personalized plan discussed during visit - 5
Hip and ankle mobility
Reduce compensations that increase knee stress
If assessment identifies a relevant limitation, use the hip or ankle mobility exercises selected by the physiotherapist without knee pain. Do not automatically attribute apophysitis to a stiff ankle or force stretching to compensate for it.
3 × 30 seconds per mobility exercise - 6
Quadriceps isometric, if tolerated
Loading must be adapted to apophysitis; this is not pain relief to enable playing through pain.
Sit in the position taught by the physiotherapist and tighten the thigh against stable resistance without moving the knee. Do not trap the foot under furniture. Use a comfortable effort without local pain or breath holding. Stop or reduce the effort if pain occurs; any immediate relief does not authorise return to sport.
Agree dosage according to age, strength and symptoms; start with a light effort. - 7
Slow squat with individual progression
Gradual strengthening after reducing activities that provoke pain.
Start with body weight near a stable support, using a shallow squat in the agreed pain-free range. Lower and rise slowly with controlled knees and feet. Do not add weights or depth based only on the week reached. Progress with the physiotherapist when technique is sound and there is no pain, limp or worsening the following day.
Individualise sets, repetitions and recovery days; no automatic increase in weights. - 8
Hamstring strengthening
Posterior-chain strengthening adapted to knee tolerance.
Begin with a bridge on both feet on a stable mat. When authorised, try the single-leg version while keeping the pelvis level and avoiding back arching. Do not use sliding chairs. Hamstring stretching is a separate activity, performed only if indicated and without knee pain.
3 × 10-12 each side + 3 × 30 second stretch - 9
Gluteus medius strengthening (clamshell)
Hip control reduces the dynamic valgus that overloads the patellar tendon
Lie on your side with bent knees and feet together. Open the top knee without rolling the pelvis backwards, then return slowly. Use resistance only if prescribed. Stop if knee or hip pain occurs: an exercise without impact can still load the painful area.
3 × 15 each side - 10
Return to sport with pain monitoring
Clear criteria for safely resuming training and matches
Resume when daily activities and basic exercises are pain-free without limping, and the physiotherapist confirms recovery of control and strength. Introduce straight-line running, then acceleration, jumping and direction changes according to the sport. Progression requires sound technique and no worsening the following day; elapsed weeks alone are insufficient. Complete full training before competition.
Individual progression checked with the treating clinician; reduce loading if symptoms increase.
Frequently Asked Questions
Does Osgood-Schlatter go away on its own?
Symptoms often improve with skeletal maturation, but timing and course vary and pain can persist in some cases. The bony prominence may remain. Load management and phase-appropriate exercises help manage symptoms; persistent pain needs reassessment.
Can you put ice on Osgood-Schlatter?
Cold may provide temporary relief, without guaranteeing an anti-inflammatory effect or faster healing. If comfortable, use a pack wrapped in a cloth for short periods, up to 10-15 minutes, checking the skin frequently and stopping earlier for discomfort, numbness or colour change. Do not apply it directly to the skin; avoid it with impaired sensation or circulation.
Are knee pads needed for Osgood-Schlatter?
Knee pads with protective cushion over the tibial tuberosity can be useful during sports to protect the tender area from impacts. Infrapatellar straps may help reduce tendon traction. They're not essential but can improve comfort.