Paediatric Orthopaedic Specialist
Scoliosis / posture
Home Exercise Program
Not every exercise listed here is suitable for every child: the selection is individual and is defined during the consultation.
For whom: Adolescents with mild scoliosis or scoliotic attitude. For structural scoliosis, exercises are part of a broader program.
Dose and frequency: Perform only the exercises selected during the visit. The listed dosages are examples to adapt: follow the dose, frequency, rest and progression prescribed for age, symptoms and phase. Do not automatically perform the whole list.
Equipment and supervision: A stable, clear surface, comfortable clothing and a secure support. Check resistance-band anchors. Adult supervision; avoid marbles and small objects if the child may put them in their mouth, using a towel instead.
Avoid: Forcing a painful or unauthorised movement; Increasing load, resistance or frequency without the agreed rest periods; Doing balance exercises without stable support or supervision.
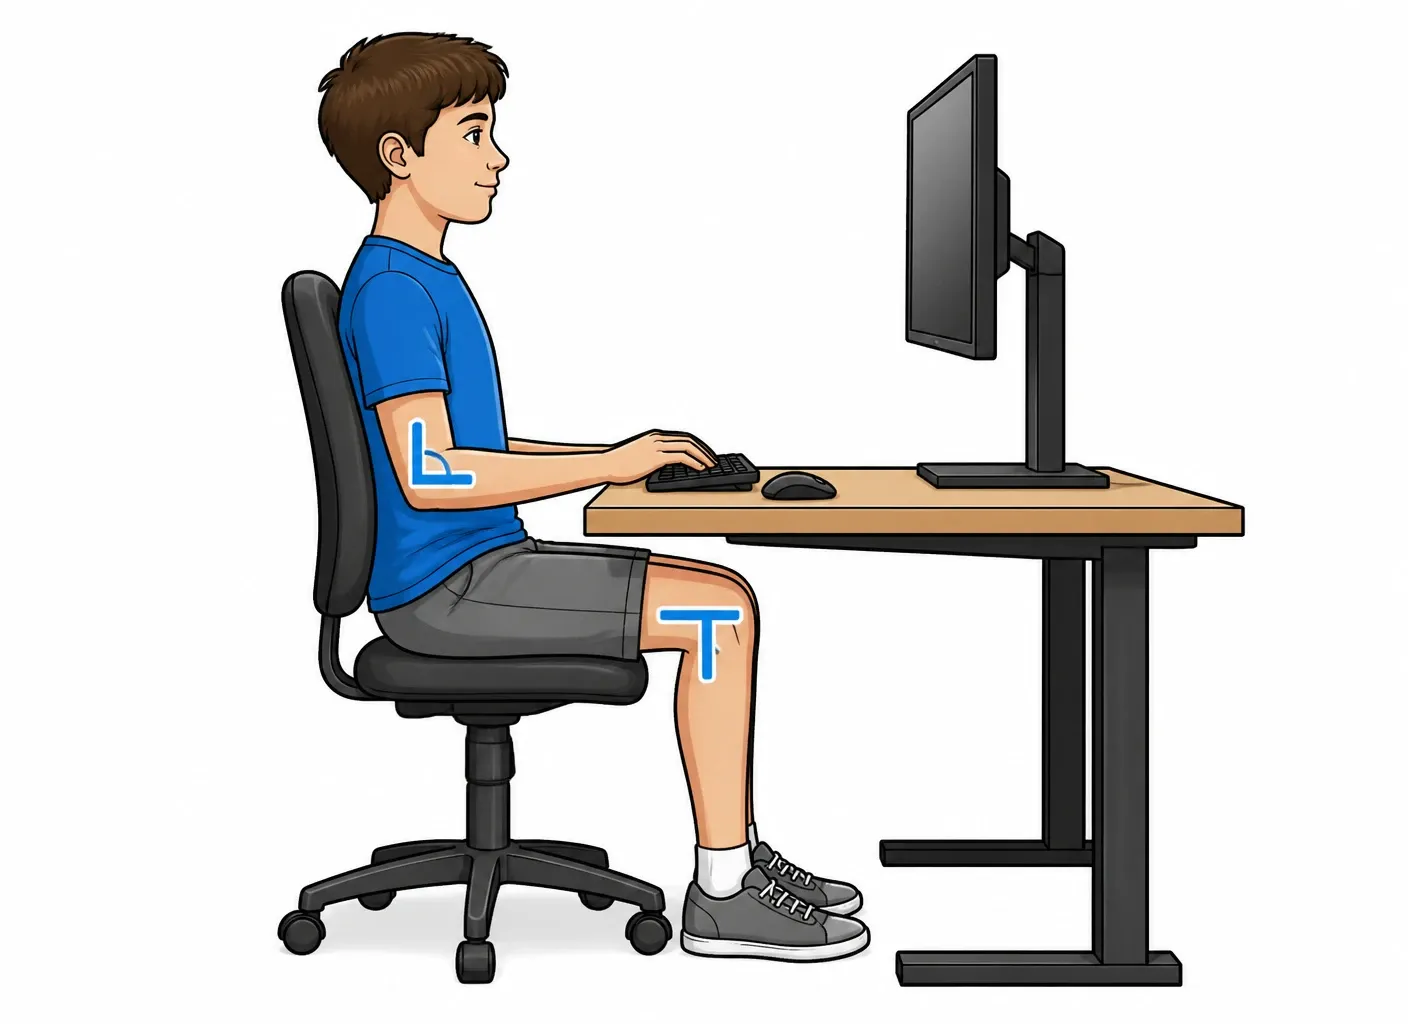
1.Postural education and load management
IMPORTANT: exercises do NOT cure structural scoliosis
Generic exercises support mobility, strength and trunk awareness; they do not replace scoliosis-specific exercises or a prescribed brace. Arrange a comfortable workstation with supported feet and change position regularly. Reduce unnecessary backpack contents, adjust both straps and choose a comfortable load: 10–15% of body weight is not a universal safety threshold.
Every day, breaks every 20-30 minutes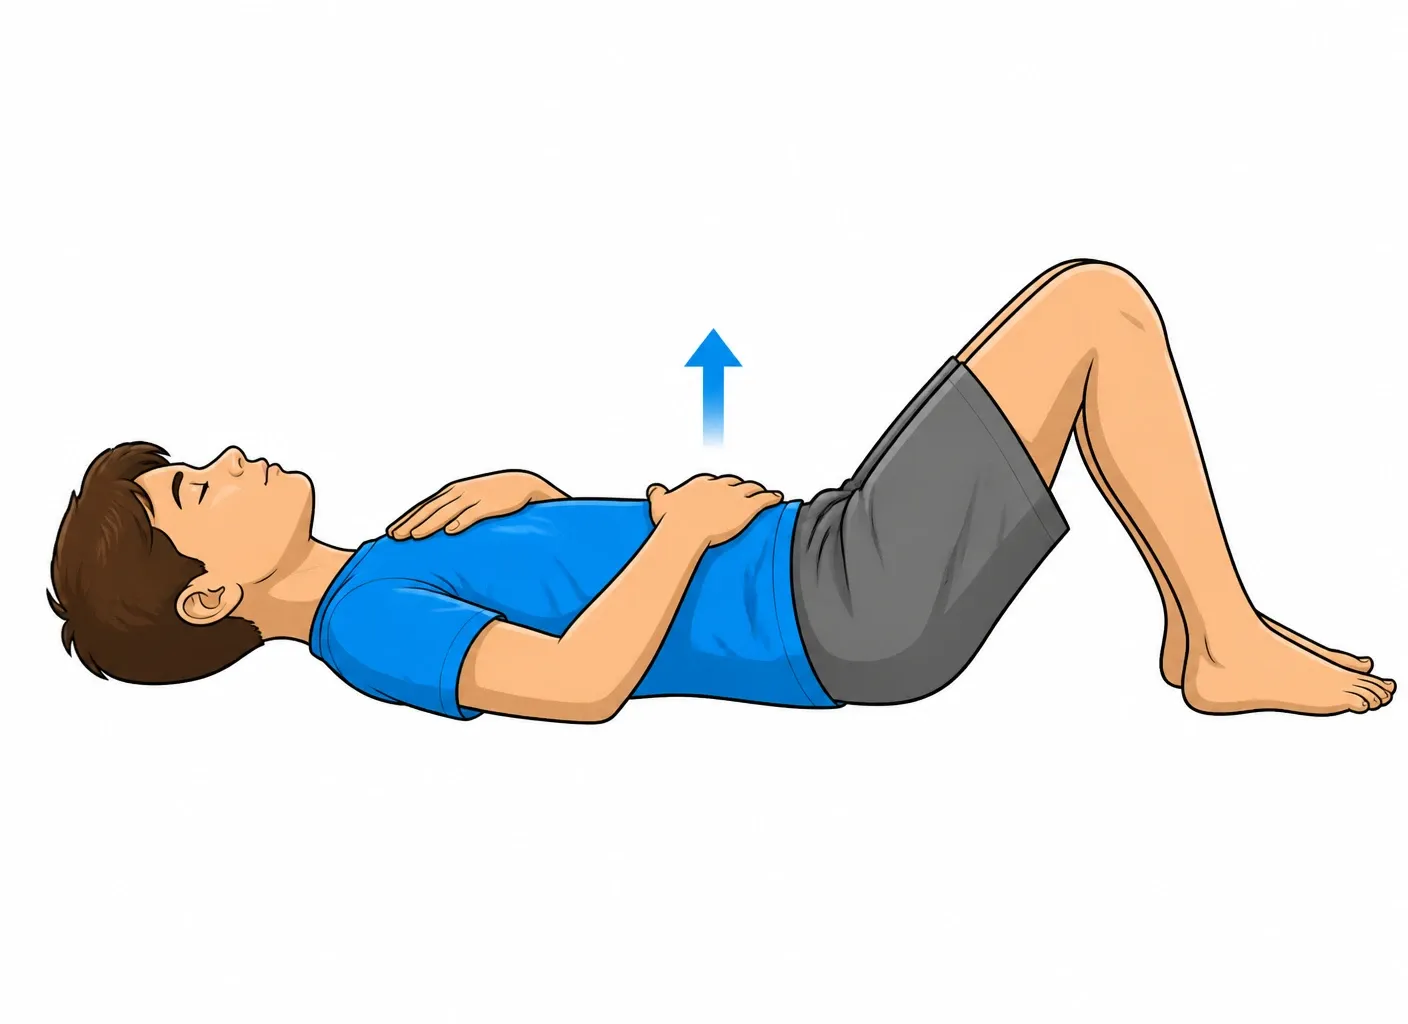
2.Diaphragmatic breathing and rib expansion
Breathing and trunk-awareness exercise; by itself it has not been shown to increase respiratory capacity in mild scoliosis.
Supine with knees bent, one hand on the chest and one on the belly. Inhale SLOWLY through the nose expanding the belly while the chest stays still; exhale slowly through the mouth. If indicated by the specialist, direct the air toward the concave side using a hand on that flank as a cue.
2 sets of 8-10 breaths, twice daily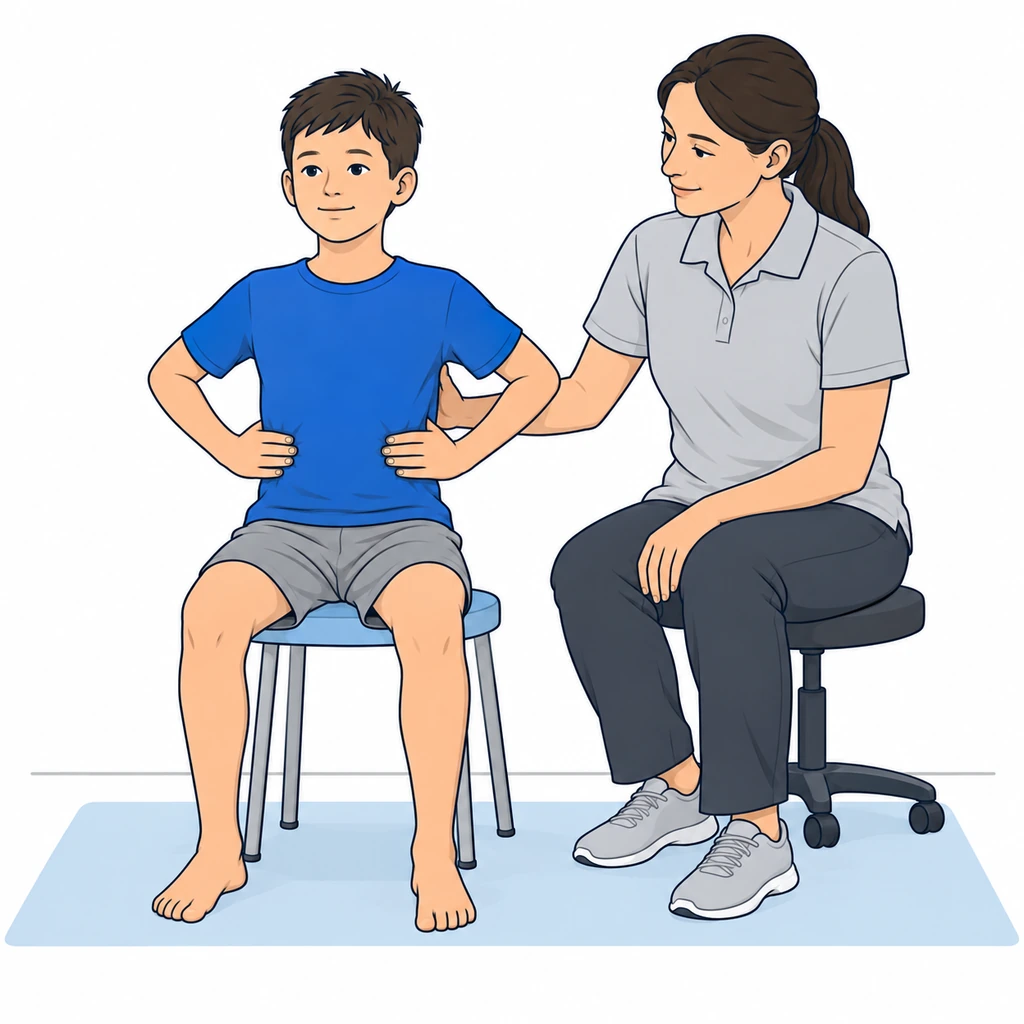
3.Breathing in the individual corrected position
A specific movement to adapt to the curve and check with the physiotherapist.
Illustrative tactile feedback for breathing. The physiotherapist selects the posture and expansion areas.
Use only the position, expansion area and contact points taught by a physiotherapist trained in scoliosis-specific exercises. Do not choose the side from shoulder height alone. Breathe in slowly while maintaining the taught correction, without pushing on the ribs or holding your breath.
Use the position, side and dosage in the individual programme.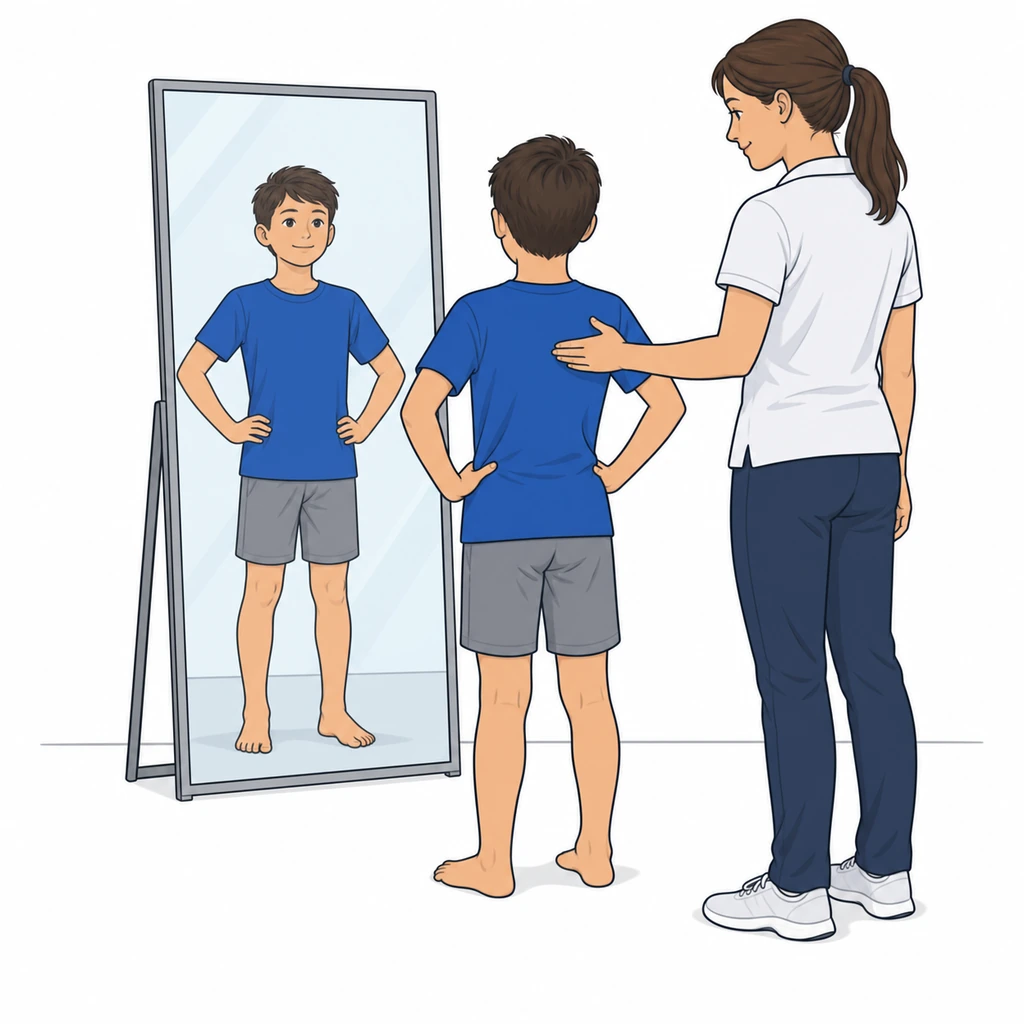
4.Individual self-correction in a mirror
A specific movement to adapt to the curve and check with the physiotherapist.
Use the mirror to repeat the correction taught for your curve, rather than forcing a generic symmetrical posture.
Repeat the correction sequence taught for your own curve. Do not try to level the shoulders and pelvis using a one-size-fits-all rule. Use the mirror for feedback and breathe freely.
Use the position, side and dosage in the individual programme.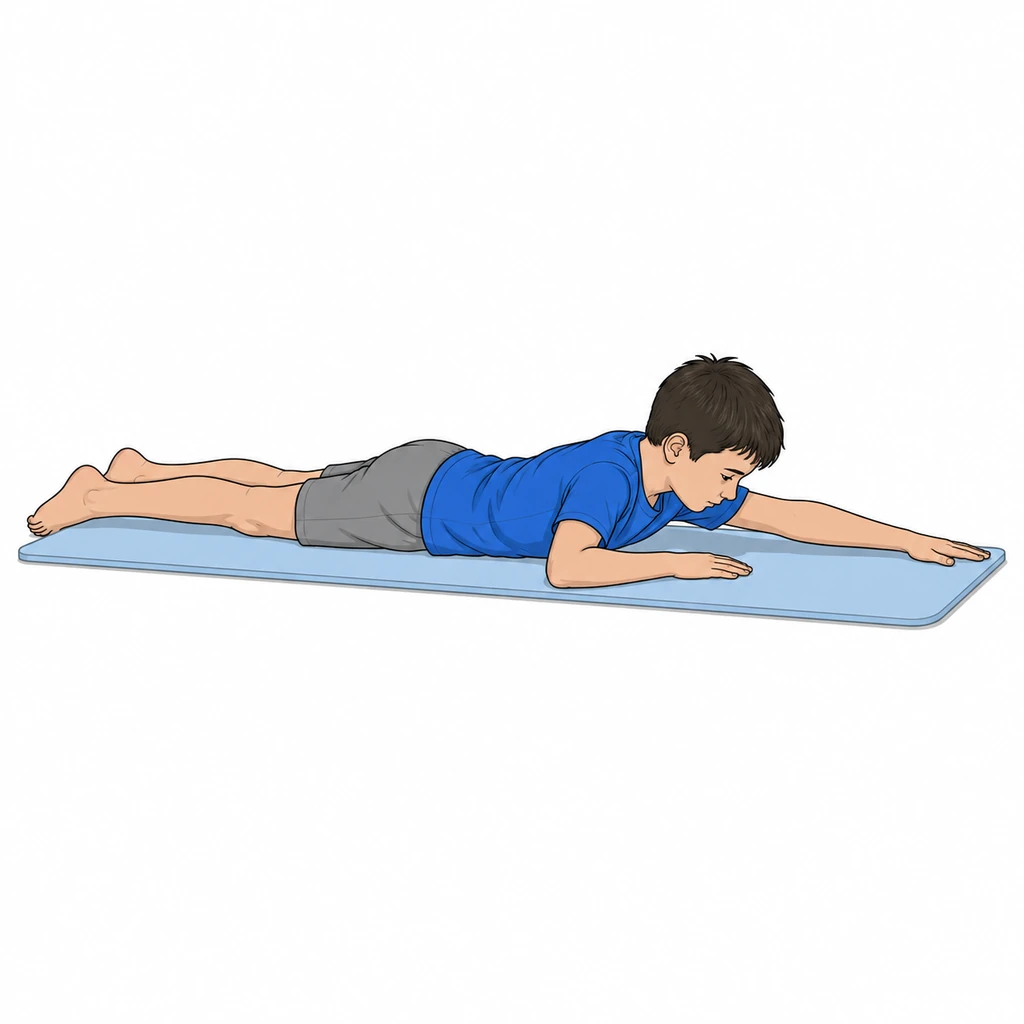
5.Prone self-elongation with arm reach
Self-elongation with trunk control, using the variant prescribed by the physiotherapist
The arm shown is an example: use the side and supports specified in your programme.
Prone on the mat, supported on the forearms with the forehead in line with the spine. Lengthen the trunk forward as if "growing taller", then extend one arm forward/upward (the side is indicated by the specialist) keeping the pelvis still and the lower back not arched. Return slowly.
2-3 sets of 5-8 reps with a 10-15 second hold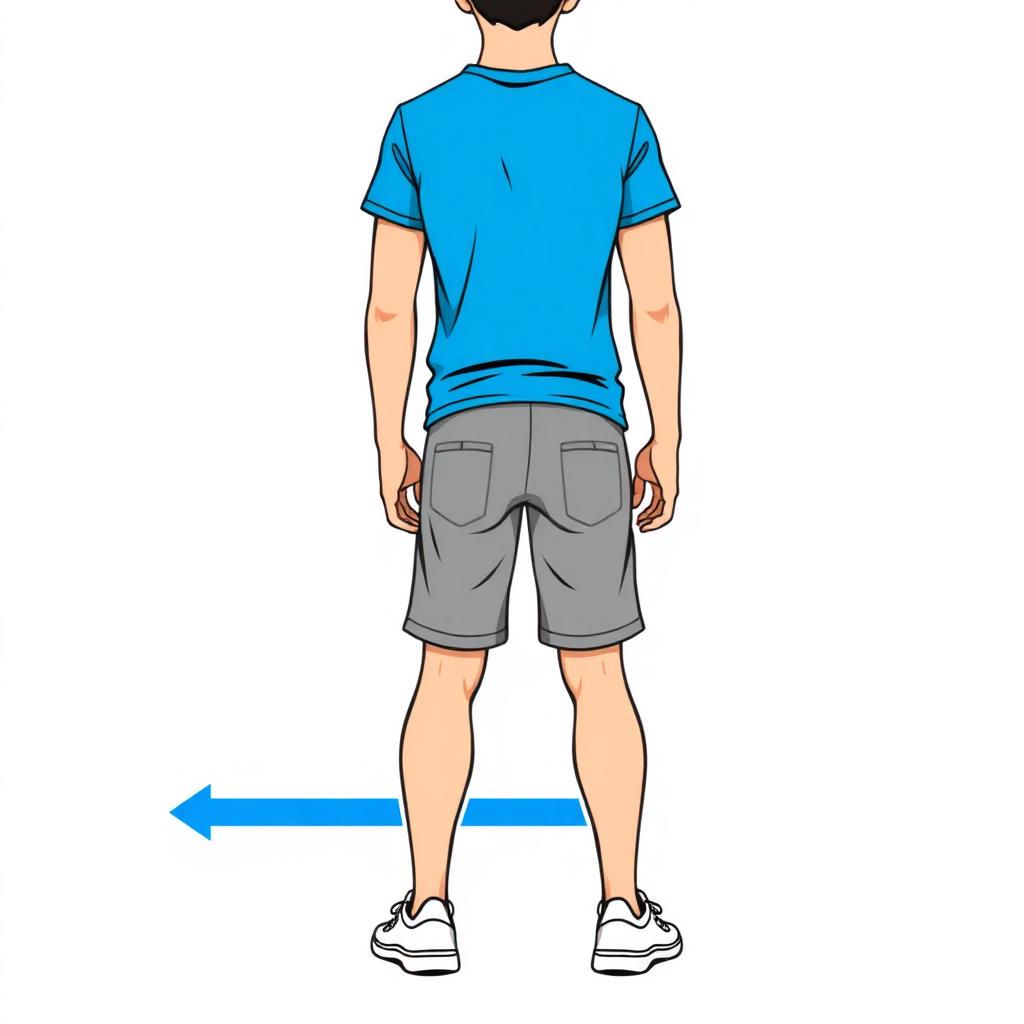
6.Trunk shift, if prescribed
A specific movement to adapt to the curve and check with the physiotherapist.
Shift the trunk in the direction and range demonstrated by the physiotherapist, keeping feet and pelvis still. The side depends on the curve and individual programme: do not independently apply a rule to move “towards the concavity”.
Use the position, side and dosage in the individual programme.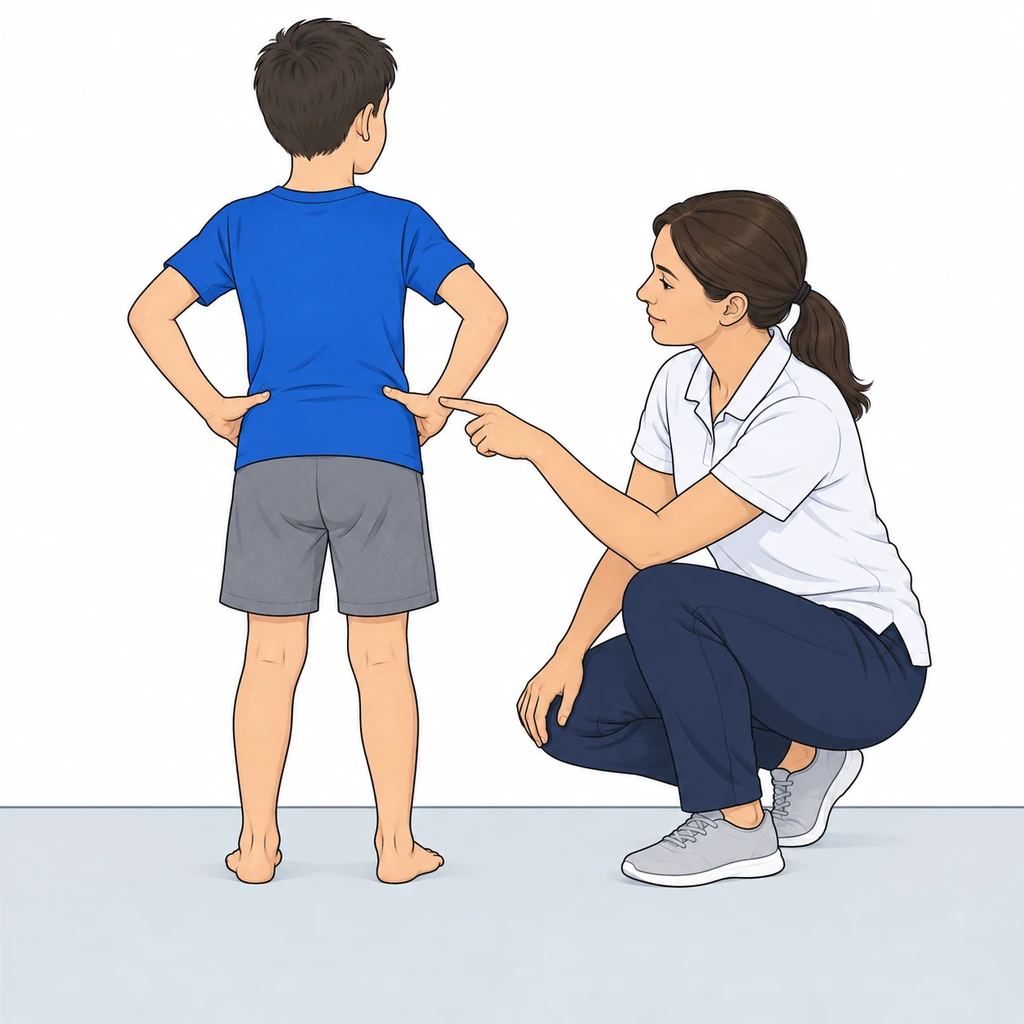
7.Pelvic control within the individual programme
A specific movement to adapt to the curve and check with the physiotherapist.
The figure shows pelvic landmark feedback. The correction direction and range are defined during the session.
Repeat only the pelvic correction prescribed after assessment of the curve, compensations and any leg-length difference. Do not raise one side to make it look symmetrical in a mirror without that instruction.
Use the position, side and dosage in the individual programme.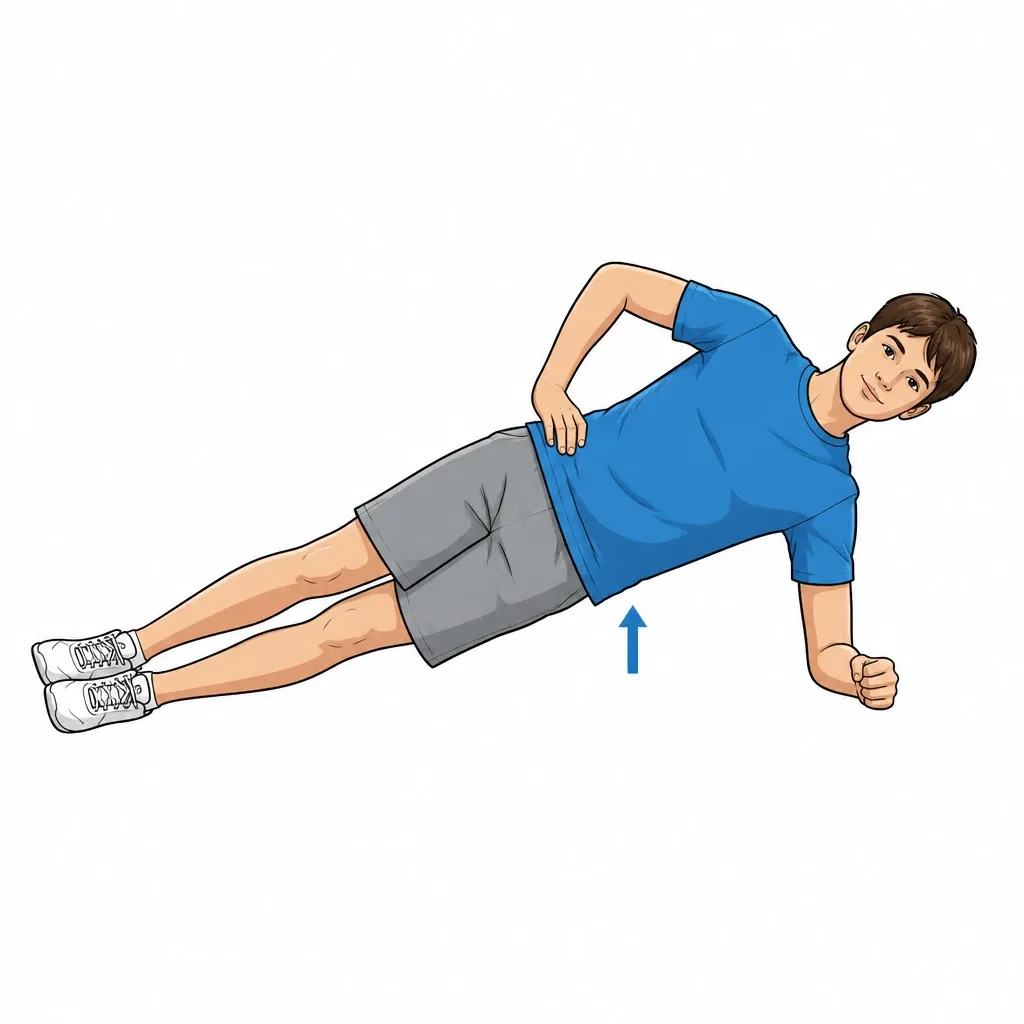
8.Side plank within the individual programme
A specific movement to adapt to the curve and check with the physiotherapist.
The physiotherapist selects the side, supports and duration. Begin with the taught version, elbow under the shoulder and pelvis controlled. Do not infer the side from the curve’s convexity alone or increase duration at the expense of alignment.
Use the position, side and dosage in the individual programme.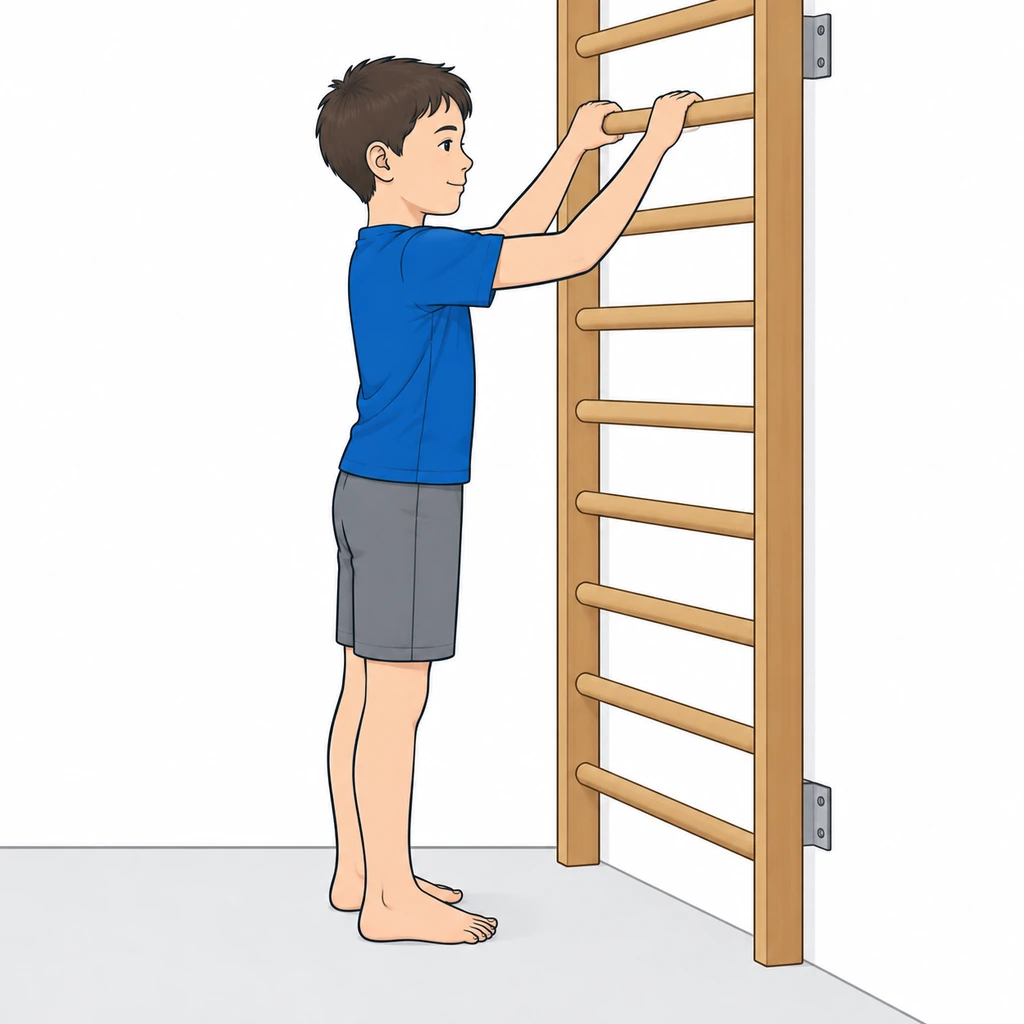
9.Supported self-elongation, if prescribed
A specific movement to adapt to the curve and check with the physiotherapist.
Keep both feet supported. Use the grip and trunk position taught by your physiotherapist.
Only on stable equipment and after demonstration. Keep the feet supported and use the individually prescribed grip and correction. Do not hang from a home pull-up bar or lift the feet off the floor.
Use the position, side and dosage in the individual programme.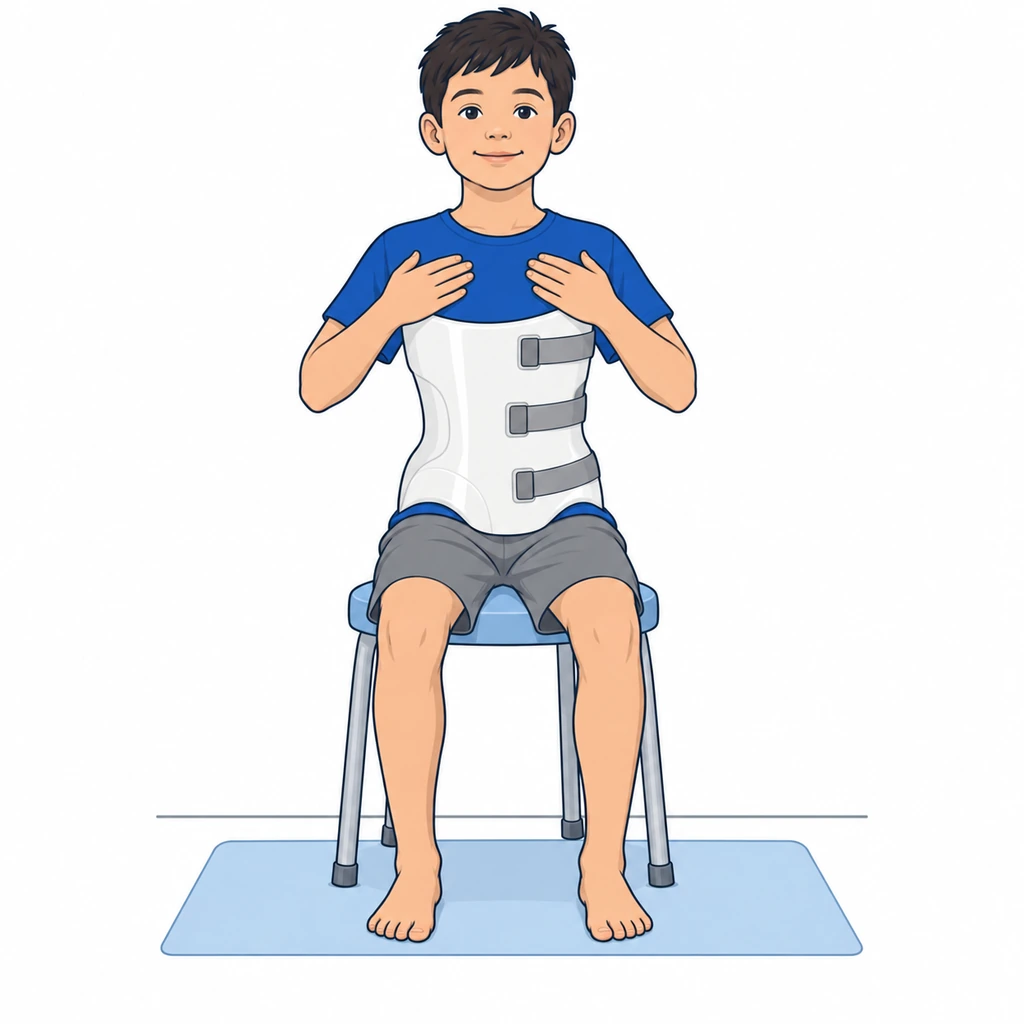
10.Exercises compatible with the brace
A specific movement to adapt to the curve and check with the physiotherapist.
Illustrative brace: follow the instructions for your own model and taught position, keeping the prescribed settings.
Perform only the exercises taught for your own brace. Breathe freely in the corrected position without pushing indiscriminately against all pads. Do not change pads, straps or wearing hours for exercise.
Use the position, side and dosage in the individual programme.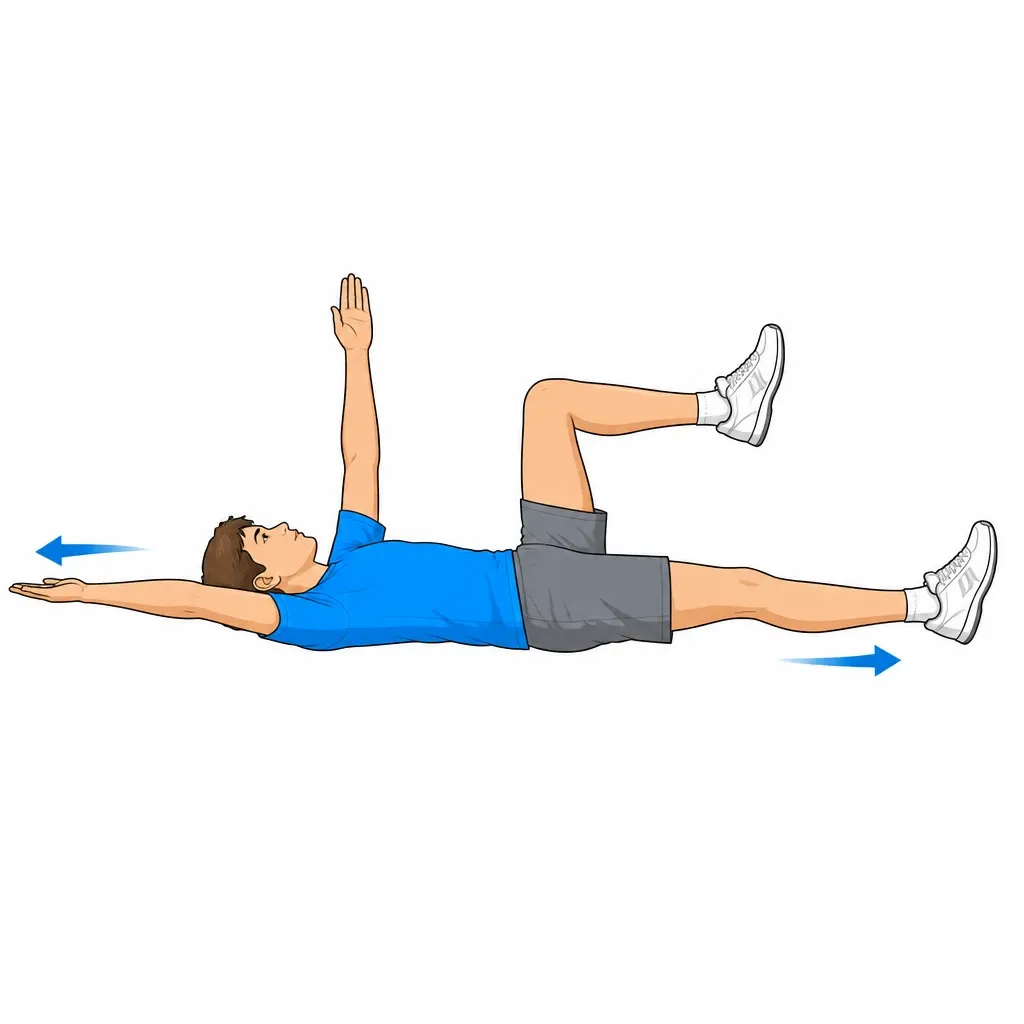
11.Dead bug (core stability)
Trains trunk control during limb movement; it does not eliminate spinal loading.
Supine, arms toward the ceiling and knees bent 90°. SLOWLY extend one leg and the opposite arm keeping the lower back pressed to the floor. If the back lifts off, reduce the range. Exhale during the extension.
3 × 10 reps each side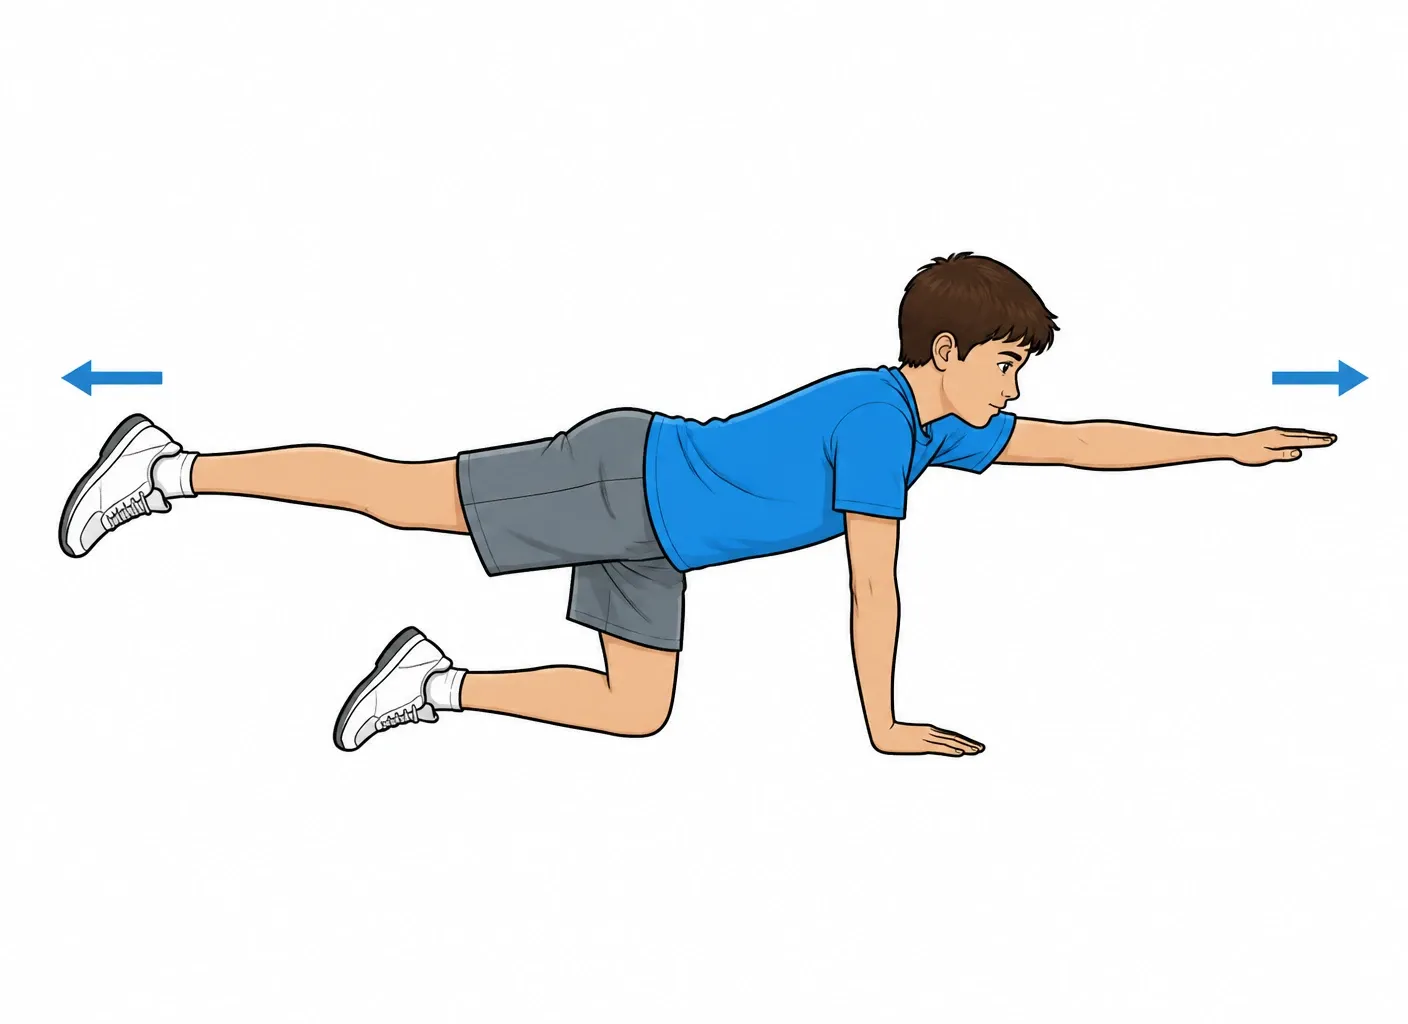
12.Bird dog
Cross-chain trunk control
On all fours, hands under shoulders and knees under hips. Extend one arm and the opposite leg to trunk level, without rotating the pelvis or arching the back. Imagine a glass of water resting on the lower back that must not spill.
3 × 8-10 reps each side, 3-second hold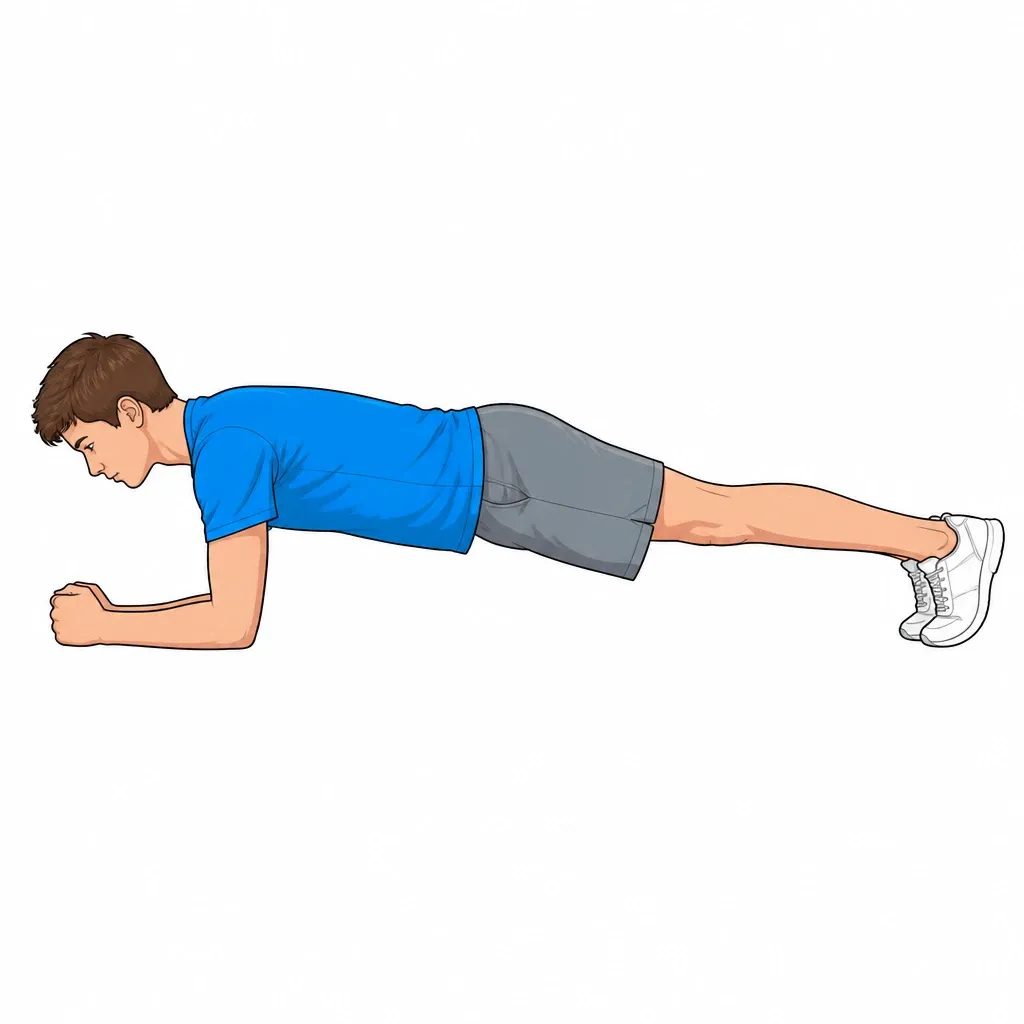
13.Front plank (progression)
Endurance of trunk stabilising muscles
Prone on forearms, elbows under shoulders. Start with knees on the floor; once stable for 30 seconds, progress to the full version on the toes. Body in line from head to heels: the pelvis must not sag or pike. Breathe normally during the hold.
3 × 20-40 seconds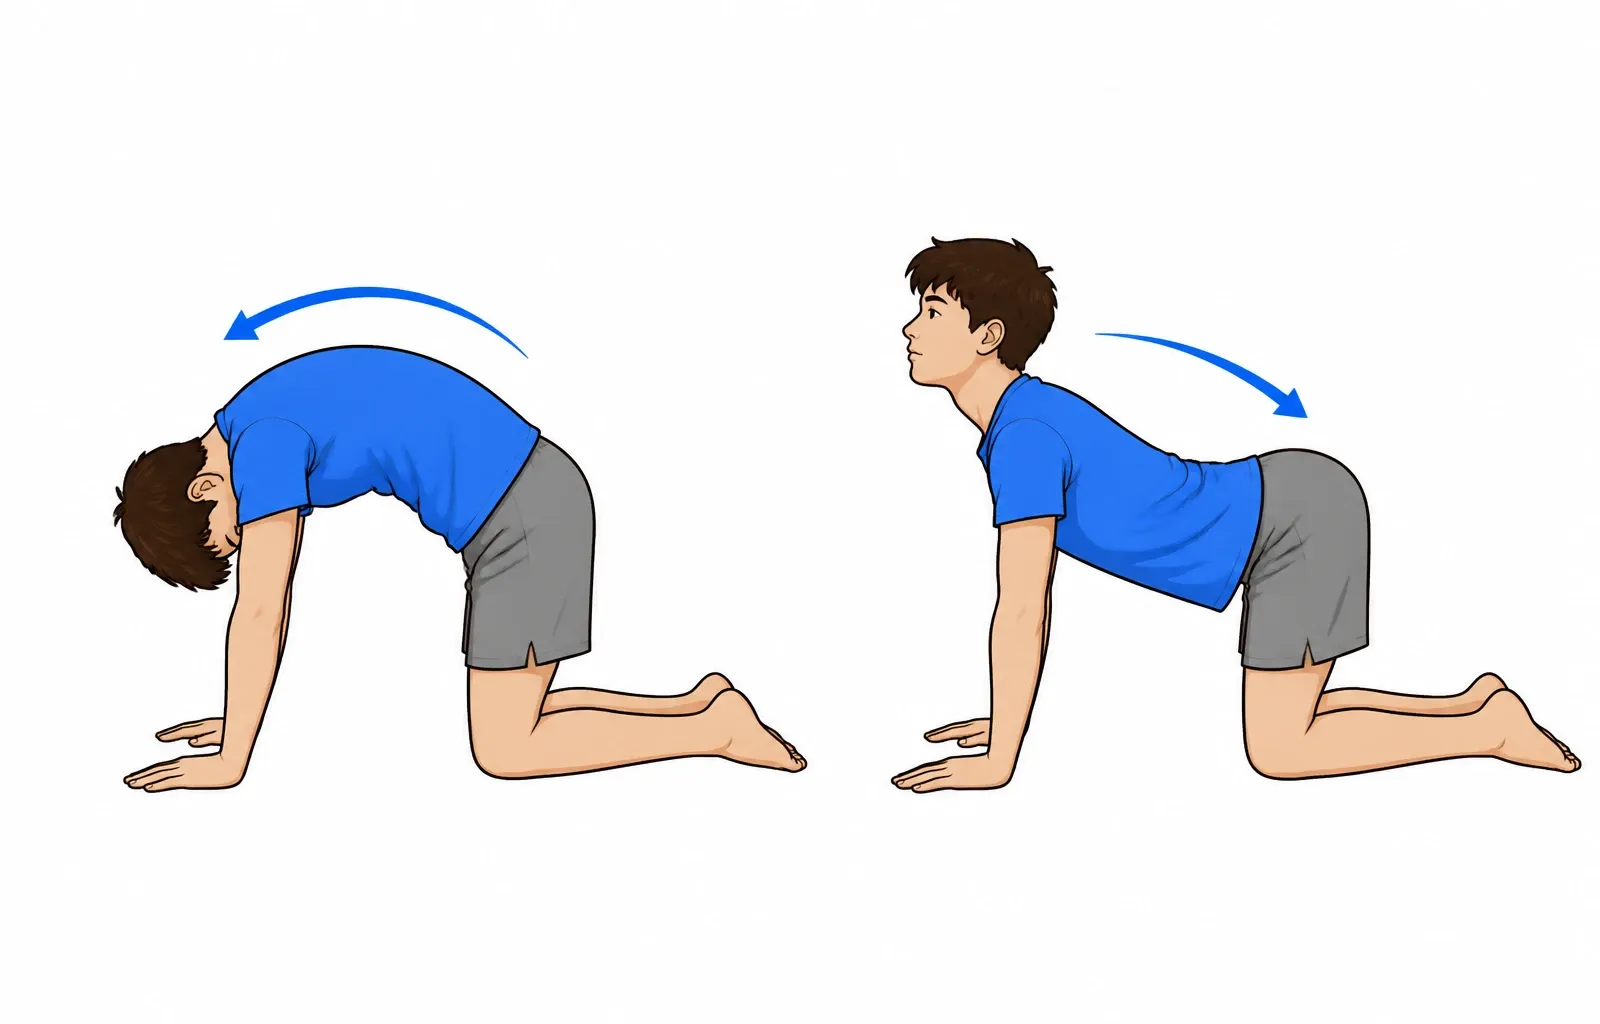
14.Cat-cow and thoracic rotations
Maintains thoracic spine mobility
CAT-COW: on all fours, alternate arching up (cat) and extending (cow) with slow controlled movements, following the breath. THORACIC ROTATIONS: seated with arms crossed on the chest, rotate the torso side to side keeping the pelvis still.
2 × 10 reps per exercise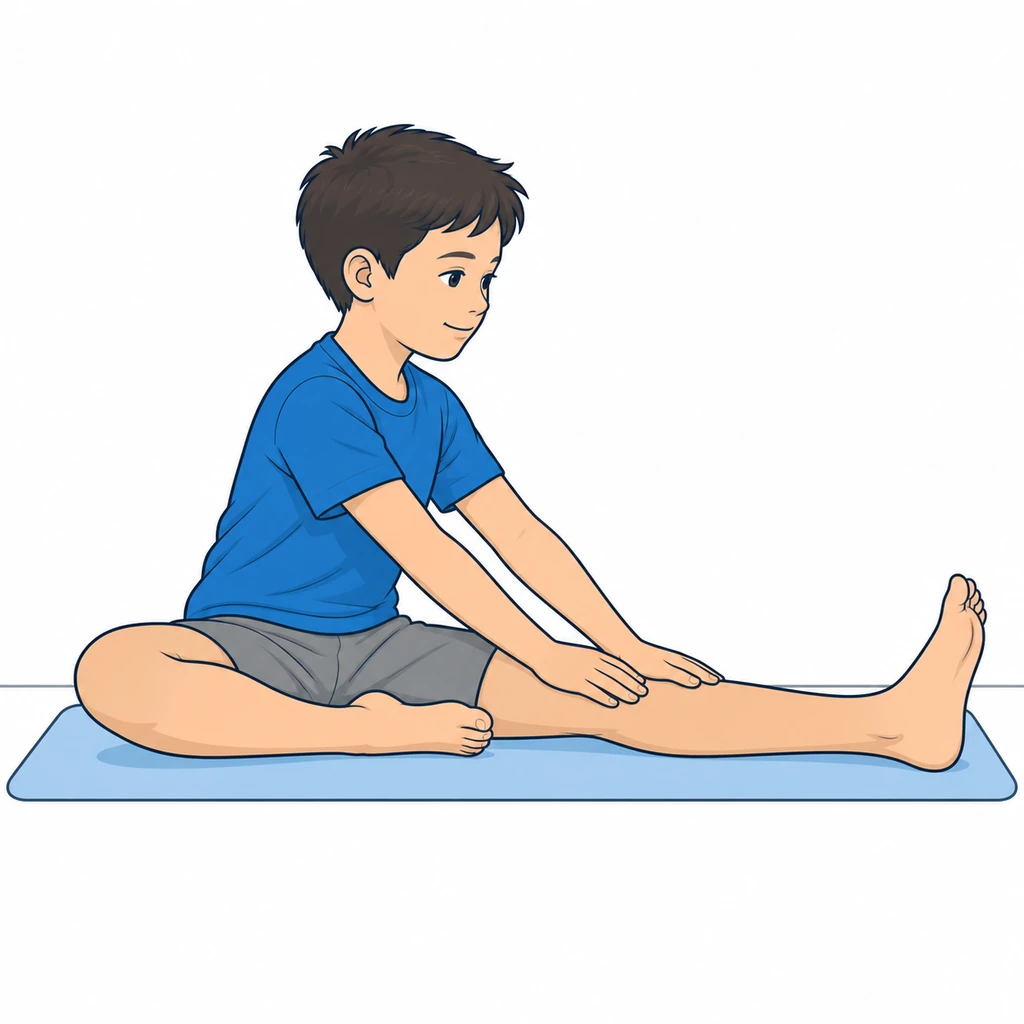
15.Hamstring stretching
Stiff hamstrings limit pelvic control
Seated on the floor with one leg extended and the other bent with the sole against the inner thigh. Hinge forward FROM THE HIPS keeping the back straight, reaching the hands toward the foot. Stop at the first sensation of tension, without pain and without rounding the back.
3 × 30 seconds each side, daily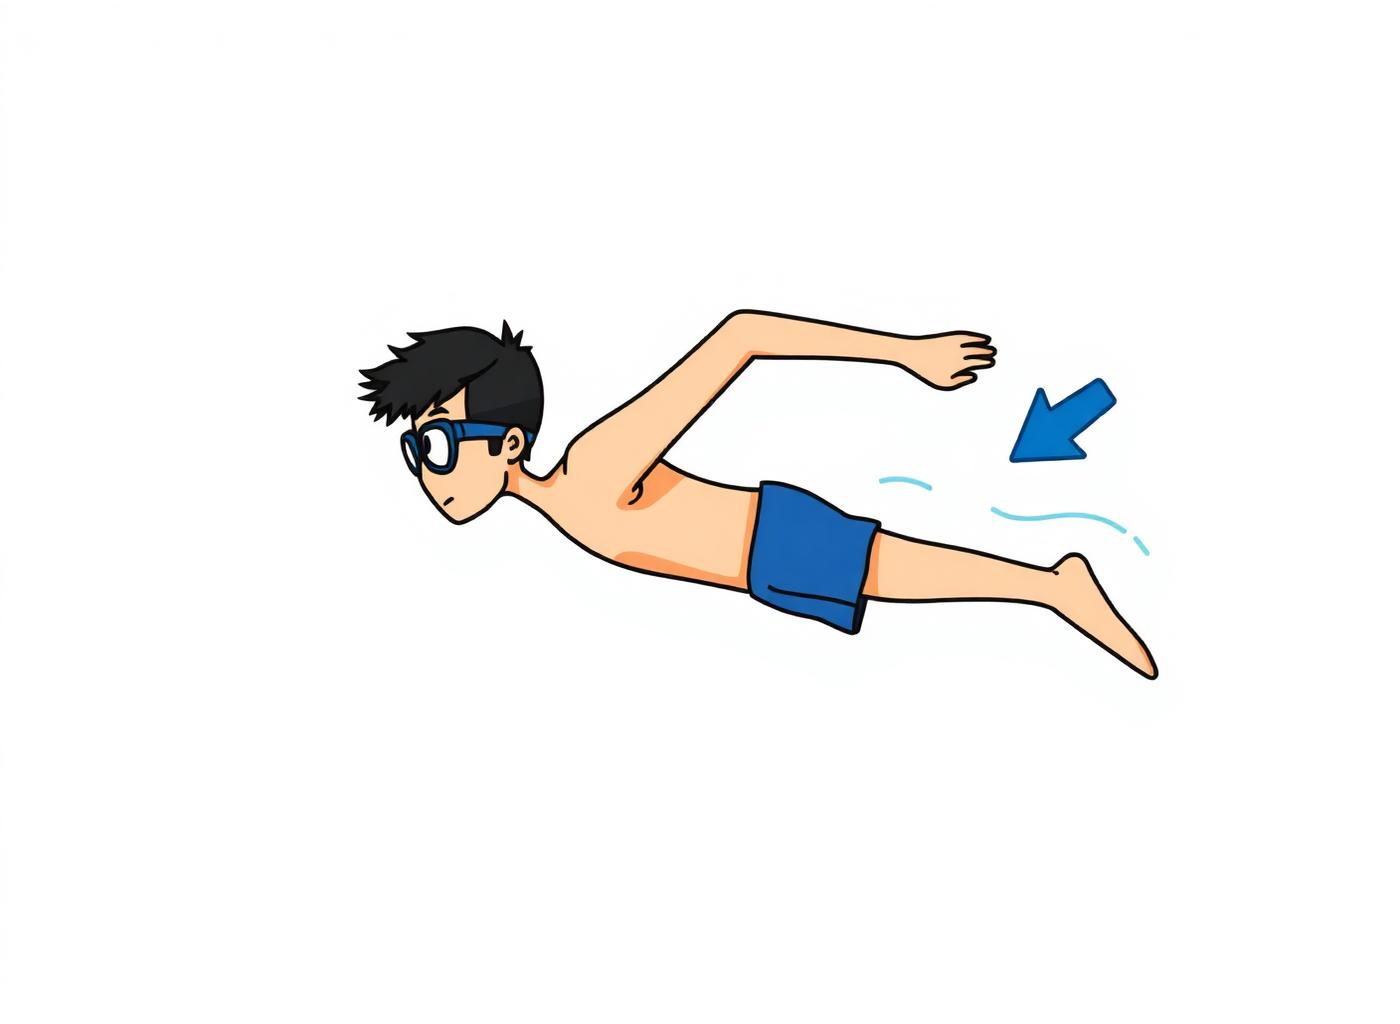
16.Physical activity and recommended sports
Physical activity is encouraged; no generic sport replaces scoliosis-specific exercises when indicated.
Physical activity is generally recommended. Swimming (all strokes), gentle gymnastics, yoga and pilates are suitable; there is no strict preference for symmetric sports over others. Asymmetric sports (tennis, fencing, volleyball) are not forbidden as such. Competitive sport should be discussed with the specialist; scoliosis-specific exercises (SEAS, Schroth) should be set up with a trained physiotherapist, as a complement to the brace when prescribed.
2-3 sessions per week, year-round
RED FLAGS - When to stop and contact the doctor immediately
Stop the exercises immediately and contact the specialist (or go to the emergency department if severe) if any of the following occur:
- Acute or sudden pain during exercise
- Significant swelling after exercises
- Pain that progressively worsens over days
- Fever or general malaise
- Difficulty walking or using the limb after exercises
- Any neurological symptoms (tingling, numbness, sudden weakness)
- A red or hot joint, or inability to bear weight: seek prompt assessment; use emergency care if severe.
In case of doubt, always prefer a check-up over continuing the exercises.
Dott. Daniele Priano
Paediatric Orthopaedics - ASST Gaetano Pini-CTO
Content version: 21 September 2026
ortopediaevolutiva.com • Printed: 18/10/2026
 Full sheet and videos
https://ortopediaevolutiva.com/en/parents-kids/exercises/spine-posture/scoliosis-posture
Prepare the visit handout
Use the condition and phase indicated by your clinician. You can leave out individual exercises; instructions, illustrations and safety advice remain together.
Exclude exercises if needed
16 of 16 exercise cards included
The full web page remains available. Your selection is not saved or shared.
Before You Start
Who is this guide for?
Adolescents with mild scoliosis or scoliotic attitude. For structural scoliosis, exercises are part of a broader program.
What you need
A stable, clear surface, comfortable clothing and a secure support. Check resistance-band anchors. Adult supervision; avoid marbles and small objects if the child may put them in their mouth, using a towel instead.
Suggested frequency
Perform only the exercises selected during the visit. The listed dosages are examples to adapt: follow the dose, frequency, rest and progression prescribed for age, symptoms and phase. Do not automatically perform the whole list.
Common mistakes to avoid
- •Forcing a painful or unauthorised movement
- •Increasing load, resistance or frequency without the agreed rest periods
- •Doing balance exercises without stable support or supervision
⚠️ Red flags — when to stop and contact the doctor immediately
Stop exercises immediately and contact the specialist if any of the following occur:
- Acute or sudden pain during exercise
- Significant swelling after exercises
- Pain that progressively worsens over days
- Fever or general malaise
- Difficulty walking or using the limb after exercises
- Any neurological symptoms (tingling, numbness, sudden weakness)
- A red or hot joint, or inability to bear weight: seek prompt assessment; use emergency care if severe.
Detailed Exercises
- 1
Postural education and load management
IMPORTANT: exercises do NOT cure structural scoliosis
Generic exercises support mobility, strength and trunk awareness; they do not replace scoliosis-specific exercises or a prescribed brace. Arrange a comfortable workstation with supported feet and change position regularly. Reduce unnecessary backpack contents, adjust both straps and choose a comfortable load: 10–15% of body weight is not a universal safety threshold.
Every day, breaks every 20-30 minutes - 2
Diaphragmatic breathing and rib expansion
Breathing and trunk-awareness exercise; by itself it has not been shown to increase respiratory capacity in mild scoliosis.
Supine with knees bent, one hand on the chest and one on the belly. Inhale SLOWLY through the nose expanding the belly while the chest stays still; exhale slowly through the mouth. If indicated by the specialist, direct the air toward the concave side using a hand on that flank as a cue.
2 sets of 8-10 breaths, twice daily - 3
Breathing in the individual corrected position
A specific movement to adapt to the curve and check with the physiotherapist.
Illustrative tactile feedback for breathing. The physiotherapist selects the posture and expansion areas.
Use only the position, expansion area and contact points taught by a physiotherapist trained in scoliosis-specific exercises. Do not choose the side from shoulder height alone. Breathe in slowly while maintaining the taught correction, without pushing on the ribs or holding your breath.
Use the position, side and dosage in the individual programme. - 4
Individual self-correction in a mirror
A specific movement to adapt to the curve and check with the physiotherapist.
Use the mirror to repeat the correction taught for your curve, rather than forcing a generic symmetrical posture.
Repeat the correction sequence taught for your own curve. Do not try to level the shoulders and pelvis using a one-size-fits-all rule. Use the mirror for feedback and breathe freely.
Use the position, side and dosage in the individual programme. - 5
Prone self-elongation with arm reach
Self-elongation with trunk control, using the variant prescribed by the physiotherapist
The arm shown is an example: use the side and supports specified in your programme.
Prone on the mat, supported on the forearms with the forehead in line with the spine. Lengthen the trunk forward as if "growing taller", then extend one arm forward/upward (the side is indicated by the specialist) keeping the pelvis still and the lower back not arched. Return slowly.
2-3 sets of 5-8 reps with a 10-15 second hold - 6
Trunk shift, if prescribed
A specific movement to adapt to the curve and check with the physiotherapist.
Shift the trunk in the direction and range demonstrated by the physiotherapist, keeping feet and pelvis still. The side depends on the curve and individual programme: do not independently apply a rule to move “towards the concavity”.
Use the position, side and dosage in the individual programme. - 7
Pelvic control within the individual programme
A specific movement to adapt to the curve and check with the physiotherapist.
The figure shows pelvic landmark feedback. The correction direction and range are defined during the session.
Repeat only the pelvic correction prescribed after assessment of the curve, compensations and any leg-length difference. Do not raise one side to make it look symmetrical in a mirror without that instruction.
Use the position, side and dosage in the individual programme. - 8
Side plank within the individual programme
A specific movement to adapt to the curve and check with the physiotherapist.
The physiotherapist selects the side, supports and duration. Begin with the taught version, elbow under the shoulder and pelvis controlled. Do not infer the side from the curve’s convexity alone or increase duration at the expense of alignment.
Use the position, side and dosage in the individual programme. - 9
Supported self-elongation, if prescribed
A specific movement to adapt to the curve and check with the physiotherapist.
Keep both feet supported. Use the grip and trunk position taught by your physiotherapist.
Only on stable equipment and after demonstration. Keep the feet supported and use the individually prescribed grip and correction. Do not hang from a home pull-up bar or lift the feet off the floor.
Use the position, side and dosage in the individual programme. - 10
Exercises compatible with the brace
A specific movement to adapt to the curve and check with the physiotherapist.
Illustrative brace: follow the instructions for your own model and taught position, keeping the prescribed settings.
Perform only the exercises taught for your own brace. Breathe freely in the corrected position without pushing indiscriminately against all pads. Do not change pads, straps or wearing hours for exercise.
Use the position, side and dosage in the individual programme. - 11
Dead bug (core stability)
Trains trunk control during limb movement; it does not eliminate spinal loading.
Supine, arms toward the ceiling and knees bent 90°. SLOWLY extend one leg and the opposite arm keeping the lower back pressed to the floor. If the back lifts off, reduce the range. Exhale during the extension.
3 × 10 reps each side - 12
Bird dog
Cross-chain trunk control
On all fours, hands under shoulders and knees under hips. Extend one arm and the opposite leg to trunk level, without rotating the pelvis or arching the back. Imagine a glass of water resting on the lower back that must not spill.
3 × 8-10 reps each side, 3-second holdBird dog
Press Play to load the video. Follow the instructions and precautions on this exercise sheet.
Brief demonstration of the approved movement; follow the individual dose and limits in the exercise sheet. The video does not replace the full programme.
- 13
Front plank (progression)
Endurance of trunk stabilising muscles
Prone on forearms, elbows under shoulders. Start with knees on the floor; once stable for 30 seconds, progress to the full version on the toes. Body in line from head to heels: the pelvis must not sag or pike. Breathe normally during the hold.
3 × 20-40 secondsForearm plank on knees
Press Play to load the video. Follow the instructions and precautions on this exercise sheet.
Shows only the forearm plank with knees supported, with a brief illustrative hold. The version on the toes and its progression are not demonstrated.
- 14
Cat-cow and thoracic rotations
Maintains thoracic spine mobility
CAT-COW: on all fours, alternate arching up (cat) and extending (cow) with slow controlled movements, following the breath. THORACIC ROTATIONS: seated with arms crossed on the chest, rotate the torso side to side keeping the pelvis still.
2 × 10 reps per exercise - 15
Hamstring stretching
Stiff hamstrings limit pelvic control
Seated on the floor with one leg extended and the other bent with the sole against the inner thigh. Hinge forward FROM THE HIPS keeping the back straight, reaching the hands toward the foot. Stop at the first sensation of tension, without pain and without rounding the back.
3 × 30 seconds each side, dailySeated hamstring stretch
Press Play to load the video. Follow the instructions and precautions on this exercise sheet.
Brief demonstration of seated hamstring stretching on one side. It does not replace the 30-second hold or the complete routine on both sides.
- 16
Physical activity and recommended sports
Physical activity is encouraged; no generic sport replaces scoliosis-specific exercises when indicated.
Physical activity is generally recommended. Swimming (all strokes), gentle gymnastics, yoga and pilates are suitable; there is no strict preference for symmetric sports over others. Asymmetric sports (tennis, fencing, volleyball) are not forbidden as such. Competitive sport should be discussed with the specialist; scoliosis-specific exercises (SEAS, Schroth) should be set up with a trained physiotherapist, as a complement to the brace when prescribed.
2-3 sessions per week, year-round
Frequently Asked Questions
Can exercises correct scoliosis?
Generic exercises do NOT correct structural scoliotic curve. Their role is to maintain mobility, improve muscle strength and postural awareness. For significant scoliosis, specific exercises (SEAS, Schroth) are prescribed by the specialist.
Can my child with scoliosis do sports?
Yes, physical activity is generally recommended in scoliosis. Swimming, gentle gymnastics, yoga and other sports are suitable in most cases, with no strict preference for symmetric sports; asymmetric sports (tennis, fencing) are not forbidden as such. Competitive sport and scoliosis-specific exercises should be set up with the specialist and a physiotherapist trained in these techniques.
Do heavy backpacks cause scoliosis?
There is no evidence that a backpack causes idiopathic scoliosis. The 10-15% body-weight rule, sometimes used as practical advice, is not a universal threshold for pain or injury. Reduce unnecessary contents, adjust both straps and choose a comfortable load. Persistent pain deserves assessment rather than automatic attribution to the backpack.
How often should scoliosis be checked?
During growth, check-ups are generally every 4-6 months for mild scoliosis (10-20°) and more frequent for larger curves or during rapid growth phases. Frequency is determined by the specialist based on individual case.