Paediatric ACL reconstruction (all-epiphyseal / all-inside)
Protocol for the patient with open growth plates operated with physeal-sparing techniques: more cautious progressions, growth surveillance and later return to sport.
Pivoting sport generally no earlier than 12 months in younger athletes; individualise criteria and growth surveillance.
Prepare the visit handout
Use the condition and phase indicated by your clinician. You can leave out individual exercises; instructions, illustrations and safety advice remain together.
Changing phase restores its full exercise list. Timing alone does not determine the phase.
Exclude exercises if needed
17 of 17 exercise cards included
The full web page remains available. Your selection is not saved or shared.
This protocol is part of the post-operative pathway and must be adapted to the surgeon’s instructions and to the individual clinical response.
These documents are protocol templates for information and education only: they do not replace the rehabilitation prescription for the individual case. Timing, loading and progressions must always be adapted to the patient, the lesion pattern, the surgical technique used and the clinical course, in collaboration between orthopaedic surgeon, physiotherapist and, where appropriate, physiatrist. Progression is driven by objective criteria, not by the calendar alone.
At a glance — the full pathway
- Weight bearing
- Often more cautious than in adults: partial weight bearing with crutches for the first 2-4 weeks depending on fixation.
- Brace
- Frequently prescribed, with ROM limited to 0-90° in the early weeks.
- ROM
- Early full extension; progressive flexion without forcing, to protect epiphyseal fixation.
- Stresses to avoid
- Varus/valgus and rotational forces on the knee in the first 3 months.
- Running
- Usually from month 4, only when strength and control criteria are met.
- Growth surveillance
- Clinical (and radiographic where indicated) review for limb length discrepancy or angular deviation: indicatively at 6, 12 and 24 months, with duration and frequency modulated on remaining growth and the technique used.
Children and adolescents often have not completed skeletal growth: their bones are still partly made of growth cartilage (physis), which can be damaged by the surgical procedures required for ACL reconstruction.
Step by step
Each phase offers exercise options: perform only those selected by your clinician, without bringing later phases forward or automatically adding earlier exercises. Dosage, frequency and rests are individualised; the complete catalogue is not a single session.
Before surgery — Preoperative preparation (prehabilitation)
Indicatively 2-6 weeks before surgery, when the knee allows it: duration and need depend on the clinical picture, there is no mandatory minimum.
When it applies
- •When the clinical picture and surgical timing allow, the preoperative phase is an integral part of the pathway, not a side note.
- •It is particularly useful with a still swollen or stiff knee, an extension deficit or quadriceps inhibition after the injury.
- •It is carried out with the physiotherapist, with an agreed daily home programme.
- •In the growing patient, preparation also includes educating the family on the post-operative pathway and growth follow-up.
Goals before surgery
- •Full extension, or symmetrical to the uninjured knee.
- •Near-full flexion.
- •Minimal effusion (a "dry" knee).
- •Walking without significant limp, ideally without crutches.
- •Good voluntary quadriceps control and activation, with no extension lag.
- •Strength recovery compatible with the clinical picture of the injured limb.
- •Education on brace, crutches, allowed weight bearing and the early post-operative phases.
Activities
- •Effusion and pain control (ice, elevation, load management).
- •Practical education on brace, crutches, allowed weight bearing and the goals of the first weeks.
- •Daily home programme, alongside physiotherapy sessions.
Preoperative exercises
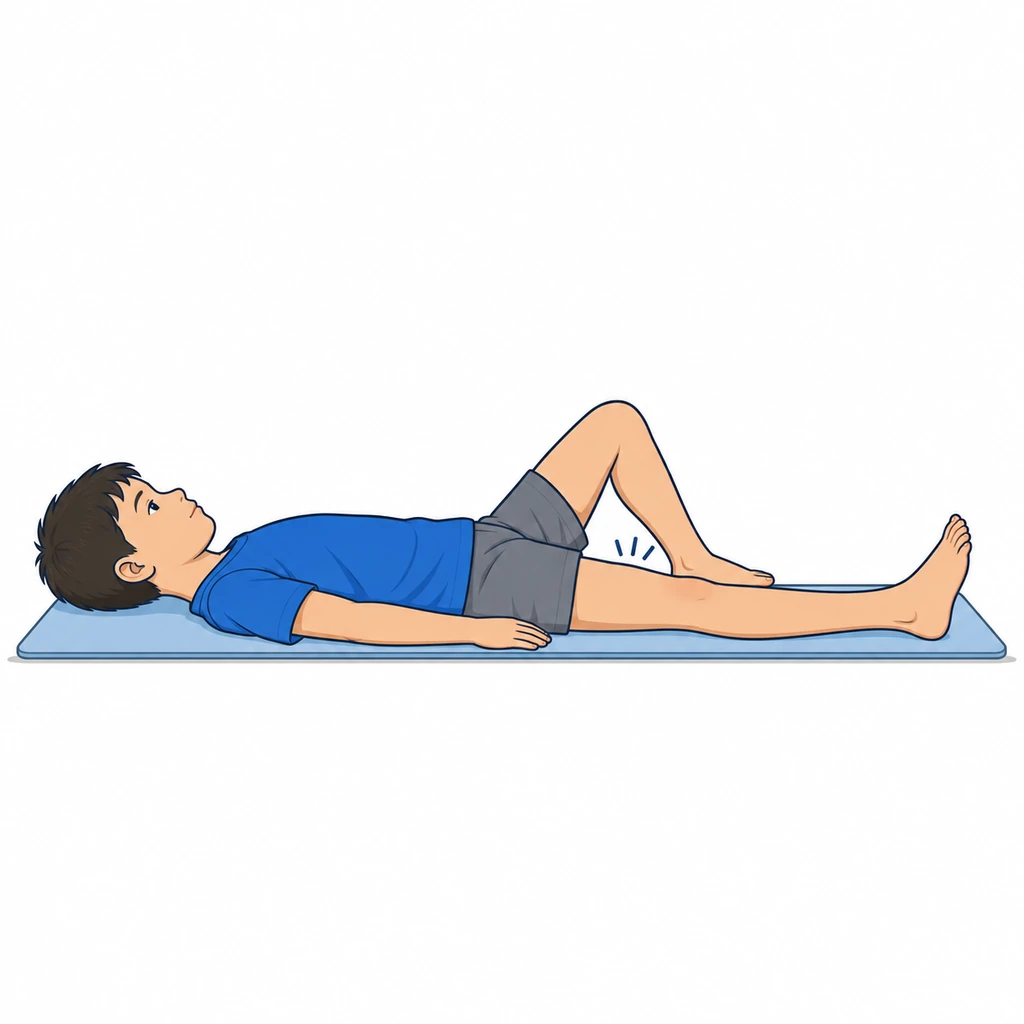
Quadriceps isometric contraction (quad set)
- •Lying down, knee straight in a neutral position on the surface; if proprioceptive feedback helps, place a small rolled towel under the knee.
- •Contract the quadriceps pushing the back of the knee toward the surface, hold, then release slowly.
- •Aim for a visible, global quadriceps contraction, without breath holding.
Dosage: Indicative: 10 contractions of 5 seconds, 2-3 times a day. To be adapted with the physiotherapist.
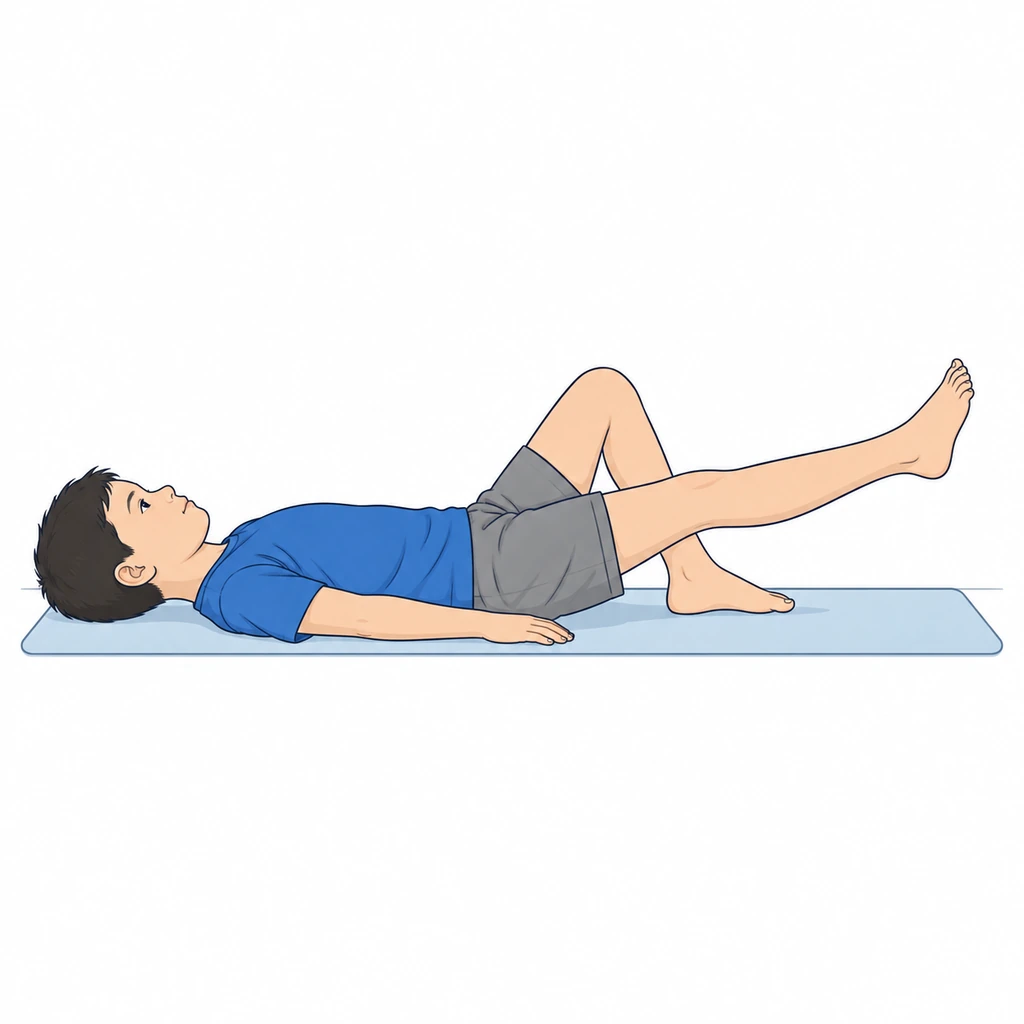
Straight leg raise (only if there is no extension lag)
- •First contract the quadriceps and lock the knee in full extension.
- •Lift the straight leg about 30 cm keeping the knee straight, then lower it slowly.
- •If the knee drops into flexion during the lift (extension lag), stop and work on quad sets first.
Dosage: Indicative: 2-3 sets of 8-10 repetitions. To be adapted with the physiotherapist.
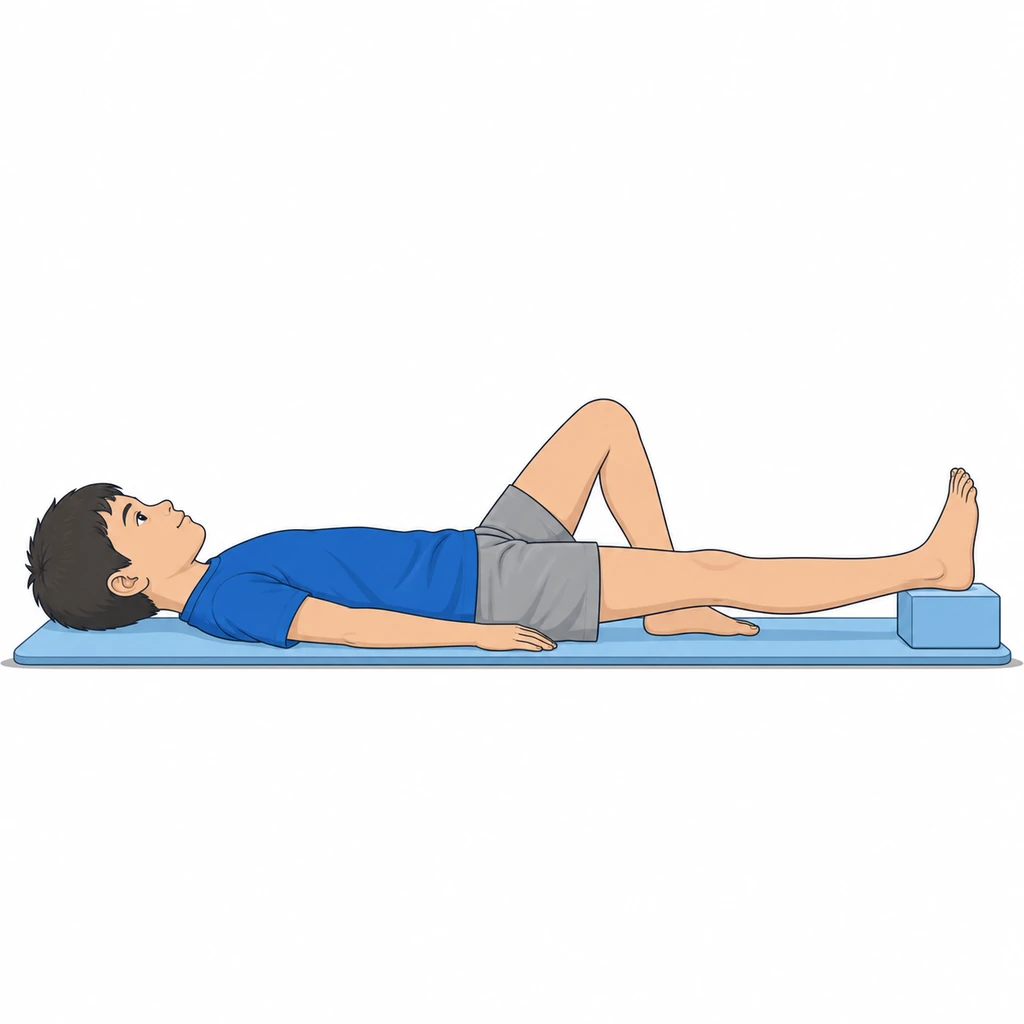
Extension recovery with the heel supported
- •Lying down, rest only the heel on a low support leaving the knee unsupported.
- •Let the knee drop under gravity with the thigh relaxed; a gentle quadriceps contraction can be added.
- •Do not force and do not push abruptly on the knee: extension returns with time and relaxation.
Dosage: Indicative: 3-5 minutes, several times a day if well tolerated.
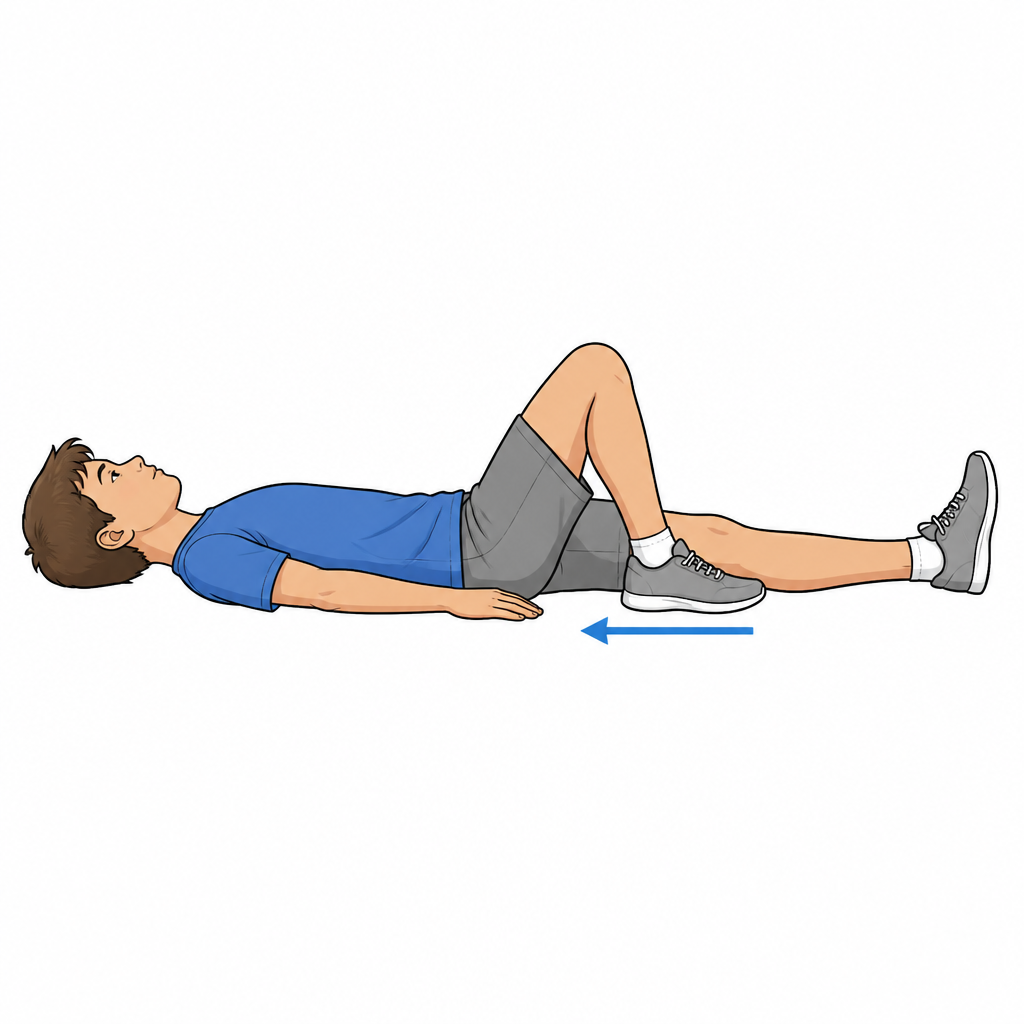
Heel slides / active-assisted flexion
- •Lying down, slide the heel toward the buttock keeping the foot in contact with the surface.
- •You may assist with your hands or a towel around the leg, staying within the pain-free range.
- •Return slowly to the start position, regaining full extension.
Dosage: Indicative: 10-15 repetitions, 2-3 times a day.
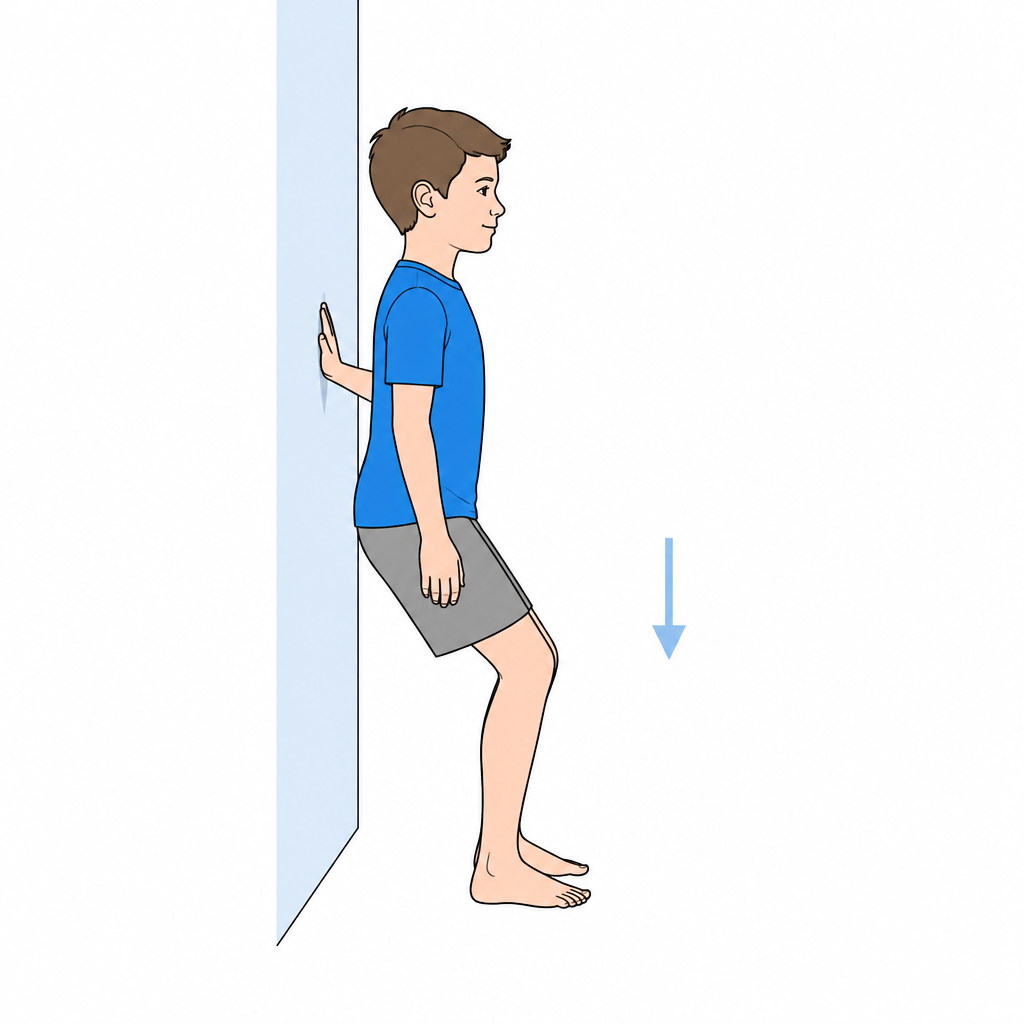
Mini squat or sit-to-stand within the tolerated range
- •Standing, bend the knees only within the pain-free range (usually within 45-60°), keeping the knee aligned over the foot.
- •Alternatively, stand up and sit down from a comfortable chair height, sharing weight between both legs.
- •Avoid knee valgus collapse and trunk twisting.
Dosage: Indicative: 2-3 sets of 8-12 repetitions, on alternate days or as advised.
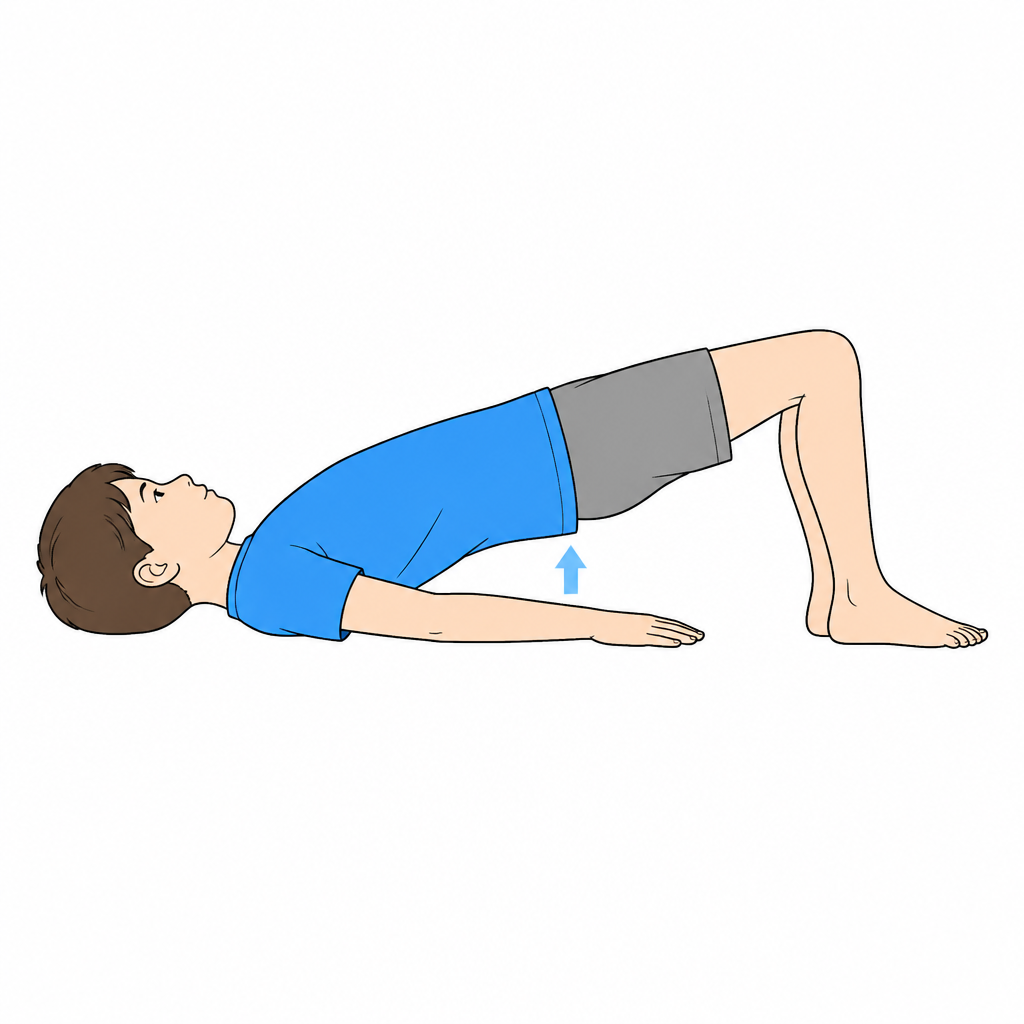
Bridge
- •Supine, knees bent and feet hip-width apart on the floor.
- •Lift the pelvis squeezing the glutes, without arching the back, then lower slowly.
Dosage: Indicative: 2-3 sets of 10-12 repetitions.
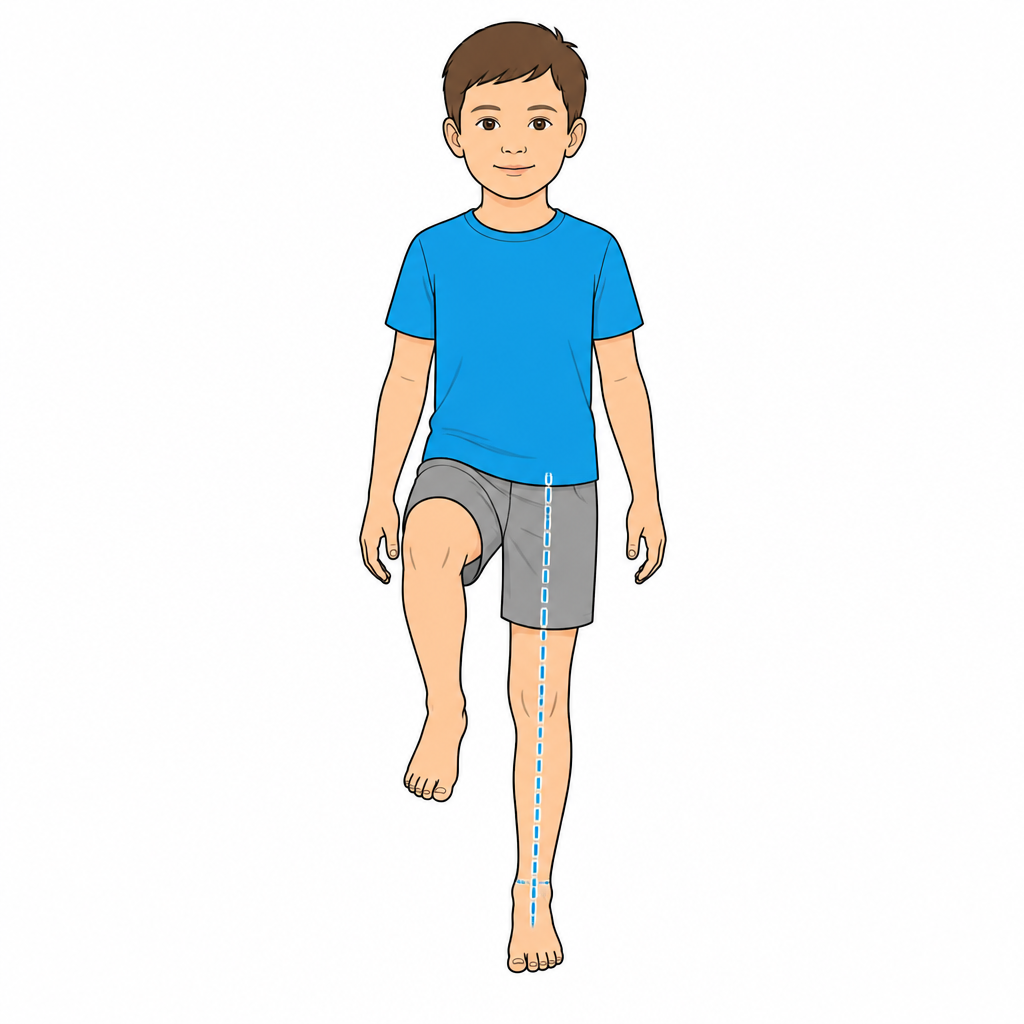
Single-leg balance (only if safe)
- •Standing near a support, load one leg keeping the knee slightly flexed and the pelvis level.
- •Stop if pain, giving-way sensation or instability appear.
Dosage: Indicative: 3-5 holds of 20-30 seconds per side.
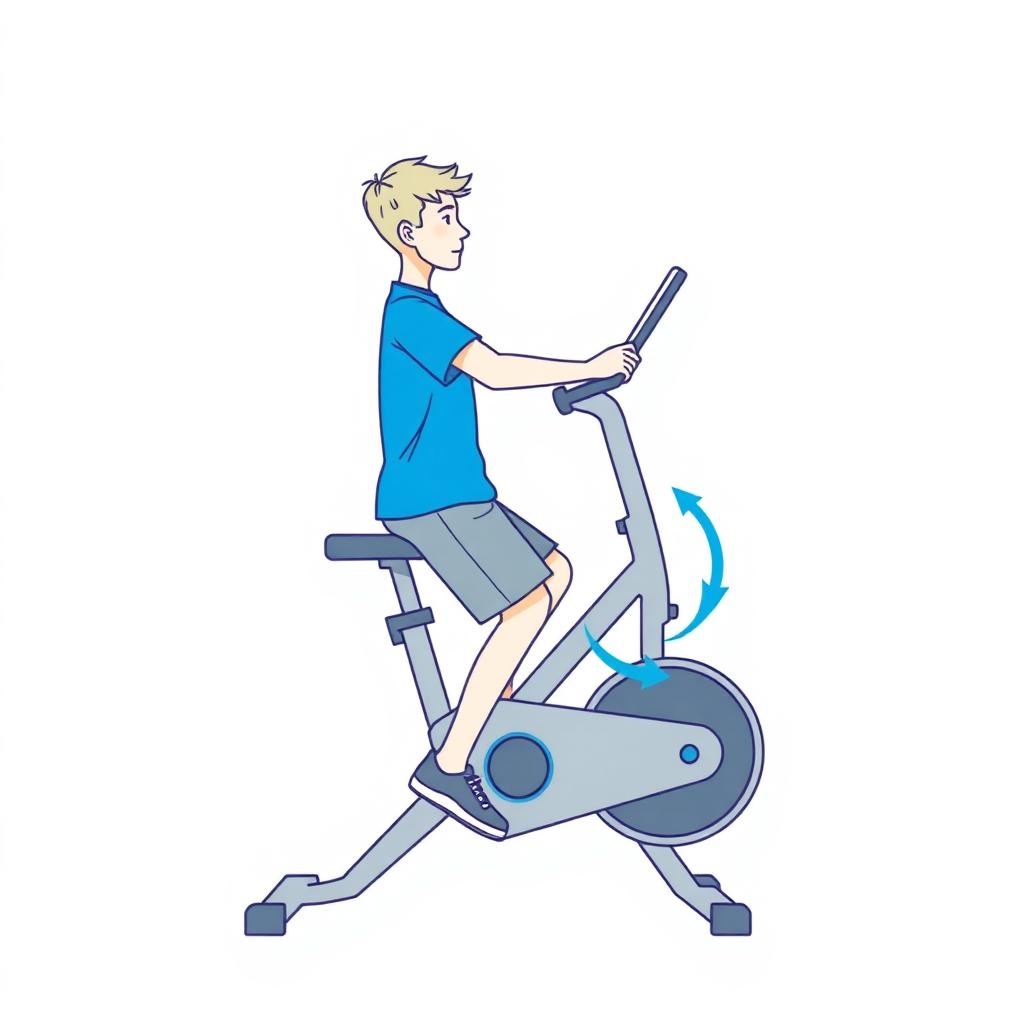
Stationary bike
- •To be introduced when range of motion and pain allow: raise the saddle if flexion is still limited.
- •Continuous pedalling at low resistance, pain-free and without increased swelling in the following hours.
Dosage: Indicative: 10-20 minutes, as tolerated.
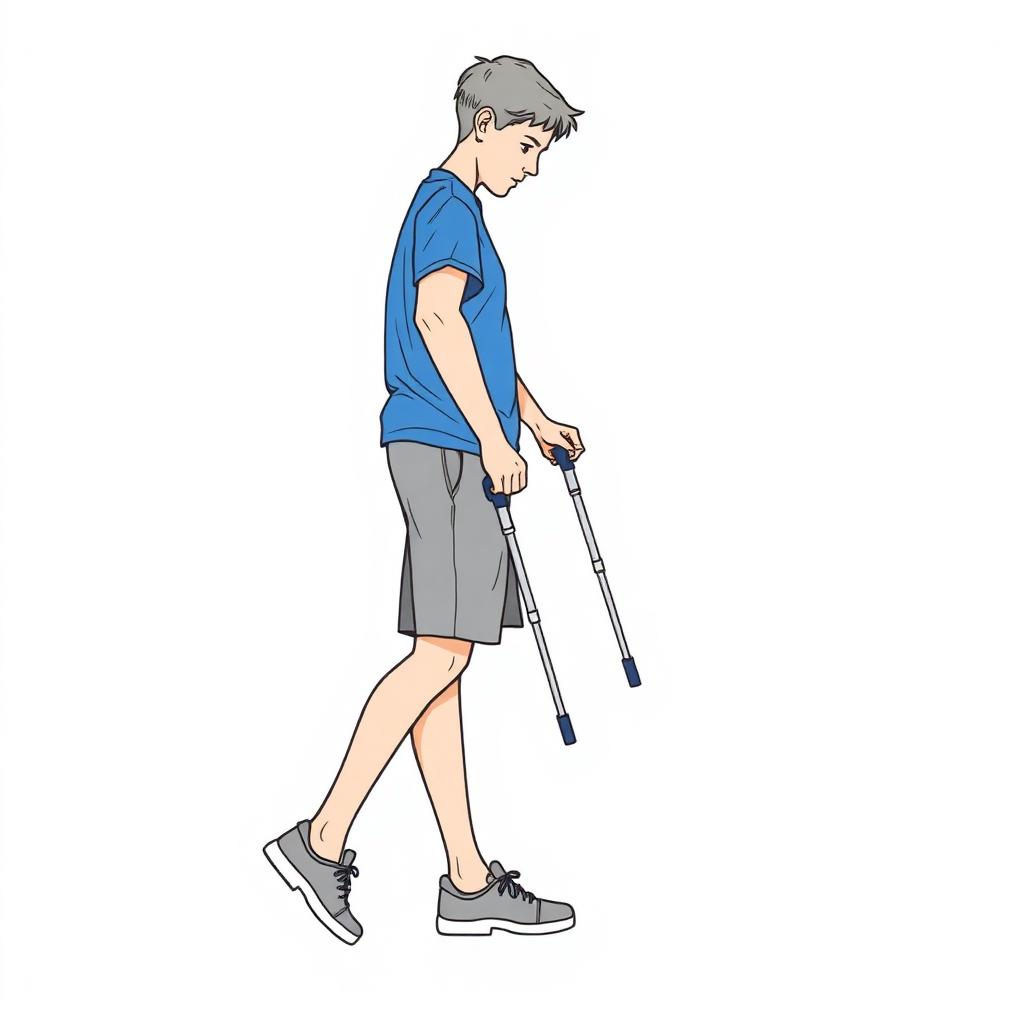
Crutch and weight-bearing training
- •Try the crutches before surgery, with correct height and the weight-bearing status set by the surgeon.
- •Practise on level ground, stairs and the entrance to your home, with someone assisting.
- •Also practise sitting, standing and moving in the bathroom while respecting the planned loading restrictions.
Dosage: At least one training session before admission; repeat until the technique is safe.
Readiness criteria for surgery
- ☐Full or symmetrical extension and near-full flexion.
- ☐A dry knee, or a stable minimal effusion.
- ☐Smooth gait, without antalgic limp.
- ☐Effective quadriceps contraction, with no extension lag on straight leg raise.
- ☐The young patient and family can use crutches and brace and understand the first post-operative weeks.
When surgery must not be delayed
- •Locked knee or bucket-handle meniscal tear: surgery should not be postponed to complete weeks of prehabilitation.
- •Associated lesions needing timely treatment (repairable chondral or osteochondral lesions, multiligament injuries, fractures).
- •Repeated giving-way episodes: not an automatic indication, but they may make it appropriate to bring forward the surgical decision, especially if they limit daily life or expose the knee to new meniscal or chondral injuries.
What to prepare at home and school
- •Organise movement at home: clear pathways, remove rugs, keep useful items within reach.
- •Prepare ice, a support for the heel, comfortable clothing and crutches already adjusted.
- •Inform school or the sports club: plan the absence, temporary exemption and gradual return.
- •Agree the first post-operative physiotherapy session in advance.
Preoperative preparation may improve pre-surgical strength and function and support early recovery after reconstruction. It is not a guarantee of the final outcome: the post-operative pathway remains decisive. Dosages and duration are indicative and must be adapted by the physiotherapist.
Phase 1 — Protection and activation
Indicative timing: Weeks 0-6
The time window is indicative: progression depends on the criteria listed below, not on the calendar.
Goals
- •Full extension and swelling control
- •Quadriceps activation without extension lag
- •Correct gait with prescribed aids
What to do
- •Quadriceps isometrics, straight leg raise, patellar mobilisations
- •Progressive active-assisted flexion within the brace-allowed range
- •Cryotherapy, compression, elevation; education of child and parents
- •Hip, core and ankle work in offloaded positions
Restrictions and precautions
- •No twisting or varus/valgus stress on the knee
- •Weight bearing per surgical prescription: do not anticipate
- •No return to school physical education
Exercises for this phase
1. Quadriceps isometric contraction (quad set)After entering the indicated phase and receiving clearance for this exercise; respect prescribed load and range.
- •Lie on your back with the leg supported and the knee within the authorised extension range.
- •Tighten the front of the thigh without lifting the leg or forcing the knee. Use a small support under the knee only if demonstrated by your physiotherapist.
- •Hold briefly and relax. Lifting the heel is neither a target nor proof of full extension.
Dosage: 10 contractions of 5 seconds, 4-6 times a day
2. Straight-leg raiseAfter entering the indicated phase and receiving clearance for this exercise; respect prescribed load and range.
- •Lying on your back, first tighten the thigh until the knee locks straight.
- •Lift the straight leg about 30 cm, hold 3 seconds and lower slowly.
- •If the knee bends while lifting, the quadriceps is not ready yet: go back to quad sets.
Dosage: 3 sets of 10, twice a day
Ready for the next phase when
- ☐Passive extension 0° and flexion ≥90°
- ☐Decreasing effusion
- ☐Effective quad set without lag and non-antalgic gait within allowed loading
Note for the physiotherapist
In children, compliance is the critical factor: short and frequent doses, playful goals, parental involvement in the home programme. Check brace and crutch adherence at every session.
Phase 2 — ROM and strength recovery
Indicative timing: Weeks 6-12
The time window is indicative: progression depends on the criteria listed below, not on the calendar.
Goals
- •Full symmetrical ROM
- •Progressively symmetrical quadriceps and hamstring strength
- •Stable single-leg control
What to do
- •Progressive closed kinetic chain (mini squat, protected-range leg press, step up)
- •Gluteal and core strengthening, proprioception on stable then unstable surfaces
- •Cycling, walking in water, swimming (except breaststroke) once the wound has healed
Restrictions and precautions
- •No jumping, no change of direction
- •Avoid heavy open kinetic chain loading in the 0-30° arc
Exercises for this phase
3. Mini-squat 0-45°After entering the indicated phase and receiving clearance for this exercise; respect prescribed load and range.
- •Standing, feet hip-width apart, weight evenly distributed.
- •Bend the knees to about 45°, keeping the knees aligned over the feet.
- •Rise by pushing through the heels, without letting the knee collapse inwards.
Dosage: 3 sets of 12, 3-4 times a week
4. Glute bridgeAfter entering the indicated phase and receiving clearance for this exercise; respect prescribed load and range.
- •Lie on your back, knees bent, feet flat on the floor.
- •Lift the pelvis by squeezing the glutes until shoulders, hip and knee are aligned.
- •Lower slowly without arching the back.
Dosage: 3 sets of 12-15, on alternate days
5. Single-leg balanceAfter entering the indicated phase and receiving clearance for this exercise; respect prescribed load and range.
- •Stand on one leg with the knee slightly bent and look ahead, after clearance for weight bearing.
- •Keep your eyes open on firm ground near a stable support; an adult must be able to assist the child.
- •Aim to keep your pelvis steady. If it tilts or you lose balance, put the other foot down, reduce the difficulty and ask your physiotherapist to check the movement.
Dosage: 3 x 30 seconds per side, daily
Ready for the next phase when
- ☐Full symmetrical ROM, dry knee
- ☐Single leg squat without dynamic valgus
- ☐Quadriceps strength ≥70-80% of the contralateral side
Phase 3 — Running and controlled plyometrics
Indicative timing: Months 4-8
The time window is indicative: progression depends on the criteria listed below, not on the calendar.
Goals
- •Resume running and aerobic conditioning
- •Jump and landing quality
- •Strength symmetry
What to do
- •Running progression: straight line → wide curves → figure-of-8 → acceleration/deceleration
- •Progressive bilateral then single-leg plyometrics with landing technique feedback
- •Movement screening (LESS score, drop vertical jump) and correction of dynamic valgus
Restrictions and precautions
- •No contact, no competitive gestures
- •Graded jump volume: avoid weekly load spikes
Exercises for this phase
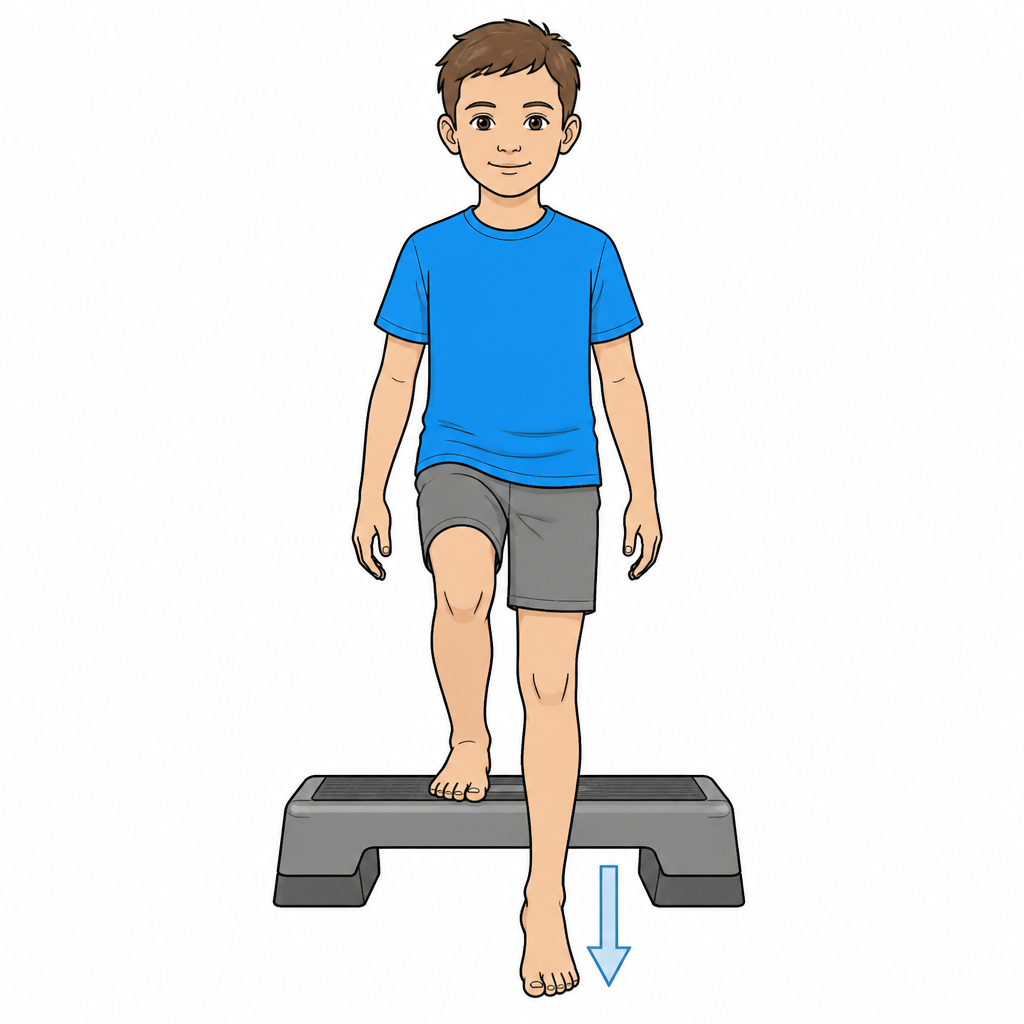
6. Controlled step-downAfter entering the indicated phase and receiving clearance for this exercise; respect prescribed load and range.
- •Stand on a 15-20 cm step on the operated leg.
- •Lower slowly with the other foot, touching the floor with the heel, over 3 seconds.
- •The standing knee must stay aligned over the foot: if it collapses inwards, lower the step.
Dosage: 3 sets of 8-10 per side, 3 times a week
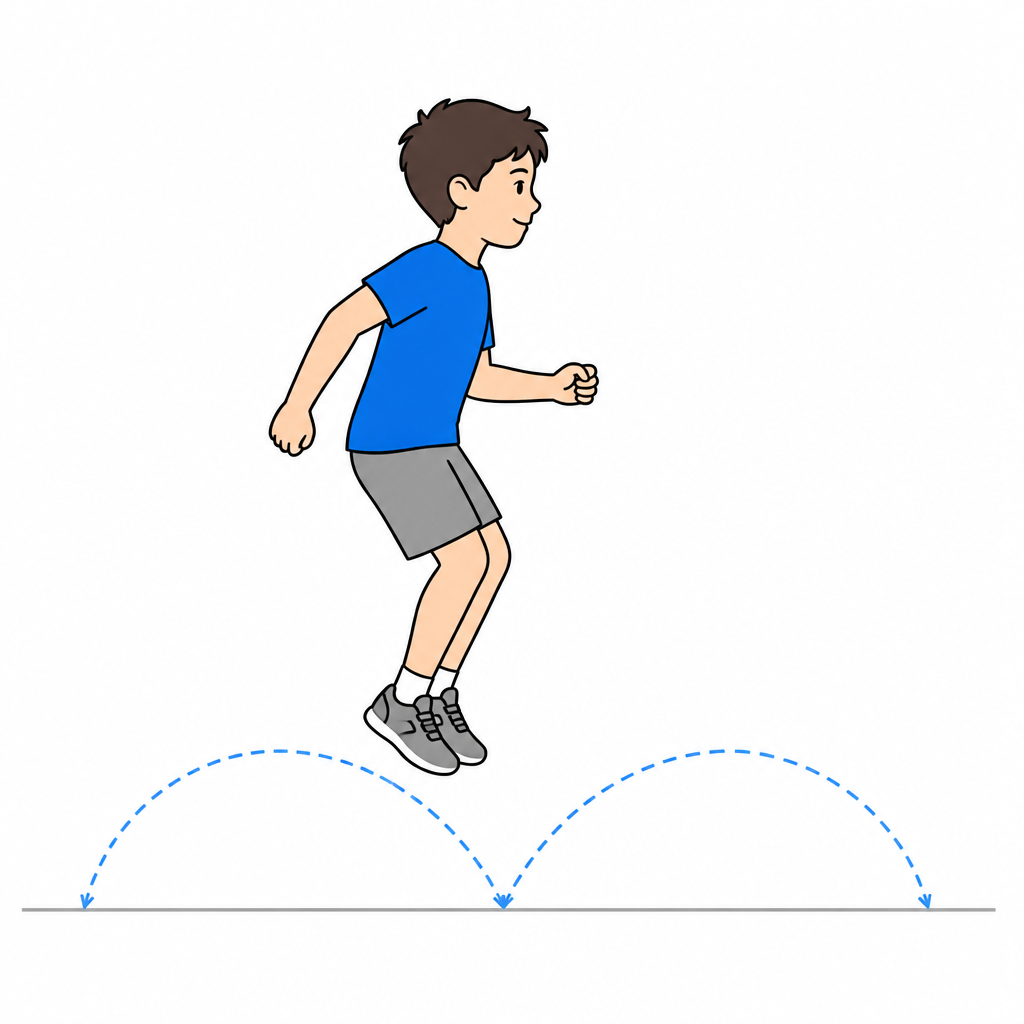
7. Progressive plyometricsAfter entering the indicated phase and receiving clearance for this exercise; respect prescribed load and range.
- •Only after clearance for impact and demonstration by your physiotherapist, start with small two-foot hops on a stable surface.
- •Increase direction, height or single-leg work only within the agreed progression; do not add several challenges at once.
- •Aim for a controlled landing with knees and feet aligned. Stop for pain, giving way or loss of control; report swelling or worsening symptoms afterwards. Landing noise alone does not measure movement safety.
Dosage: 2-3 sets of 10-20 contacts, 2-3 times a week
Ready for the next phase when
- ☐Hop tests with LSI ≥85-90%
- ☐Controlled landing without valgus on drop vertical jump
- ☐No pain or effusion after sessions
Note for the physiotherapist
Under 12-14 years the test-retest reliability of functional tests is lower: use several converging measures (strength, hop, movement quality, symptoms) rather than a single cut-off.
Phase 4 — Sport-specific work and graded return
Indicative timing: From month 8; competition only after the age-specific clearance below
The time window is indicative: progression depends on the criteria listed below, not on the calendar.
Goals
- •Safe sport-specific skills
- •Progressive reintegration into team training
- •Confidence of athlete and family
What to do
- •Individual sessions, then partial and finally full team training
- •Prevention programme (FIFA 11+ Kids) built into the warm-up
- •Assessment of skeletal maturity before clearance for high-risk sport
Restrictions and precautions
- •No competitive match play before full clearance
Exercises for this phase
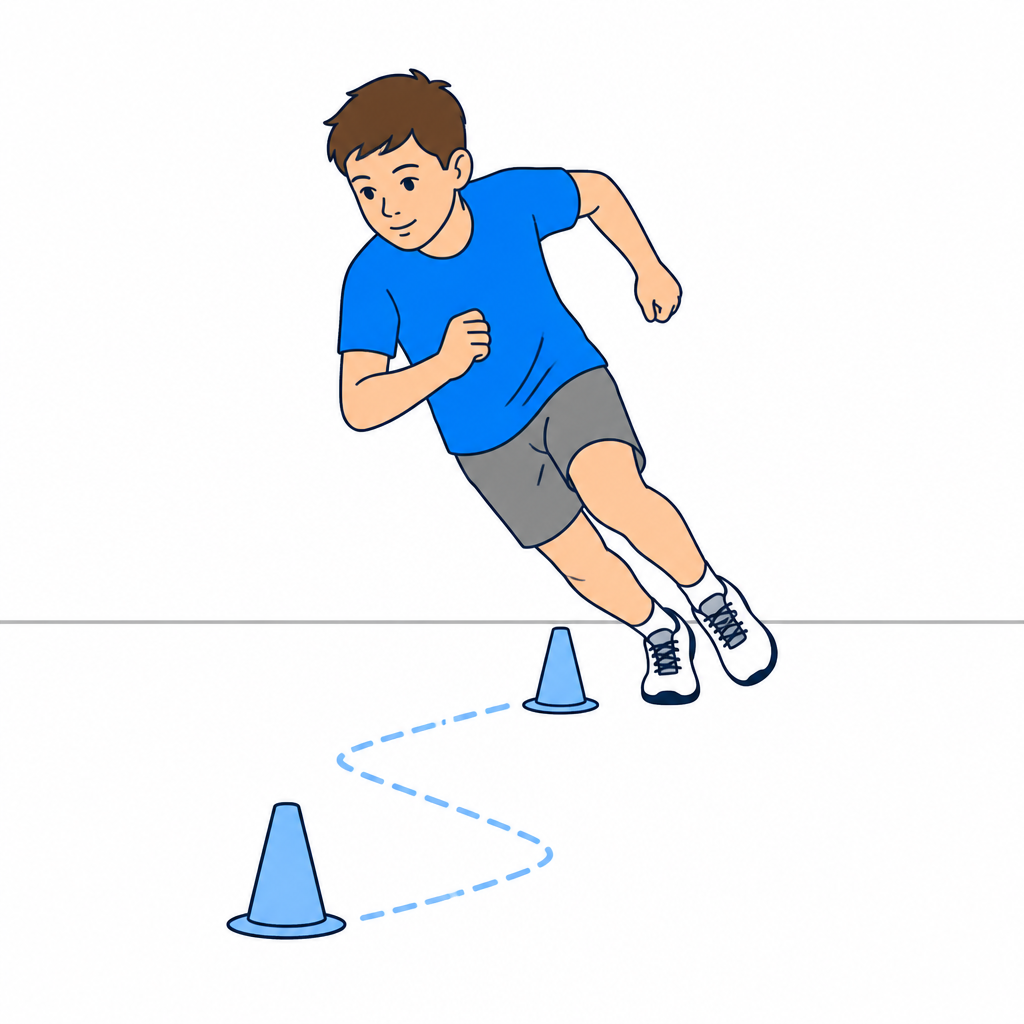
8. Agility and change of directionAfter entering the indicated phase and receiving clearance for this exercise; respect prescribed load and range.
- •After clearance, practise shuttle runs, figure-of-eight runs and cone slaloms: wide turns first, then sharper changes.
- •Add unanticipated direction changes only at the agreed stage, with the physiotherapist or trainer supervising the return to sport.
- •Stop for pain, the limb giving way or loss of movement control.
Dosage: 2 sessions a week, within training
Ready for the next phase when
- ☐Meet the age- and maturity-specific strength and functional criteria in the return-to-sport section
- ☐High IKDC and adolescent ACL-RSI scores
- ☐Full team training without symptoms
- ☐No clinical signs of growth disturbance
If symptoms appear after a progression
If persistent pain, effusion or swelling, or loss of movement appears after moving to a new phase or increasing load, stop progression and contact the treating clinician or physiotherapist to review the programme. Seek prompt assessment for the red flags below. This document does not replace individual clinical assessment.
Return to sport / full activity
For athletes aged 10-16, the Delphi consensus recommends at least 12 months before return to pivoting competition. At 17-18, a pathway closer to the adult programme may be appropriate; the team decides using maturity, sport and recovery criteria.
- ☐Mid- to postpubertal athletes aged 10-16: hop battery LSI >95%, together with movement quality; do not use a single symmetry threshold for every age.
- ☐Mid- to postpubertal athletes aged 10-16: quadriceps and hamstring strength LSI >95%. In prepubertal children, use age-appropriate tests, including single-leg sit-to-stand, and several converging measures.
- ☐Movement quality: LESS score and drop vertical jump without dynamic valgus
- ☐High IKDC and high adolescent ACL-RSI
- ☐Skeletal maturity assessment: Tanner pubertal stage at the clinical visit and, only when it changes the decision, bone age estimated on a hand and wrist radiograph; no limb length discrepancy or angular deviation
- ☐Prevention programme active and learned by the training group
These are consensus recommendations, not proof that a date or score eliminates reinjury risk. Clearance is shared between surgeon, physiotherapist, family and coach. Clinical surveillance of limb alignment and length does not follow a universal calendar: the duration and frequency of reviews are modulated on remaining growth and on the technique used, and are longer in very immature patients or where tunnels cross the physes. The Limb Symmetry Index has known limitations: on its own it is not sufficient, because the uninjured side may also be deconditioned; it should be combined with absolute strength values, movement quality and sport-specific demands.
Red flags: stop and contact us
- •New angular deviation (knock knee or bow leg) or limb length difference
- •Persistent bone pain at the epiphysis or metaphysis
- •Recurrent effusion after sessions or after returning to the field
- •Loss of full extension or joint locking
- •Giving way or a new twisting injury: stop and contact us
- •Fever, redness or discharge from the surgical wound
Author: Dott. Daniele Priano, Paediatric Orthopaedics. Content version: 9 September 2026.
Timings are indicative: progression depends on clinical and functional criteria and on the treating clinician’s instructions.
Full introduction and references at ortopediaevolutiva.com/en/rehabilitation/pediatric-acl-all-epiphyseal
Paediatric ACL reconstruction (all-epiphyseal / all-inside) — Dott. Daniele Priano, Pediatric Orthopaedics · Information document: it does not replace an in-person assessment.
 Latest online version
This protocol may be used and shared for clinical and informational purposes provided that attribution to the author and to the original source is kept intact. Republishing or distributing it as one’s own work is not allowed.
Other protocols

Any questions?
For information or questions, email me or view the locations and contact details.
Email: daniele.priano@ortopediaevolutiva.com