Non-operative recovery for a stable lesion: protection, movement, strength and gradual return to sport.
Progression follows clinical reviews and lesion healing; recovery takes months.
The treating team selects exercises individually during the consultation. Choosing or progressing exercises without medical guidance can be dangerous. Follow only the assigned phase, activities and amounts; no progression is automatic.
Scope and before starting
For stable juvenile knee osteochondritis dissecans (OCD): a lesion of the bone beneath the cartilage, assessed by the orthopaedic specialist. Not for unstable fragments, loose bodies or after surgery. Absence of pain alone does not prove healing.
Initial prescription
Record lesion site/stability, permitted weight bearing, any brace and movement limits.
Follow-up
Agree reassessment and imaging. The first 3–6 months assess treatment response; they do not guarantee a return date.
Perform only the exercises selected for you, at the prescribed dose. If permitted loading or movements are missing from your handout, ask for these to be completed before starting.
Do not try running or hopping to check whether you have healed.
Report pain or swelling that develops after the session too.
Treatment phases and illustrated exercises
Exercises are shown in their assigned starting phase, with their instructions and precautions. The physiotherapist selects them for the individual plan; the complete protocol is not a prescription to perform them all.
Respect the minimum times and protection required for the procedure. Time alone does not authorise progression: the treating team checks the clinical criteria.
1. Protect the lesion
From diagnosis to first review
Goals
Settle pain and swelling.
Physiotherapy plan
Teach prescribed crutch use; plan school and daily travel.
Gentle static quadriceps contractions in the permitted position, without increasing lesion loading.
Precautions
No running, jumping or sport; respect weight-bearing limits even without pain.
Criteria the treating team checks before progression
The prescription is understood and followed.
Symptoms stable or improving; motion cleared.
Illustrated exercise options
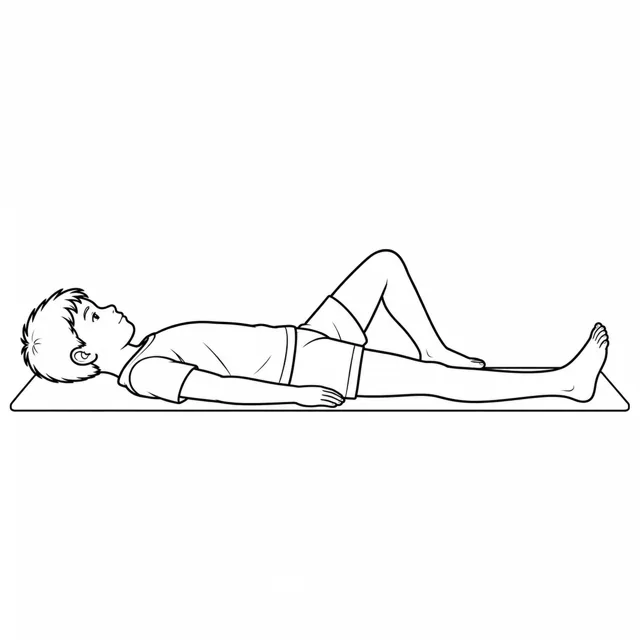
Gentle quadriceps activation
Only if the treating clinician permits this contraction during protection; respect prescribed immobilisation and position.
Lie with the leg supported in the permitted position and gently tighten the front of the thigh.
Do not lift the heel, push on the knee with your hands or add weights.
Relax completely between attempts. Stop if joint pain develops.
Dose and progression: Use the sets, repetitions or duration, rests and frequency written in your individual handout. Stop before movement control deteriorates; do not choose the dose from the illustration.
2. Recover movement
During protection, when permitted
Goals
Maintain motion and thigh control.
Physiotherapy plan
Heel slides within the permitted range and quadriceps contractions.
Straight-leg raise only while keeping the knee straight; maintain hip work without loading the knee.
Precautions
No squats, steps or cycling until loading and strengthening are cleared.
Criteria the treating team checks before progression
Permitted motion without a joint reaction.
Loading and strengthening cleared at reassessment.
Illustrated exercise options
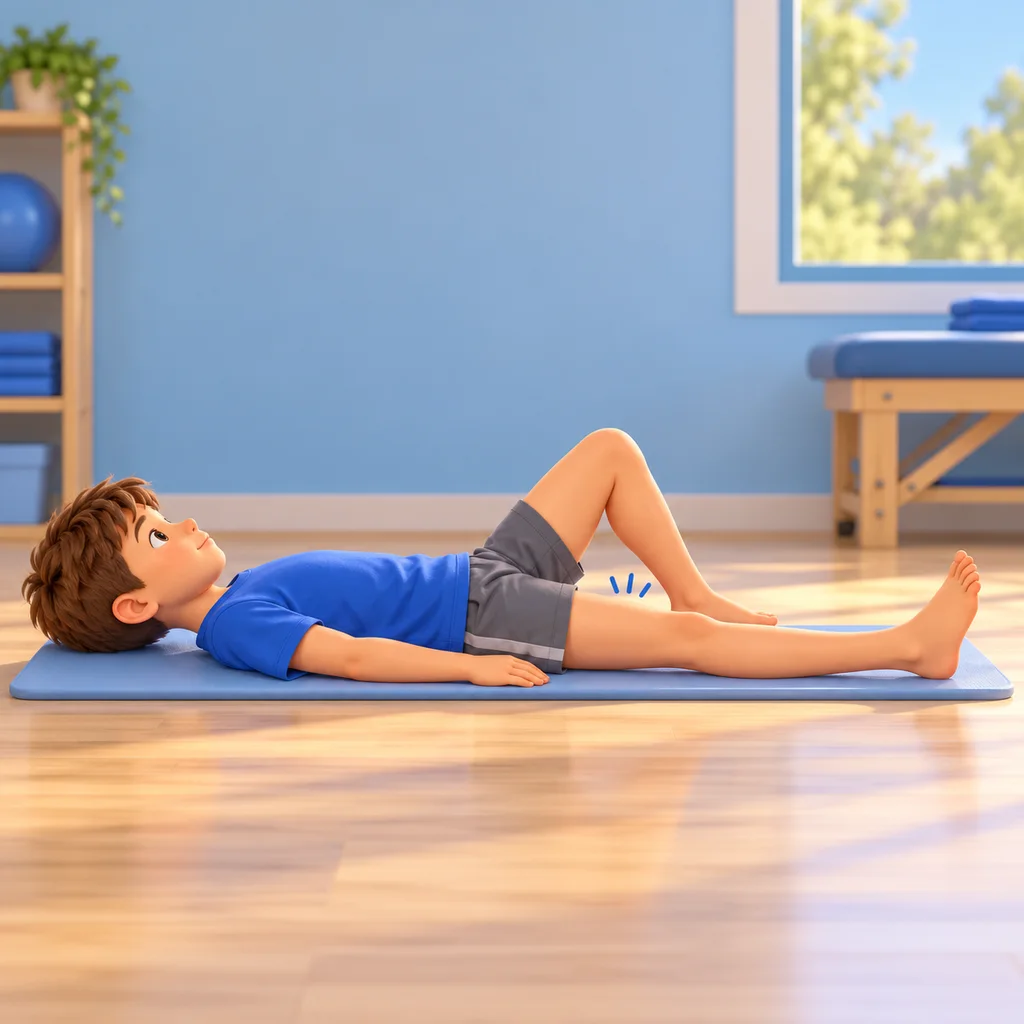
Heel slide
After clearance for motion and any brace removal; only within the prescribed range.
Lie on your back and slide the heel towards the pelvis along the supporting surface.
Stop at the permitted movement limit, even if the figure shows greater flexion.
Return slowly without forcing, pulling with a strap or adding resistance.
Dose and progression: Use the sets, repetitions or duration, rests and frequency written in your individual handout. Stop before movement control deteriorates; do not choose the dose from the illustration.
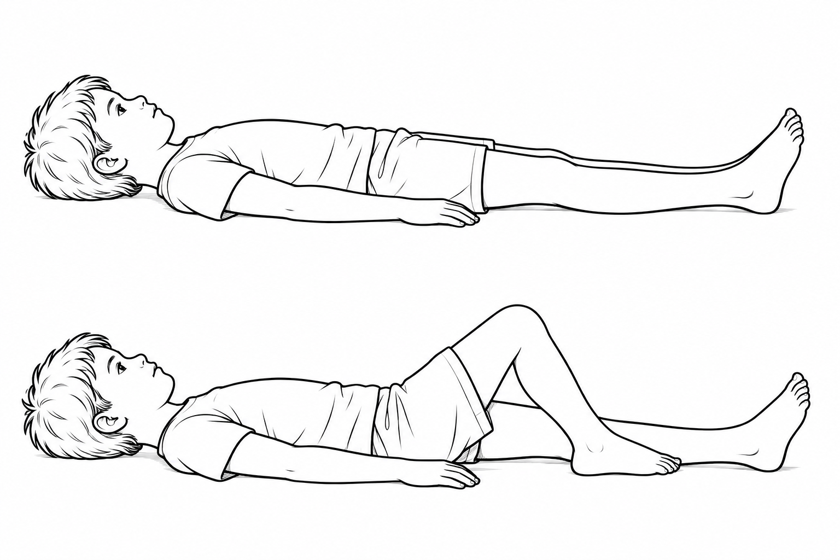
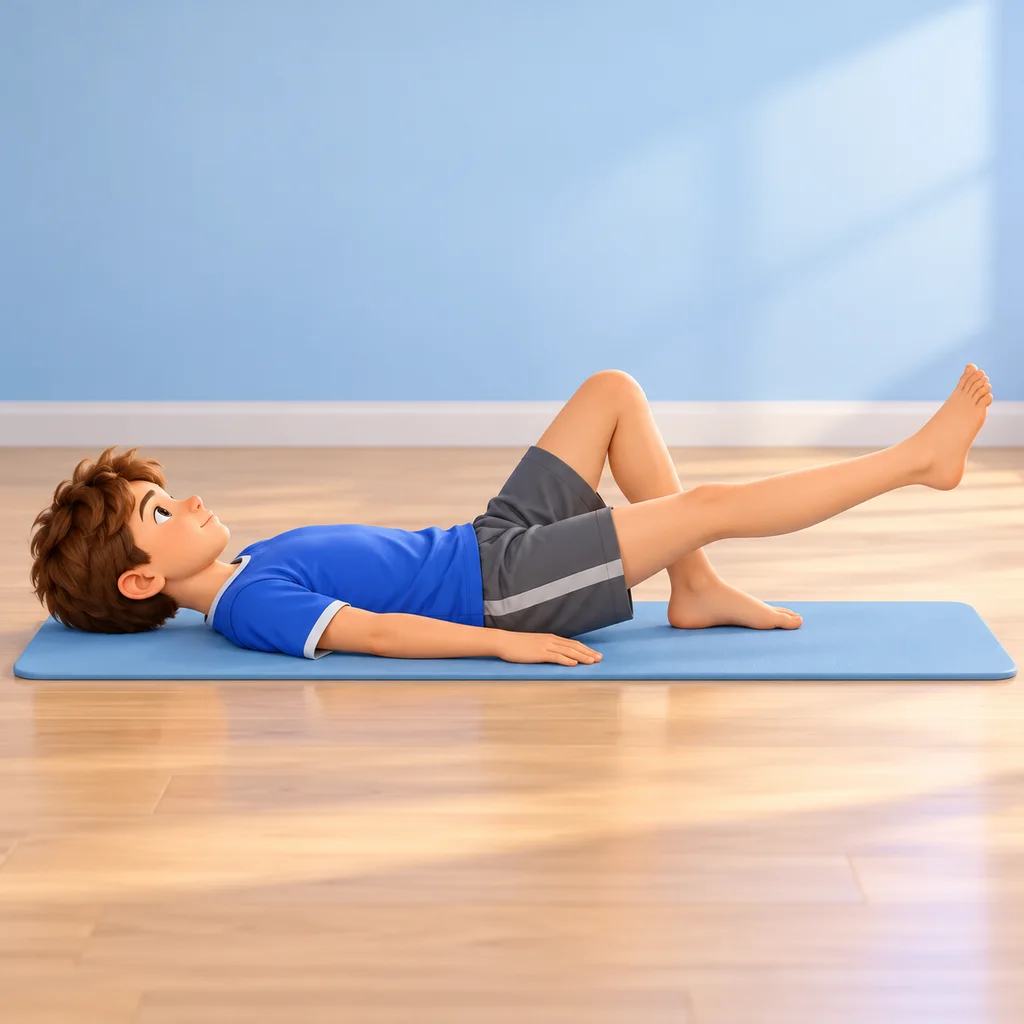
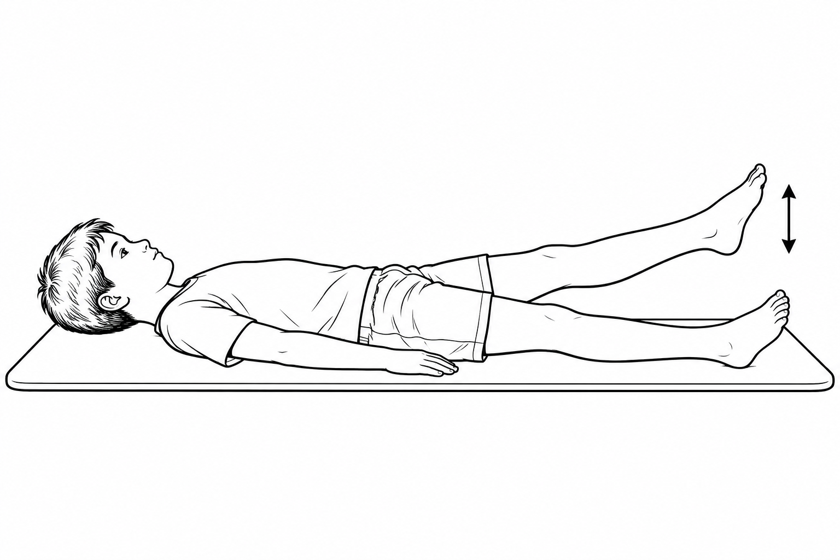
Controlled straight-leg raise
When motion and muscle activation are permitted and you can keep the knee straight without it sagging; practise first with the physiotherapist.
Lie on your back, position the other leg within its permitted range and keep the exercising leg as instructed; if both sides are treated, respect each side’s limits.
Tighten the thigh and slightly lift the leg while keeping the knee straight; lower it slowly.
If the knee bends during the lift, return to a supported quadriceps contraction. No ankle weights; do not remove a brace without permission.
Dose and progression: Use the sets, repetitions or duration, rests and frequency written in your individual handout. Stop before movement control deteriorates; do not choose the dose from the illustration.
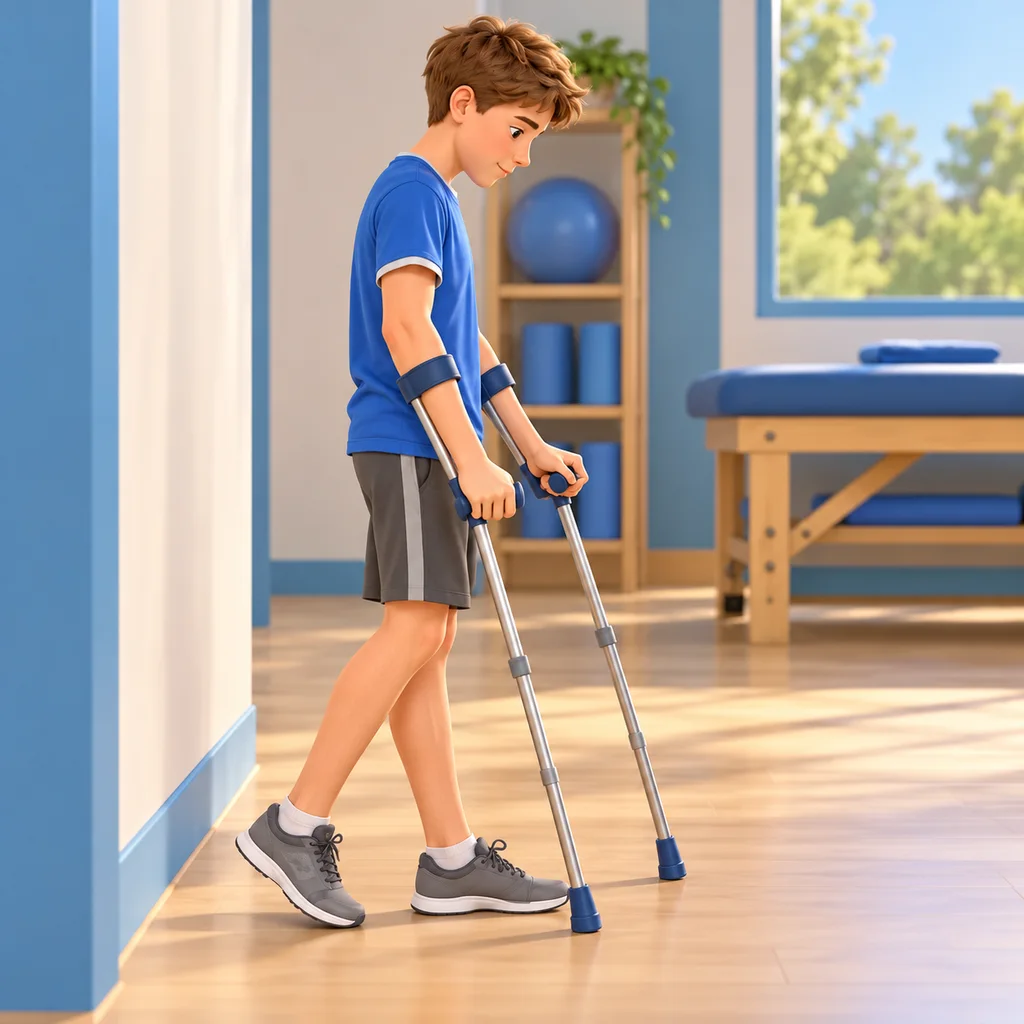
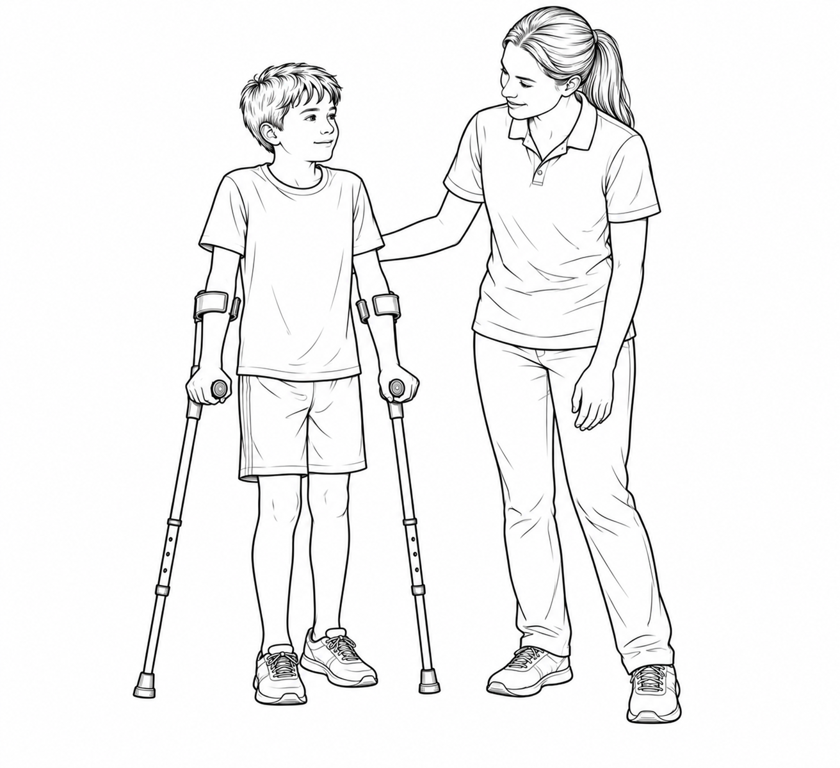
Walking with crutches and prescribed foot contact
Only when some foot contact is permitted. The figure does not show a fully non-weight-bearing pattern: if contact is prohibited, you need specific instruction.
Have the crutches adjusted and learn the sequence appropriate to your loading limit from the physiotherapist.
Practise on a level, clear path with an adult nearby; the foot contacts the ground only as prescribed.
Stop if limping, pain or fatigue increase. Practise stairs with assistance; do not stop using crutches solely because pain decreases.
Dose and progression: Agreed short distances with rests; duration and frequency depend on prescribed loading and gait quality.
3. Strength and non-impact activity
After loading clearance
Goals
Restore gait and strength.
Physiotherapy plan
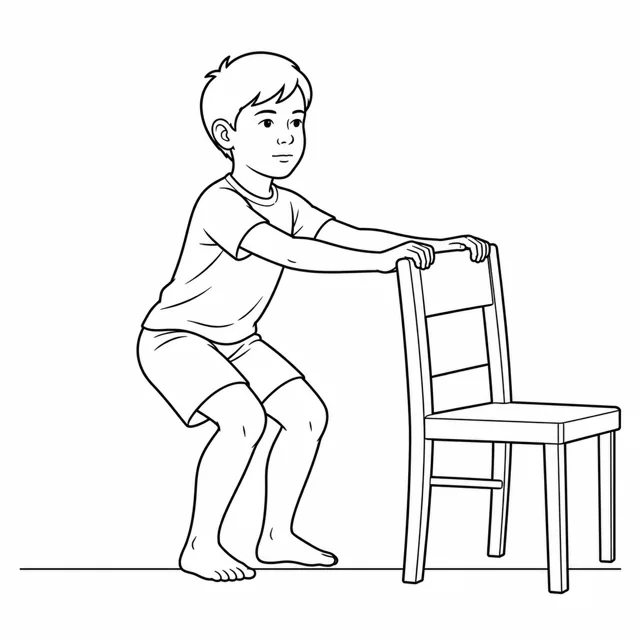
After loading and strengthening clearance, progress from static work to chair rises/mini-squats, low steps and hip work within permitted motion; increase one demand at a time.
Supported firm-ground balance, then single-leg stance if cleared; low-resistance cycling if tolerated.
Precautions
No running, hopping or maximal tests to pre-empt review.
Criteria the treating team checks before progression
Walking and selected exercises without pain or new swelling.
Lesion healing assessed by the clinician and impact clearance given.
Illustrated exercise options
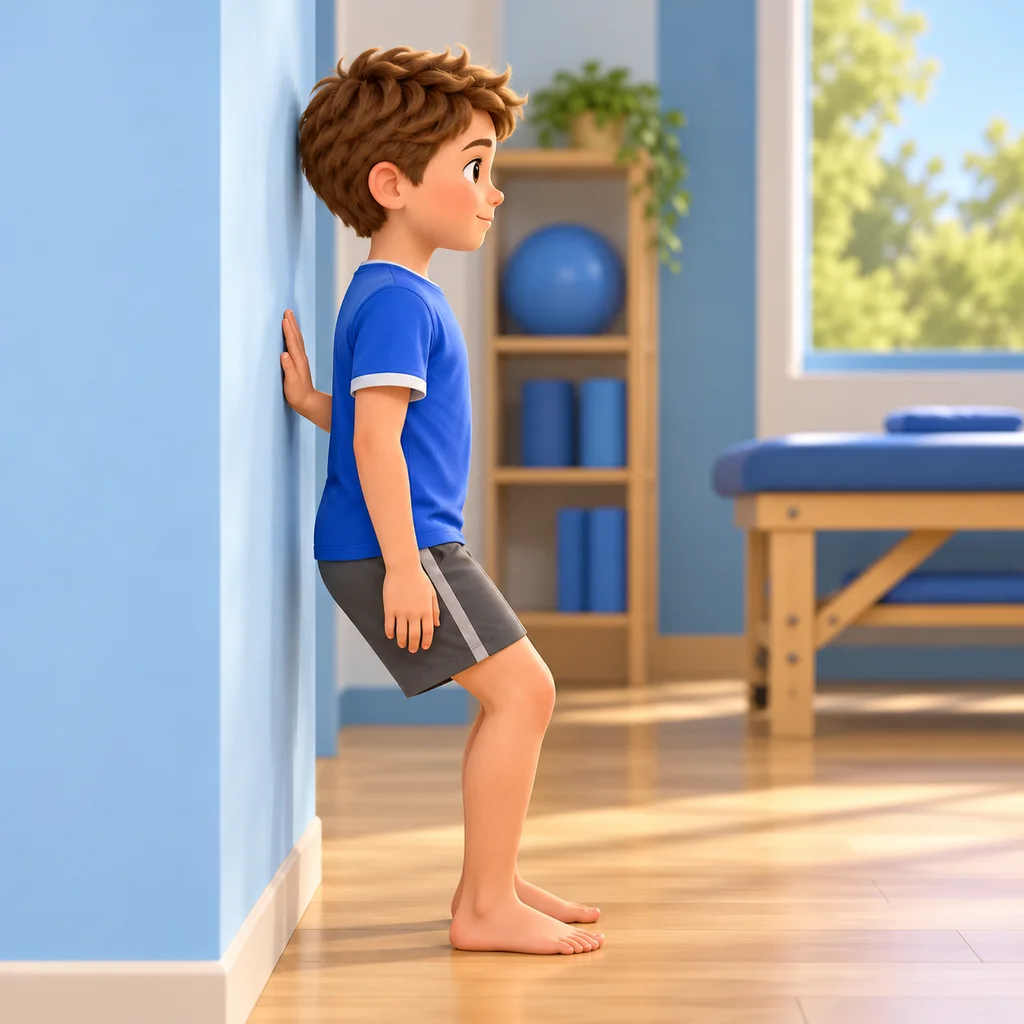
Wall-supported mini-squat
Only after clearance for full weight bearing and strengthening; use the range selected by the physiotherapist.
With your back against the wall as shown, place the feet slightly forward and keep within prescribed loading.
Slide down a short distance within the range set by the physiotherapist, with knees pointing in the same direction as the feet.
Return slowly. Do not copy the illustrated depth if it exceeds your prescribed limit.
Dose and progression: Use the sets, repetitions or duration, rests and frequency written in your individual handout. Stop before movement control deteriorates; do not choose the dose from the illustration.
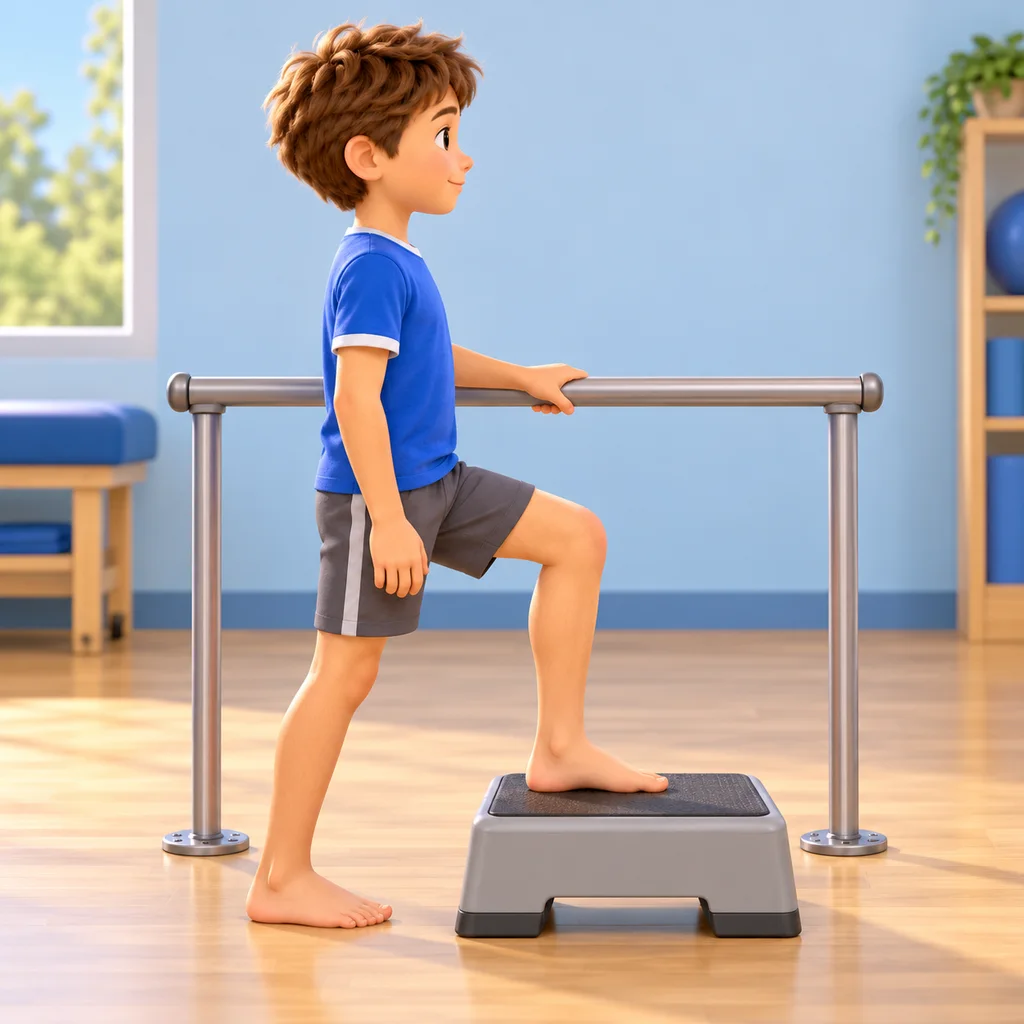
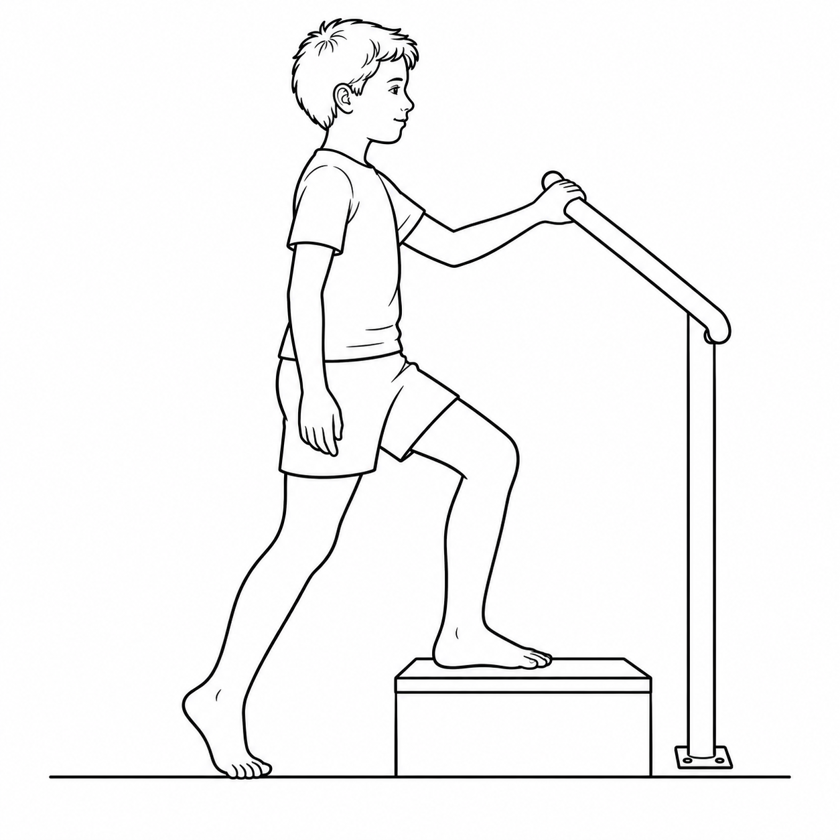
Supported low step-up
After clearance for full weight bearing and single-leg strengthening; height and range selected by the physiotherapist.
Use a stable step, lower than the drawing if needed, near a handrail or secure support.
Place the whole treated foot on the step and rise slowly, keeping knee and foot aligned and the pelvis controlled.
Step down with assistance as taught. Do not add weights or increase height if pain, limping or swelling develops.
Dose and progression: Use the sets, repetitions or duration, rests and frequency written in your individual handout. Stop before movement control deteriorates; do not choose the dose from the illustration.
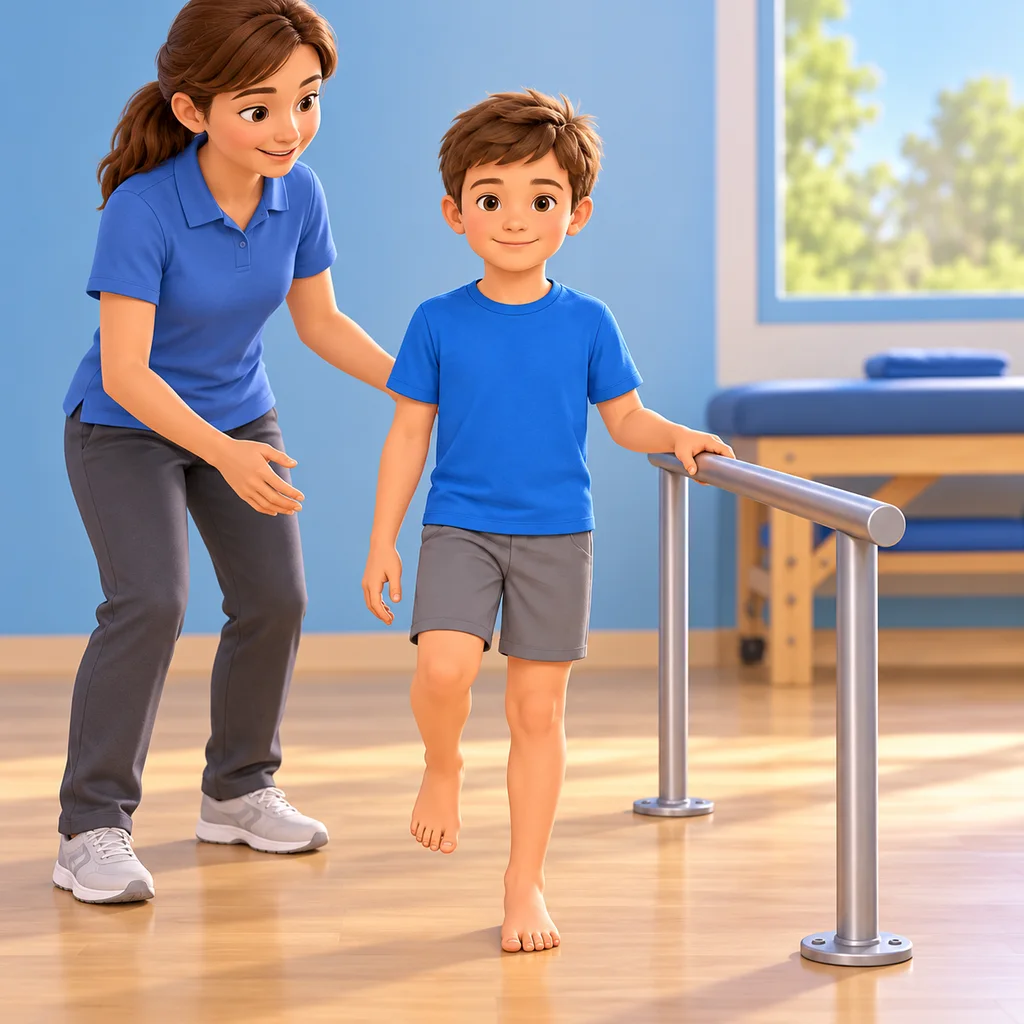
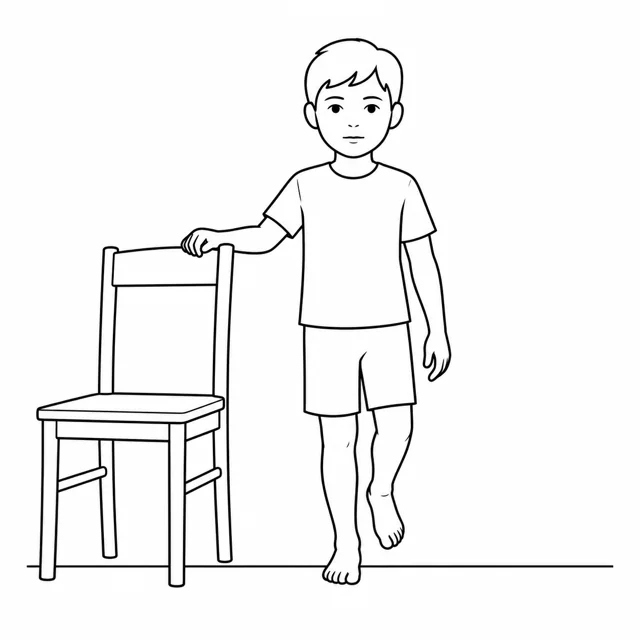
Firm-ground balance
After clearance for full weight bearing and single-leg support; practise first with the physiotherapist.
On firm ground with eyes open, slightly lift the other foot while keeping the pelvis level.
Keep one hand on a stable support as illustrated; an adult must be able to assist the child.
Put the free foot down before losing control. Do not add cushions, closed eyes or perturbations.
Dose and progression: Use the sets, repetitions or duration, rests and frequency written in your individual handout. Stop before movement control deteriorates; do not choose the dose from the illustration.
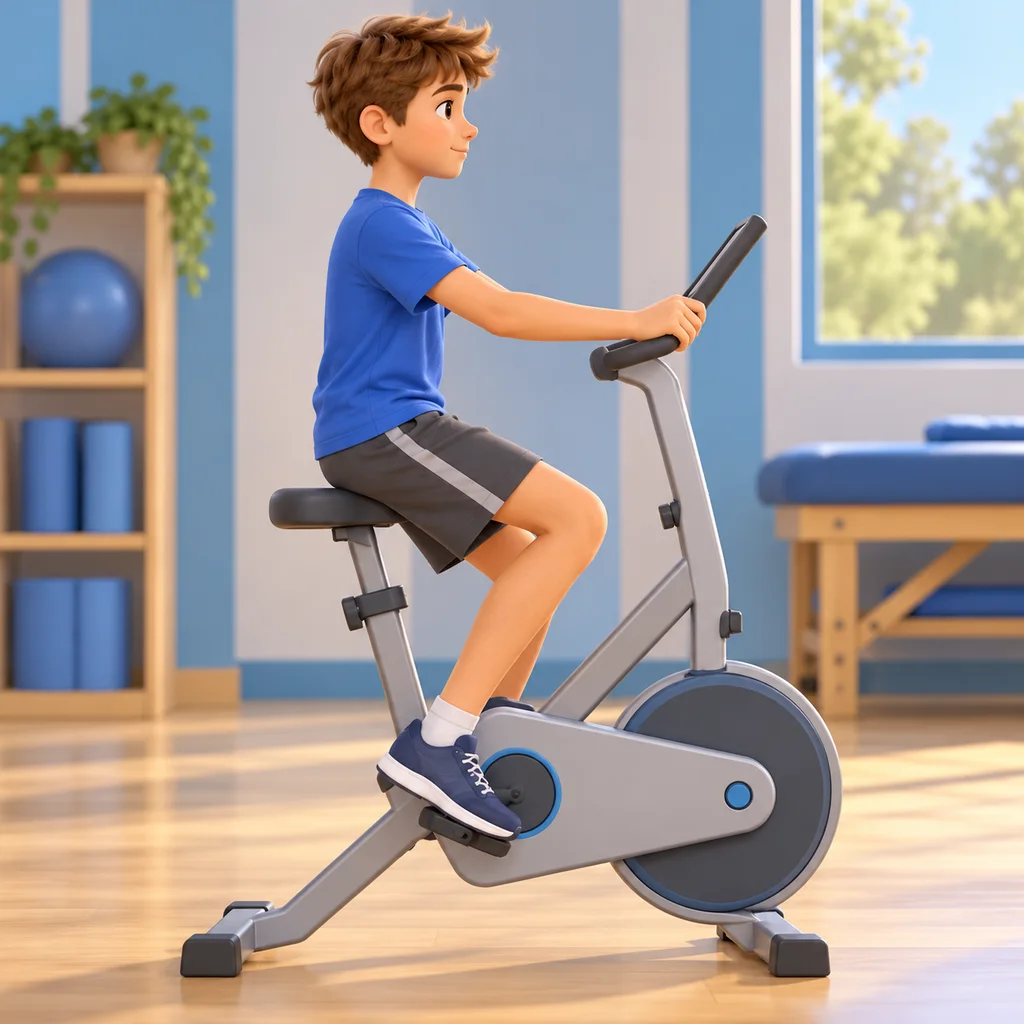
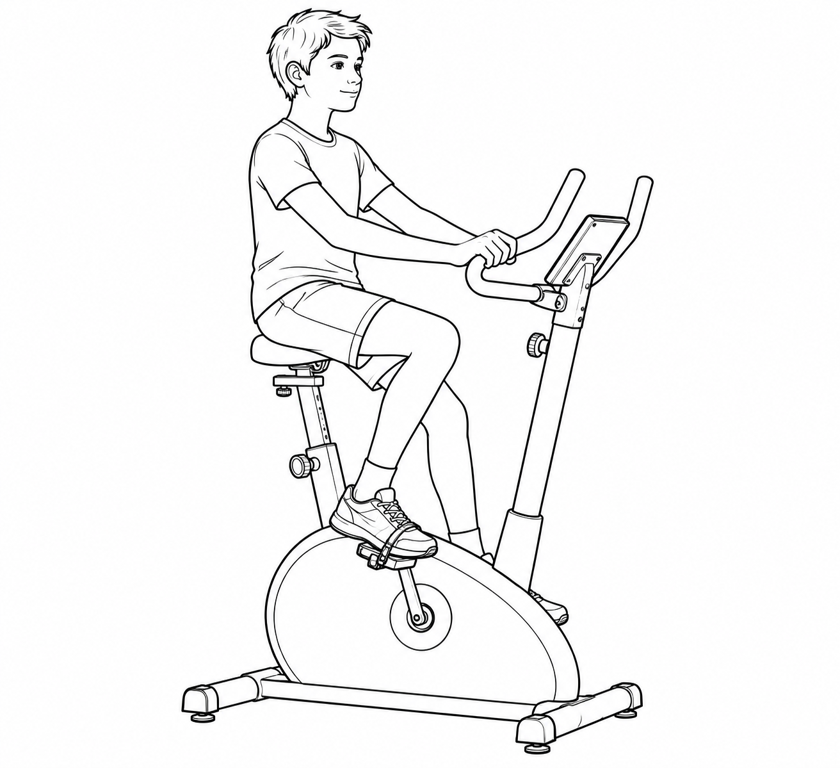
Easy stationary cycling
Only if the treating clinician permits cycling, pedal loading and the movement range. Cycling is not equivalent to complete offloading.
Use a stationary bike suited to your height; the physiotherapist adjusts the seat and supports for the permitted movement.
Pedal seated and slowly with minimal resistance; do not force a complete revolution if motion is still insufficient.
Do not stand on the pedals, sprint or increase duration and resistance together. Stop for joint pain or subsequent swelling.
Dose and progression: Use the sets, repetitions or duration, rests and frequency written in your individual handout. Stop before movement control deteriorates; do not choose the dose from the illustration.
4. Running and sport
After impact clearance
Goals
Restore sport-specific capacity.
Physiotherapy plan
Alternate walking and short running intervals, increasing one variable at a time.
After straight running is tolerated, introduce supervised landings and small hops; add deceleration and direction changes only after landing control. Partial then full training.
Precautions
Do not progress with swelling or joint pain after exercise.
Criteria the treating team checks at the end of the pathway
Full training tolerated.
Favourable orthopaedic review and agreed return.
Illustrated exercise options
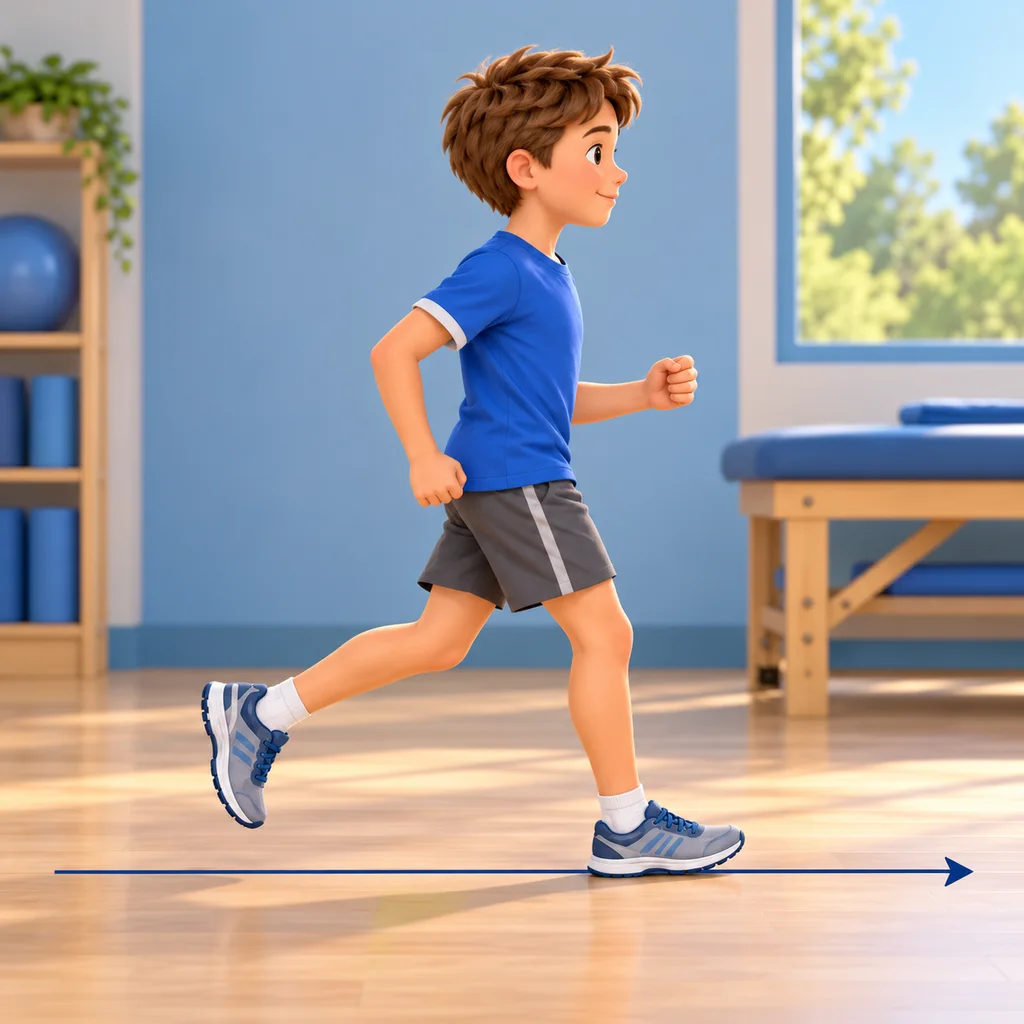
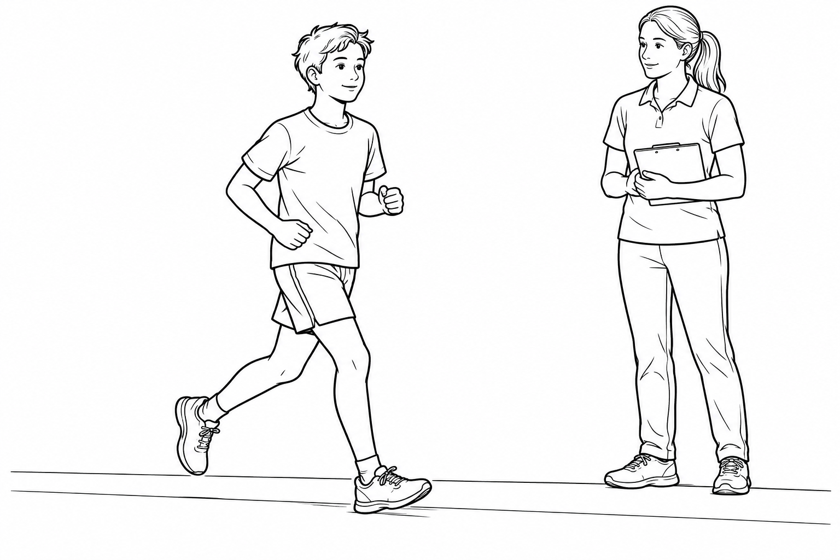
Straight-line walk–run progression
Only after running clearance under this protocol and assessment of motion, strength and control. Also respect the protection period for the injury or operation.
On level, even ground, alternate walking with short bouts of easy straight-line jogging according to the physiotherapist’s programme.
Keep an even gait without limping. Begin without sprinting, hills, jumping or direction changes.
Increase one demand at a time. If joint pain, limping or swelling occurs during the work or the next day, stop the progression and report it to the physiotherapist.
Dose and progression: Run/walk intervals, duration and recovery set by the physiotherapist for the procedure, age and response to loading; the phase does not provide an automatic dose.
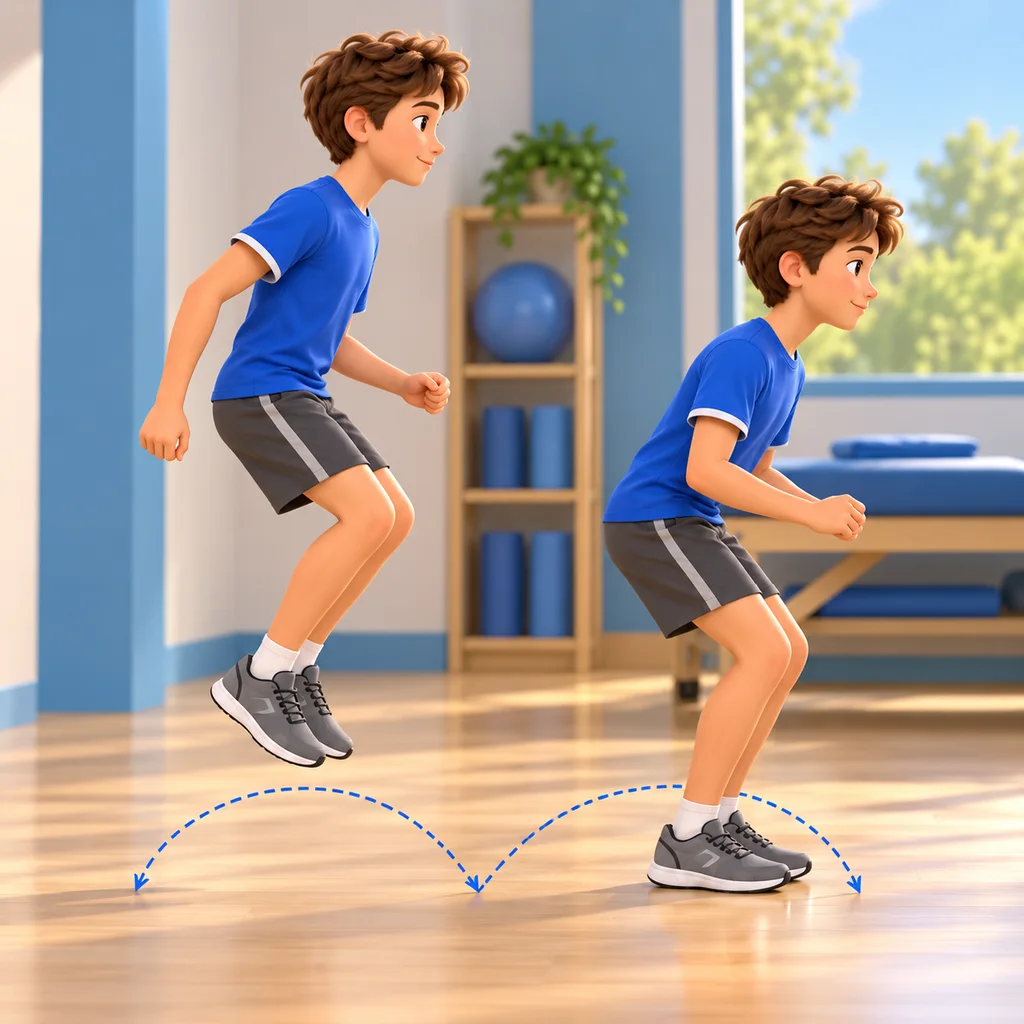
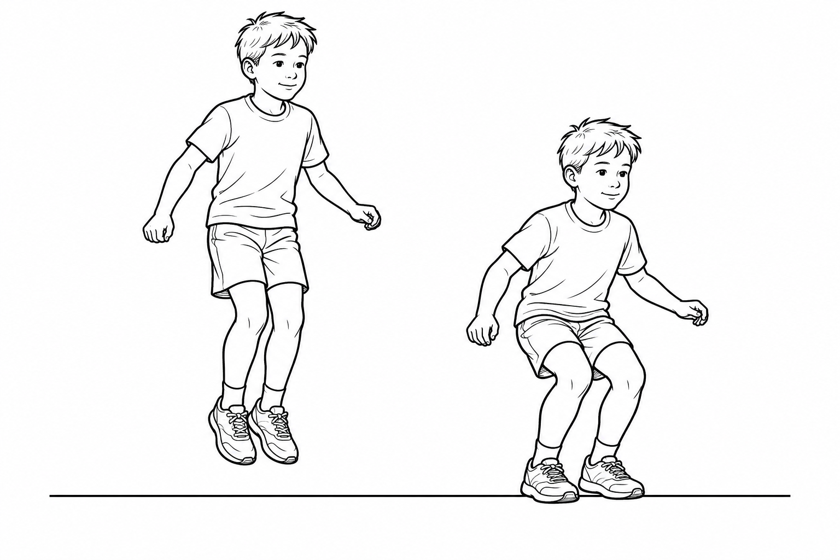
Small two-foot forward hops
Only after jump clearance and an on-the-spot landing check by the physiotherapist. The figure shows the forward progression, to introduce with them.
With the physiotherapist, make one small two-foot forward hop on a firm, even surface, as illustrated.
Land on both feet with control and pause before repeating. The physiotherapist selects distance and number of hops; no sideways or single-leg hops without further instruction.
Stop for pain or loss of control and report pain or swelling afterwards.
Dose and progression: Initial attempts and dose selected by the physiotherapist; increase only after checking the subsequent response.
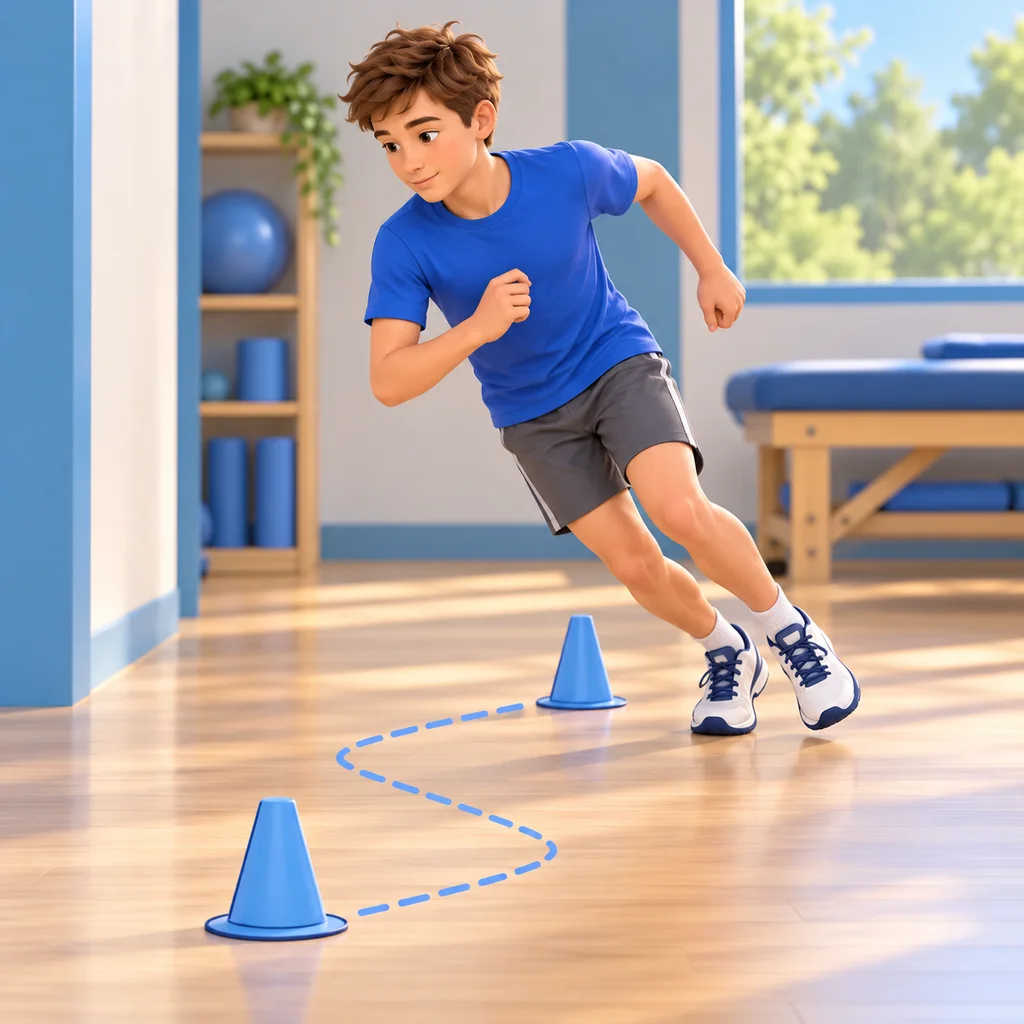
Planned braking and direction changes
After tolerating straight-line running and receiving specific clearance for braking and direction changes. First practise with the physiotherapist; this is not an initial running exercise.
With the physiotherapist, begin with controlled slowing and wide turns at low speed in agreed directions.
Control the trunk, knee and foot. Increase speed and turning angle separately; sharp, reactive or contact movements require further assessment.
Stop for pain, giving way or limping; also report swelling or pain after the session and the next day.
Dose and progression: Intervals, rests and recovery days selected for age, sport and previous level. No independent maximal tests; tolerate full training before competition.
Return to sport / full activity
Clearance depends on lesion healing and recovery, not the calendar alone.
Clinical and imaging assessment supports return.
Document motion, controlled steps and quadriceps strength (dynamometer if available); after impact clearance, assess landings and deceleration.
Full training without subsequent pain or swelling.
Warning signs: stop and contact the treating team
Joint locking, painful catching or new giving way: stop exercising and arrange reassessment.
Rest pain, recurrent swelling or new walking difficulty: stop progression and contact the treating clinician.
A very painful, hot, swollen joint, especially with fever or feeling unwell: urgent assessment, even without fever.
A cold, pale or numb foot under a cast/brace: go to emergency care immediately.
Guidelines and literature
Sources inform the pathway; they do not validate every dose for an individual child.
A framework to personalise with the orthopaedic clinician and physiotherapist, not a replacement for an individual prescription. Respect protection and clinical criteria, not dates alone.
Select the exact phase assigned by the treating team, then choose each prescribed activity. No exercise is selected automatically. The team sets loading, movement, aids, dose and frequency; missing instructions must be completed before use, including by hand.
Browse illustrated exercise options
Only if the treating clinician permits this contraction during protection; respect prescribed immobilisation and position.
After clearance for motion and any brace removal; only within the prescribed range.
When motion and muscle activation are permitted and you can keep the knee straight without it sagging; practise first with the physiotherapist.
Only when some foot contact is permitted. The figure does not show a fully non-weight-bearing pattern: if contact is prohibited, you need specific instruction.
Only after clearance for full weight bearing and strengthening; use the range selected by the physiotherapist.
After clearance for full weight bearing and single-leg strengthening; height and range selected by the physiotherapist.
After clearance for full weight bearing and single-leg support; practise first with the physiotherapist.
Only if the treating clinician permits cycling, pedal loading and the movement range. Cycling is not equivalent to complete offloading.
Only after running clearance under this protocol and assessment of motion, strength and control. Also respect the protection period for the injury or operation.
Only after jump clearance and an on-the-spot landing check by the physiotherapist. The figure shows the forward progression, to introduce with them.
After tolerating straight-line running and receiving specific clearance for braking and direction changes. First practise with the physiotherapist; this is not an initial running exercise.
Choose the current phase to prepare a printable sheet.
Phase safety summary ·
COMPLETE BEFORE EXERCISING — The treating team must complete the blank instructions, including handwritten entries, before this sheet is used.
Follow the assigned phase and instructions confirmed by the treating team; filling in fields does not authorise exercise.
No exercises assigned. This is a safety summary, not a complete exercise prescription.
Individual instructions for this phase
Loading (how much weight on the leg): ________________________________
Brace and crutches: ________________________________
Procedure and starting conditions
Initial prescription: Record lesion site/stability, permitted weight bearing, any brace and movement limits.
Follow-up: Agree reassessment and imaging. The first 3–6 months assess treatment response; they do not guarantee a return date.
Advice before starting
Perform only the exercises selected for you, at the prescribed dose. If permitted loading or movements are missing from your handout, ask for these to be completed before starting.
Do not try running or hopping to check whether you have healed.
Report pain or swelling that develops after the session too.
Warning signs: stop and contact the treating team
Joint locking, painful catching or new giving way: stop exercising and arrange reassessment.
Rest pain, recurrent swelling or new walking difficulty: stop progression and contact the treating clinician.
A very painful, hot, swollen joint, especially with fever or feeling unwell: urgent assessment, even without fever.
A cold, pale or numb foot under a cast/brace: go to emergency care immediately.
A framework to personalise with the orthopaedic clinician and physiotherapist, not a replacement for an individual prescription. Respect protection and clinical criteria, not dates alone.
A framework to personalise with the orthopaedic clinician and physiotherapist, not a replacement for an individual prescription. Respect protection and clinical criteria, not dates alone.
💬
💙
Any questions?
For information or questions, email me or view the locations and contact details.