Knee Osteochondral Lesion: fragment fixation or microfracture
Six-phase pathway after treatment of an osteochondral lesion of the femoral condyle or patella, detailing the substantial differences between fragment fixation (native hyaline cartilage is preserved) and microfracture (reparative fibrocartilage is formed).
Protected weight bearing 6-8 weeks · Running 4-6 months · Contact/pivoting sport 9-12 months (fixation) or 8-12 months (microfracture)
Prepare the visit handout
Use the condition and phase indicated by your clinician. You can leave out individual exercises; instructions, illustrations and safety advice remain together.
Changing phase restores its full exercise list. Timing alone does not determine the phase.
Exclude exercises if needed
13 of 13 exercise cards included
The full web page remains available. Your selection is not saved or shared.
This protocol is part of the post-operative pathway and must be adapted to the surgeon’s instructions and to the individual clinical response.
These documents are protocol templates for information and education only: they do not replace the rehabilitation prescription for the individual case. Timing, loading and progressions must always be adapted to the patient, the lesion pattern, the surgical technique used and the clinical course, in collaboration between orthopaedic surgeon, physiotherapist and, where appropriate, physiatrist. Progression is driven by objective criteria, not by the calendar alone.
At a glance — the full pathway
- Weight bearing (condylar lesion)
- For the protected condylar pathway: touch-down loading for approximately 6 weeks if prescribed, followed by individually authorised progression. The permitted load must be taught for the child’s weight; no fixed kilograms or weekly percentage applies to everyone.
- Weight bearing (patellar/trochlear)
- Weight bearing allowed in extension with the brace locked at 0° for 4-6 weeks; it is loaded flexion that is restricted, not loading itself.
- Mobilisation
- Manual or assisted movement within the surgeon’s permitted arc. CPM is optional when prescribed; its initial range and progression are not universal.
- Fragment fixation
- Progression to unrestricted loading depends on technique, lesion site, clinical course and scheduled reviews; MRI or CT is performed when the result can change management, not as a mandatory step before full weight bearing.
- Microfracture
- Fibrocartilage maturation takes 12-18 months: loading stays controlled for longer and impact and torsion are introduced more gradually.
- Running
- Not before month 4 (fixation with documented healing) or months 5-6 (microfracture), always with a dry knee and quadriceps ≥80%.
- Return to sport
- Pivoting/contact sport at 9-12 months, with the test battery passed and no effusion after progressive loading.
Articular cartilage is the smooth lining that lets the knee surfaces glide over one another with almost no friction. When trauma or osteochondritis dissecans detaches a fragment of cartilage together with its underlying bone, this is called an osteochondral lesion: in the knee the most frequent sites are the medial femoral condyle, the lateral condyle and the patellar facet after a patellar dislocation.
Step by step
Each phase offers exercise options: perform only those selected by your clinician, without bringing later phases forward or automatically adding earlier exercises. Dosage, frequency and rests are individualised; the complete catalogue is not a single session.
Before surgery — Preparation for surgery (elective cases)
Short educational and functional phase in elective cases; not applicable to acute cases needing immediate treatment.
When it applies
- •Only in cases already selected for surgery, with a planned indication: not every stable lesion needs surgery, many are managed conservatively.
- •No aggressive prehabilitation: the aim is to arrive prepared, not trained.
- •The type of procedure (fragment fixation, microfracture/marrow stimulation or other techniques) changes post-operative restrictions: these are explained before surgery.
Goals before surgery
- •Practical crutch and off-loading training according to the planned post-operative weight bearing.
- •Effusion and pain control.
- •Maintenance of the allowed range of motion, without stressing the involved compartment.
- •Maintenance of strength in uninvolved regions (hip, core, contralateral limb).
Activities
- •Crutch practice on level ground and stairs, with the prescribed weight bearing.
- •Education on off-loading times, use of any brace and return to school.
Preoperative exercises
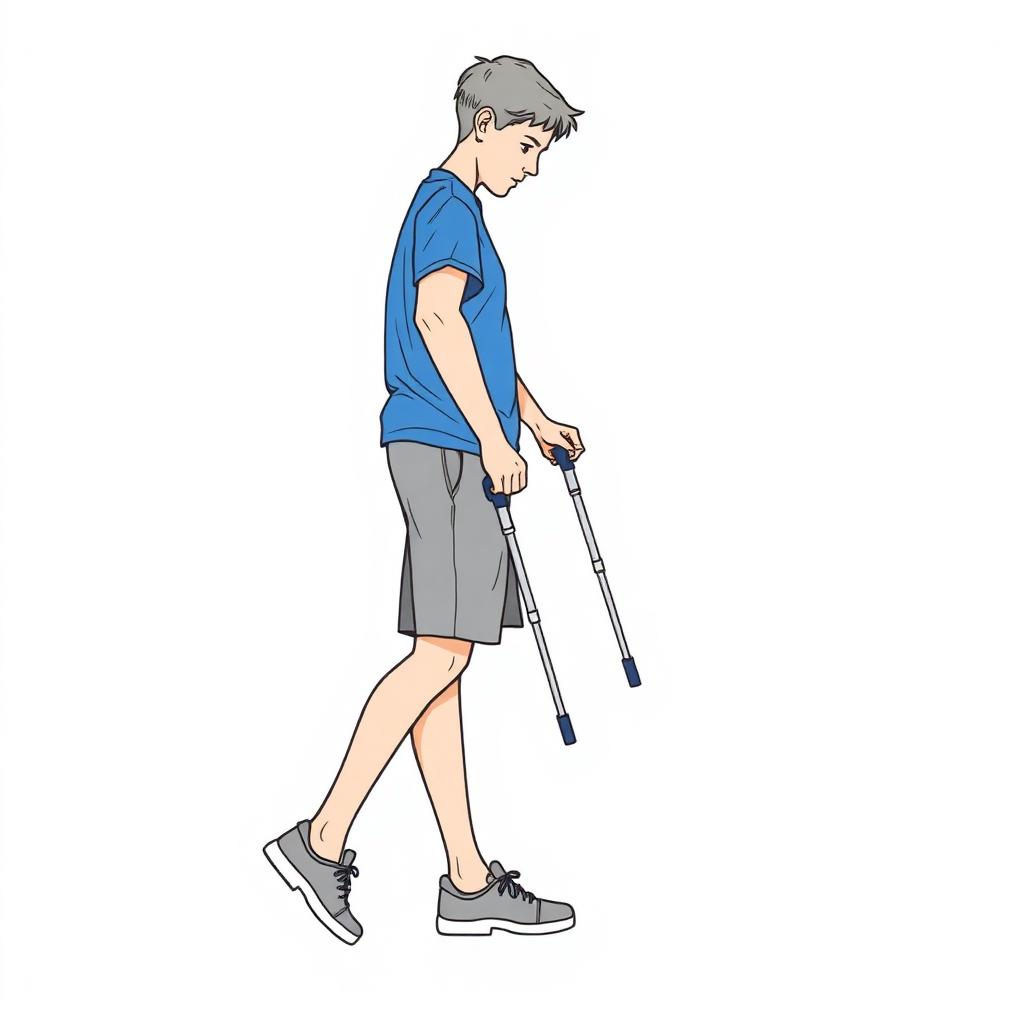
Crutch and weight-bearing training
- •Try the crutches before surgery, with correct height and the weight-bearing status set by the surgeon.
- •Practise on level ground, stairs and the entrance to your home, with someone assisting.
- •Also practise sitting, standing and moving in the bathroom while respecting the planned loading restrictions.
Dosage: At least one training session before admission; repeat until the technique is safe.
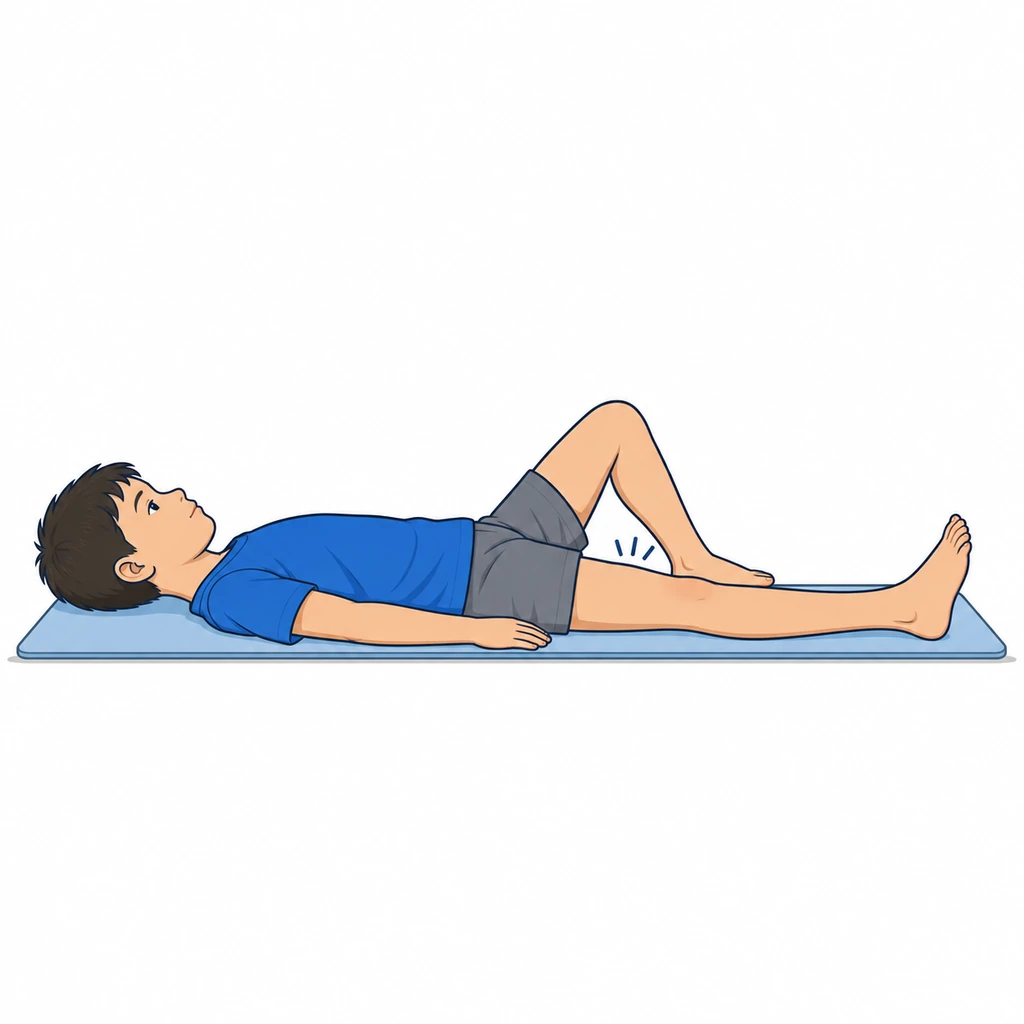
Quadriceps isometric contraction (quad set)
- •Lying down, knee straight in a neutral position on the surface; if proprioceptive feedback helps, place a small rolled towel under the knee.
- •Contract the quadriceps pushing the back of the knee toward the surface, hold, then release slowly.
- •Aim for a visible, global quadriceps contraction, without breath holding.
Dosage: Indicative: 10 contractions of 5 seconds, 2-3 times a day. To be adapted with the physiotherapist.
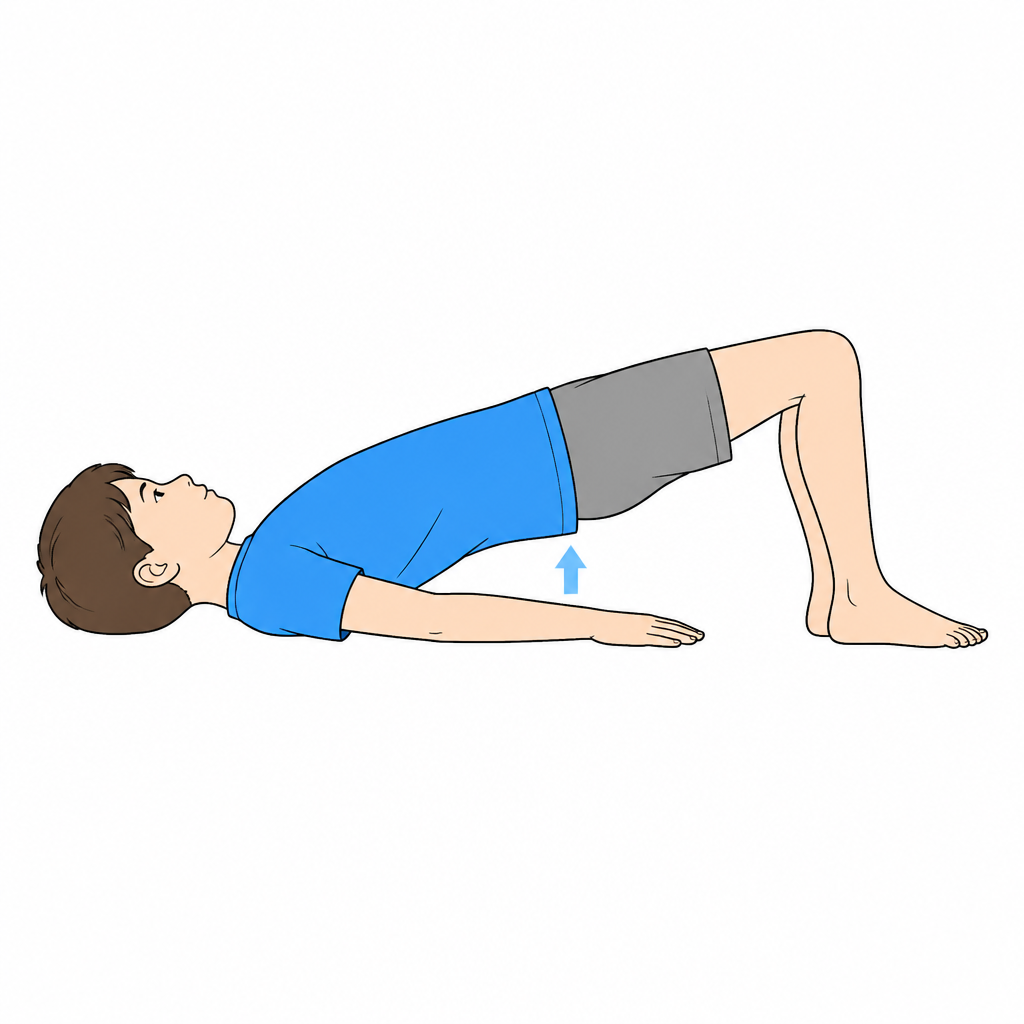
Bridge
- •Supine, knees bent and feet hip-width apart on the floor.
- •Lift the pelvis squeezing the glutes, without arching the back, then lower slowly.
Dosage: Indicative: 2-3 sets of 10-12 repetitions.
Readiness criteria for surgery
- ☐The patient uses crutches correctly with the planned weight bearing.
- ☐Pain and effusion controlled.
- ☐Allowed range of motion maintained.
- ☐Family informed about the planned procedure and post-operative restrictions.
When surgery must not be delayed
- •Acute, salvageable osteochondral fragment: fixation must not be delayed.
- •Loose body with joint locking or recurrent effusion.
What to prepare at home and school
- •Organise movement at home: clear pathways, remove rugs, keep useful items within reach.
- •Prepare ice, a support for the heel, comfortable clothing and crutches already adjusted.
- •Inform school or the sports club: plan the absence, temporary exemption and gradual return.
- •Agree the first post-operative physiotherapy session in advance.
Phase 1 — Protecting the fragment and the clot
Indicative timing: Days 0-14
The time window is indicative: progression depends on the criteria listed below, not on the calendar.
Goals
- •Protect the repair: no compression on the treated area
- •Achieve and maintain full extension (0°)
- •Reduce effusion and pain, reactivate the quadriceps
What to do
- •Early passive mobilisation as indicated: manual or, where available and prescribed, with CPM in blocks through the day; one example of progression is 0-30° in the first days with gradual increments as tolerated
- •Cryotherapy and compression 15-20 minutes, 4-6 times daily; limb elevated above heart level when sitting or lying
- •Quadriceps isometrics (quad sets) and patellar mobilisation in all directions to prevent adhesions
- •Walking with two crutches, strictly respecting the prescribed load: the toes touch down for balance only, not for support
- •Ankle and gluteal contractions, exercises for the healthy limb and trunk to maintain general condition
Restrictions and precautions
- •No load beyond touch-down for condylar lesions
- •No loaded flexion for patellar/trochlear lesions
- •No resisted open-kinetic-chain quadriceps work
- •Avoid prolonged sitting with the knee flexed and the foot dependent (increases swelling)
Exercises for this phase
1. Quadriceps isometric contraction (quad set)After entering the indicated phase and receiving clearance for this exercise; respect prescribed load and range.
- •Lie on your back with the leg supported and the knee within the authorised extension range.
- •Tighten the front of the thigh without lifting the leg or forcing the knee. Use a small support under the knee only if demonstrated by your physiotherapist.
- •Hold briefly and relax. Lifting the heel is neither a target nor proof of full extension.
Dosage: 10 contractions of 5 seconds, 4-6 times a day
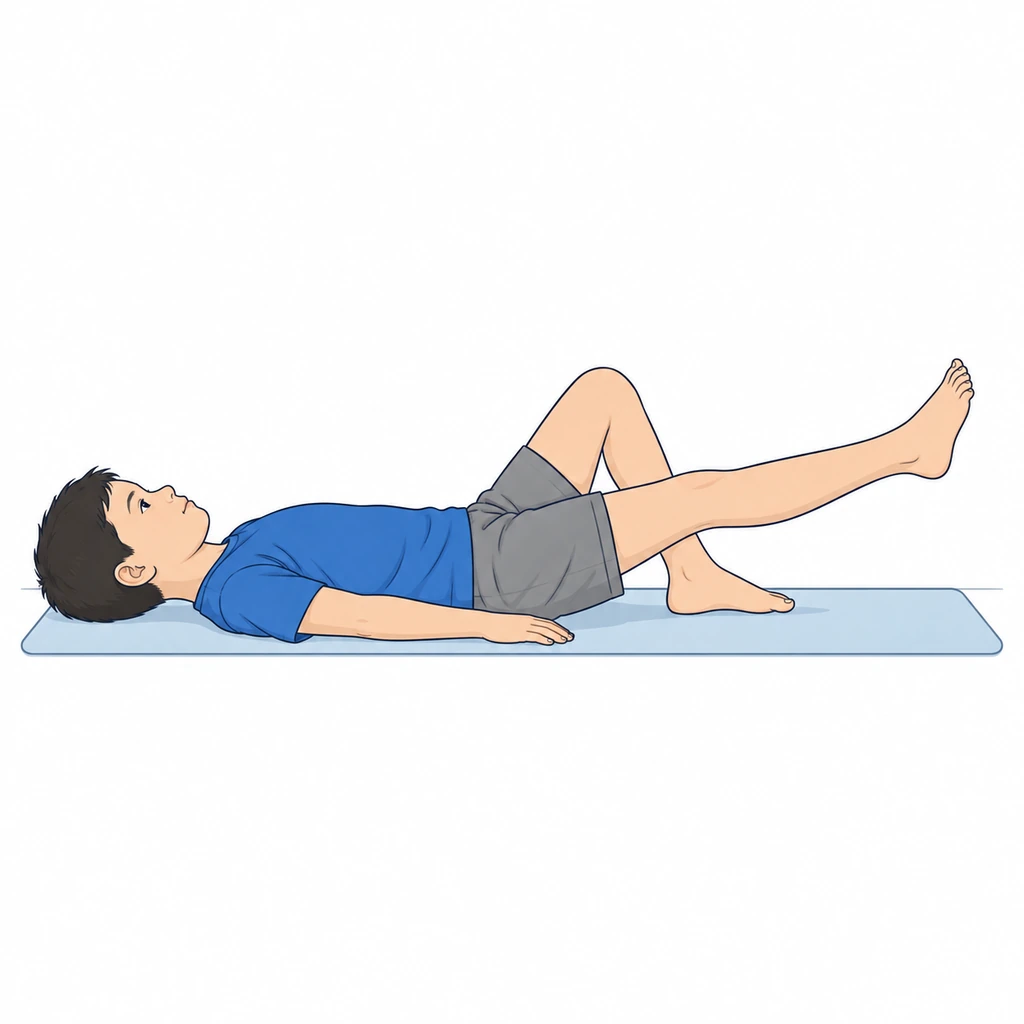
2. Straight-leg raiseAfter entering the indicated phase and receiving clearance for this exercise; respect prescribed load and range.
- •Lying on your back, first tighten the thigh until the knee locks straight.
- •Lift the straight leg about 30 cm, hold 3 seconds and lower slowly.
- •If the knee bends while lifting, the quadriceps is not ready yet: go back to quad sets.
Dosage: 3 sets of 10, twice a day
Ready for the next phase when
- ☐Full active extension (0°) with no extensor lag
- ☐Passive flexion within the individually permitted arc, without forcing an angle
- ☐Decreasing effusion, dry wounds
- ☐Safe and correct crutch use, including stairs
Note for the physiotherapist
If extension is limited, assess the cause and teach an appropriate supported position within the permitted range. A heel prop is supine; a prone hang is face down with the lower leg unsupported. Do not combine the two setups or add ankle weights independently.
Phase 2 — Restoring motion under protected loading
Indicative timing: Weeks 2-6
The time window is indicative: progression depends on the criteria listed below, not on the calendar.
Goals
- •ROM 0-120° by week 6
- •Active quadriceps control without activation delay
- •Maintain muscle trophism without loading the lesion
What to do
- •Daily active-assisted and passive mobilisation, wall heel slides, stationary bike with no resistance (high saddle) once flexion exceeds 100-105°
- •Quadriceps NMES combined with voluntary contraction if inhibition persists
- •Closed-chain strengthening in offloading or in water (hydrotherapy after wound healing), hip and core work
- •Maintain the prescribed protected load. Progress only after the surgeon’s clearance, with practical instruction on crutch use and permitted loading.
Restrictions and precautions
- •No squatting beyond 30-45° for patellar/trochlear lesions
- •No loaded leg extension, no step-ups, no lunges
- •No loaded knee torsion
No additional exercise cards are assigned here. Follow this phase’s indications and the programme selected by your physiotherapist; do not automatically continue or progress every previous exercise.
Ready for the next phase when
- ☐ROM 0-120° or within 15° of the other side
- ☐Clear quadriceps contraction with straight-leg raise and no lag
- ☐No increase in effusion in the 24 hours after sessions
- ☐Load progression achieved as prescribed
Note for the physiotherapist
For patellar or trochlear lesions, obtain the permitted flexion arc directly from the surgeon; do not infer a safe angle from a general diagram.
Phase 3 — Transition to full weight bearing
Indicative timing: Weeks 6-12
The time window is indicative: progression depends on the criteria listed below, not on the calendar.
Goals
- •Crutch weaning with symmetrical gait
- •Quadriceps strength ≥60-70% of the other side
- •Assess healing through clinical review and imaging when it can change management
What to do
- •Progressive crutch weaning: one crutch on the opposite side first, then free walking, only if there is no limp
- •Closed-chain strengthening: mini-squats 0-45°, low-load double-leg press, glute bridge, low step-ups
- •Double- then single-leg proprioception on a stable surface
- •Stationary bike with progressive resistance, freestyle swimming (avoid breaststroke for the first 12 weeks)
- •After fixation, MRI or CT only when the surgeon expects it to change the loading decision; not a routine mandatory step for everyone.
Restrictions and precautions
- •No running, no jumping, no change of direction
- •Avoid deep squats and deep lunges
Exercises for this phase
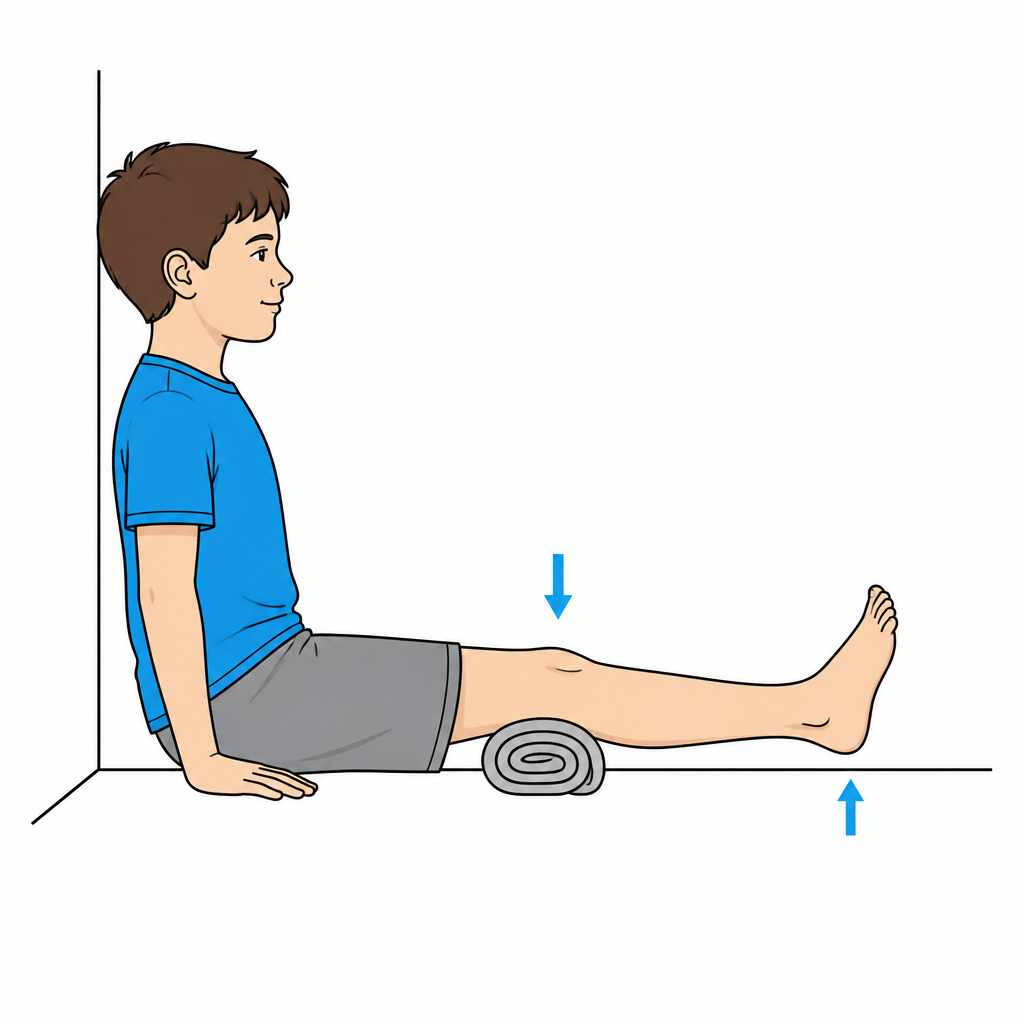
3. Global quadriceps recoveryAfter entering the indicated phase and receiving clearance for this exercise; respect prescribed load and range.
- •Sitting with a pillow under the slightly bent knee.
- •Extend the knee by pushing the heel forward, keeping the thigh on the pillow.
- •Aim for a full, even contraction of the whole thigh: isolating a single portion of the muscle is not useful.
Dosage: 3 sets of 12, once or twice a day
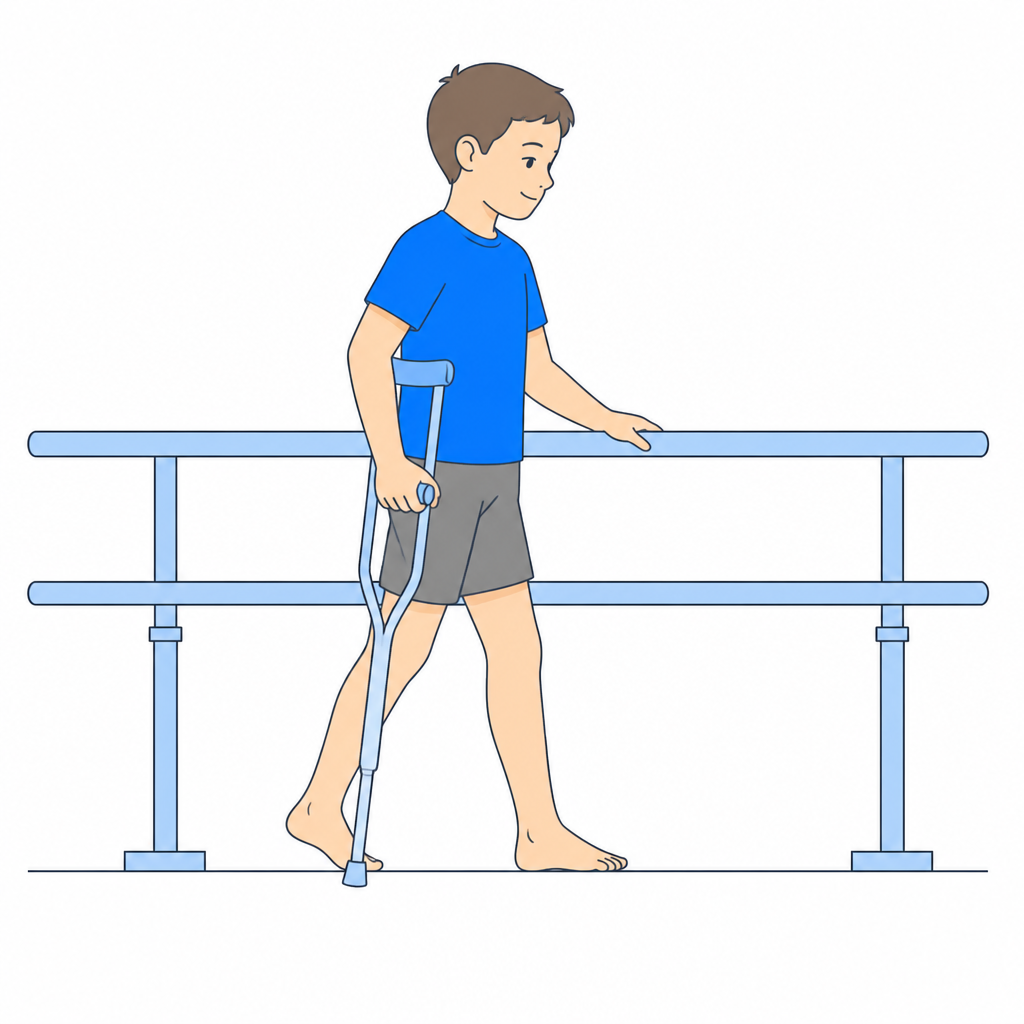
4. Load progression using scalesAfter entering the indicated phase and receiving clearance for this exercise; respect prescribed load and range.
- •Practise first with your physiotherapist, using crutches and stable supports to prevent falls.
- •Place the foot on the scales only if weight bearing is allowed and reach only the prescribed value. A percentage depends on your body weight and is not a fixed number of kilograms.
- •Scales help you recognise static loading but do not certify loading while walking. Do not increase it automatically each week.
Dosage: 5 minutes of load training per day
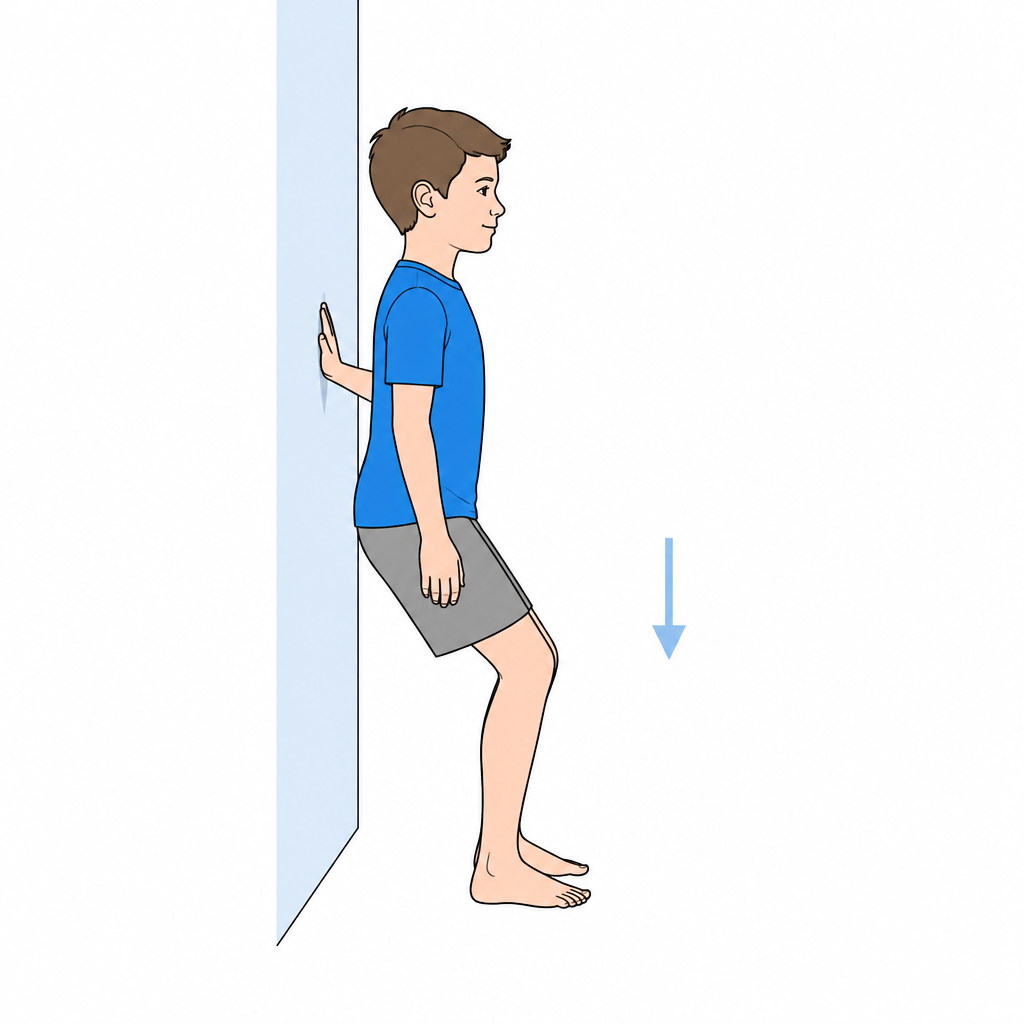
5. Mini-squat 0-45°After entering the indicated phase and receiving clearance for this exercise; respect prescribed load and range.
- •Standing, feet hip-width apart, weight evenly distributed.
- •Bend the knees to about 45°, keeping the knees aligned over the feet.
- •Rise by pushing through the heels, without letting the knee collapse inwards.
Dosage: 3 sets of 12, 3-4 times a week
6. Glute bridgeAfter entering the indicated phase and receiving clearance for this exercise; respect prescribed load and range.
- •Lie on your back, knees bent, feet flat on the floor.
- •Lift the pelvis by squeezing the glutes until shoulders, hip and knee are aligned.
- •Lower slowly without arching the back.
Dosage: 3 sets of 12-15, on alternate days
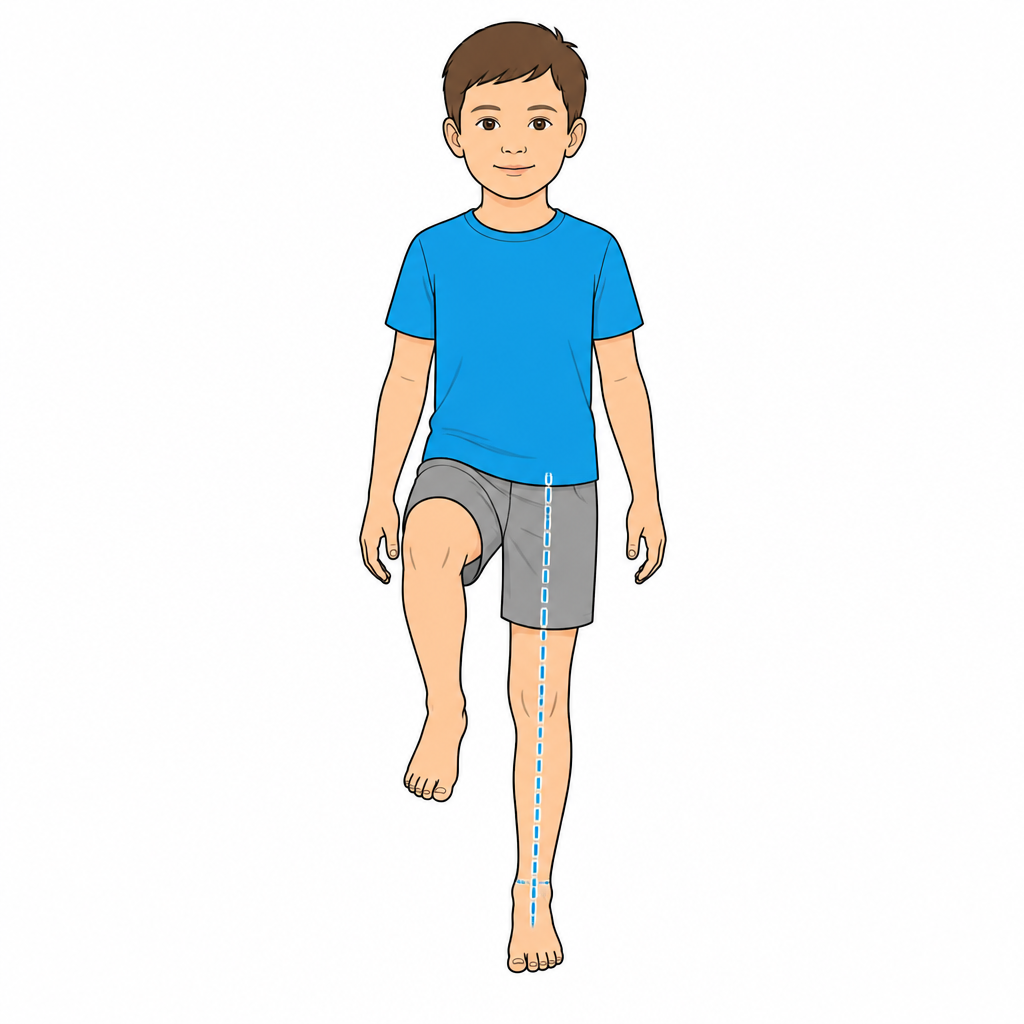
7. Single-leg balanceAfter entering the indicated phase and receiving clearance for this exercise; respect prescribed load and range.
- •Stand on one leg with the knee slightly bent and look ahead, after clearance for weight bearing.
- •Keep your eyes open on firm ground near a stable support; an adult must be able to assist the child.
- •Aim to keep your pelvis steady. If it tilts or you lose balance, put the other foot down, reduce the difficulty and ask your physiotherapist to check the movement.
Dosage: 3 x 30 seconds per side, daily
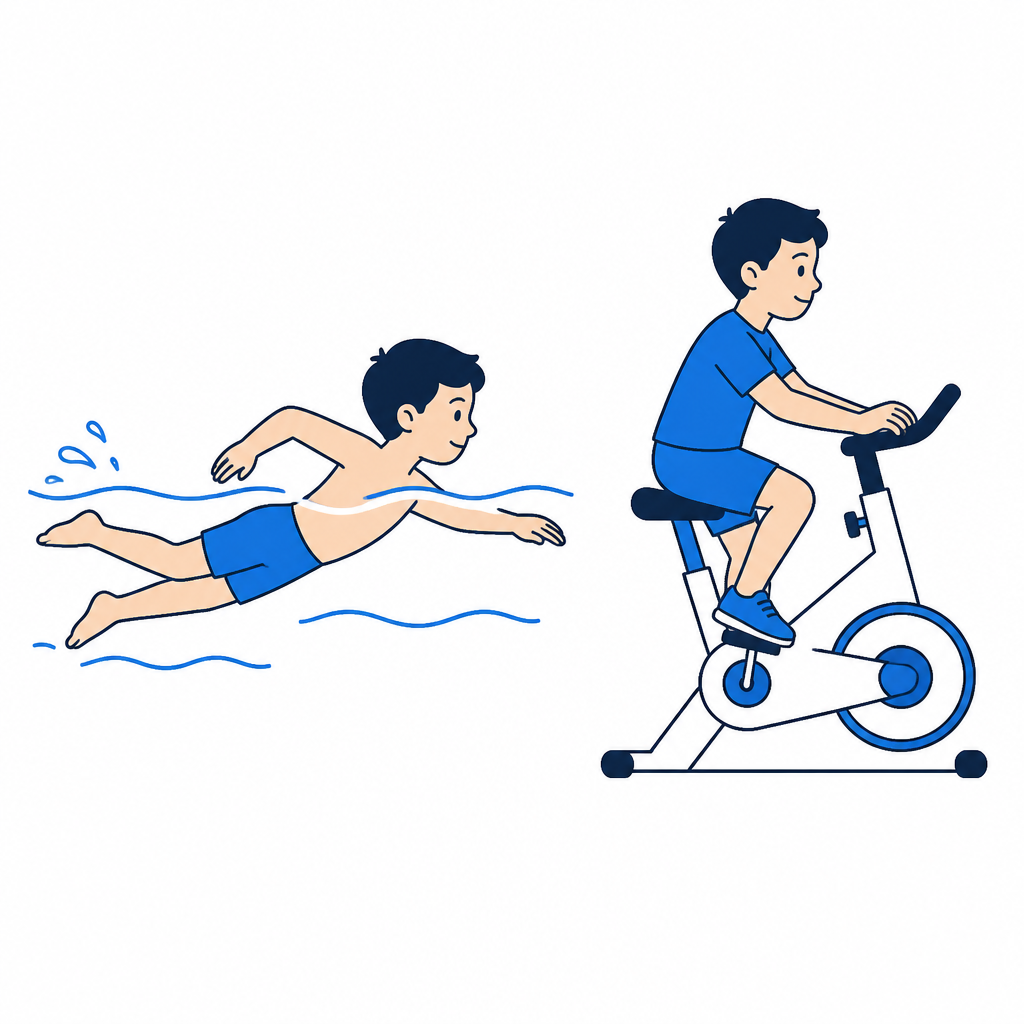
8. Low-impact conditioningAfter entering the indicated phase and receiving clearance for this exercise; respect prescribed load and range.
- •Stationary bike with high saddle and minimal resistance, swimming (avoiding breaststroke early), elliptical.
- •Select cycling, pool exercise or other low-impact activity with your physiotherapist within the permitted load, range and resistance. Low impact does not mean no compression of the repaired area.
- •The rule is always the same: no swelling the next day.
Dosage: 20-30 minutes, 3-5 times a week
Ready for the next phase when
- ☐Walking without limp or aids for at least 20 minutes
- ☐Full symmetrical ROM
- ☐Dry knee: no effusion after daily activity
- ☐Quadriceps ≥60-70% on dynamometry or comparative isometric testing
Phase 4 — Strength and neuromuscular control
Indicative timing: Months 3-5
The time window is indicative: progression depends on the criteria listed below, not on the calendar.
Goals
- •Quadriceps and hamstring strength ≥80%
- •Single-leg limb alignment control (no dynamic valgus)
- •Prepare the knee for impact
What to do
- •Progressive strengthening: squats, single-leg press, step-downs, controlled lunges, single-leg bridge
- •Eccentric quadriceps and posterior chain work (age-adapted nordic hamstring)
- •Proprioception on unstable surfaces, dual task, perturbations
- •Non-impact conditioning: bike, elliptical, swimming, deep-water running
- •After microfracture: introduce progressive cyclic loading (brisk walking, hills) before true impact
Restrictions and precautions
- •Impact and plyometrics only once phase criteria are met
- •Watch for deep pain and delayed effusion: signs of overloading the repair
Exercises for this phase
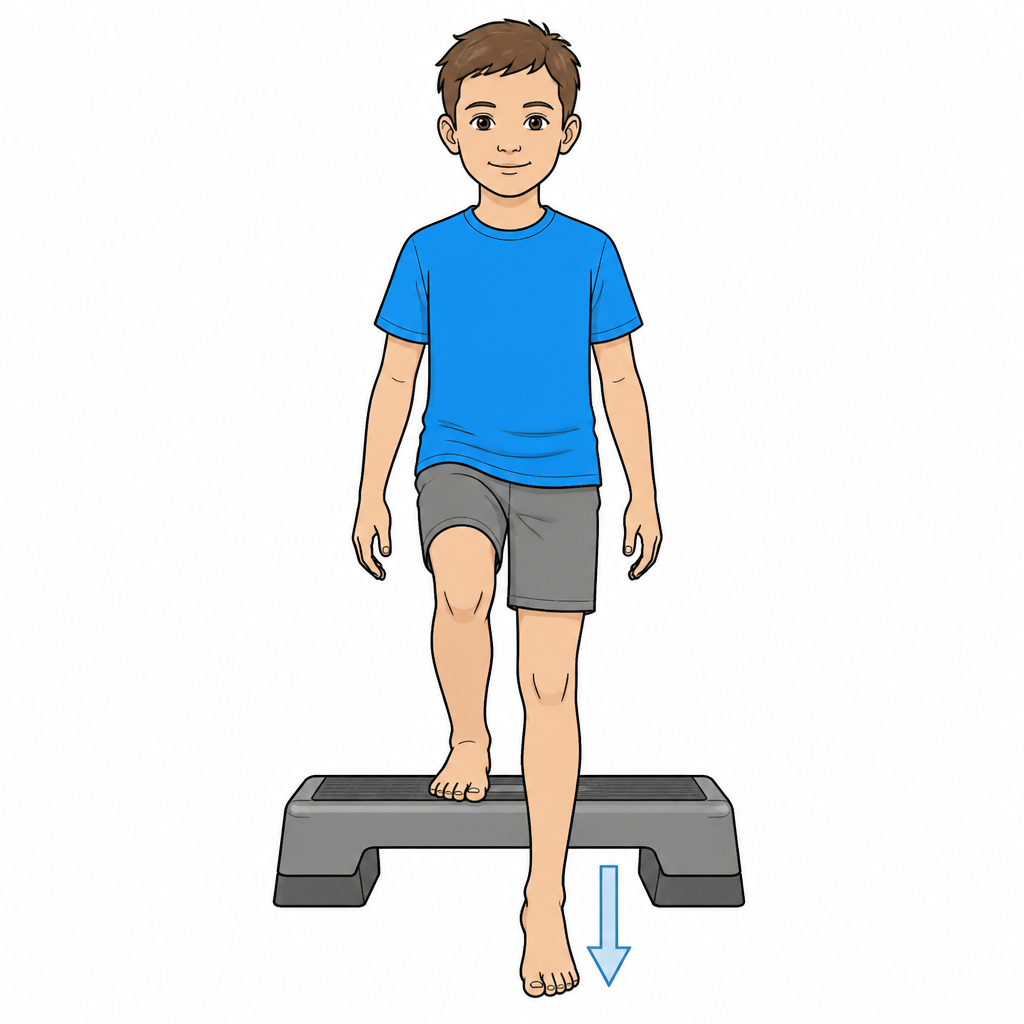
9. Controlled step-downAfter entering the indicated phase and receiving clearance for this exercise; respect prescribed load and range.
- •Stand on a 15-20 cm step on the operated leg.
- •Lower slowly with the other foot, touching the floor with the heel, over 3 seconds.
- •The standing knee must stay aligned over the foot: if it collapses inwards, lower the step.
Dosage: 3 sets of 8-10 per side, 3 times a week
Ready for the next phase when
- ☐Quadriceps strength ≥80%
- ☐20 cm step-down performed with knee control, no valgus and no pain
- ☐No effusion 48 hours after an intense session
- ☐30-minute brisk walk and stairs without pain
Note for the physiotherapist
Effusion is a sign of joint reactivity: if swelling appears after a new load, that load was probably too much. Drop back one level and retry after a few days rather than stopping everything.
Phase 5 — Running, impact and plyometrics
Indicative timing: Months 4-8 (fixation) / 5-9 (microfracture)
The time window is indicative: progression depends on the criteria listed below, not on the calendar.
Goals
- •Continuous running without symptoms or effusion
- •Symmetrical impact absorption in jumping
- •Strength ≥90%
What to do
- •Walk-run intervals on regular ground, increasing volume according to tolerance and follow-up; no automatic weekly percentage
- •Graded plyometrics: partially unloaded double-leg, full double-leg, single-leg, jumps with controlled landing
- •Linear agility, then wide and finally sharp changes of direction
- •Strength work maintained 2-3 times weekly alongside field work
Restrictions and precautions
- •No contact, no full-intensity sport-specific drills
- •Stop impact work if effusion or pain lasting more than 24 hours appears
Exercises for this phase
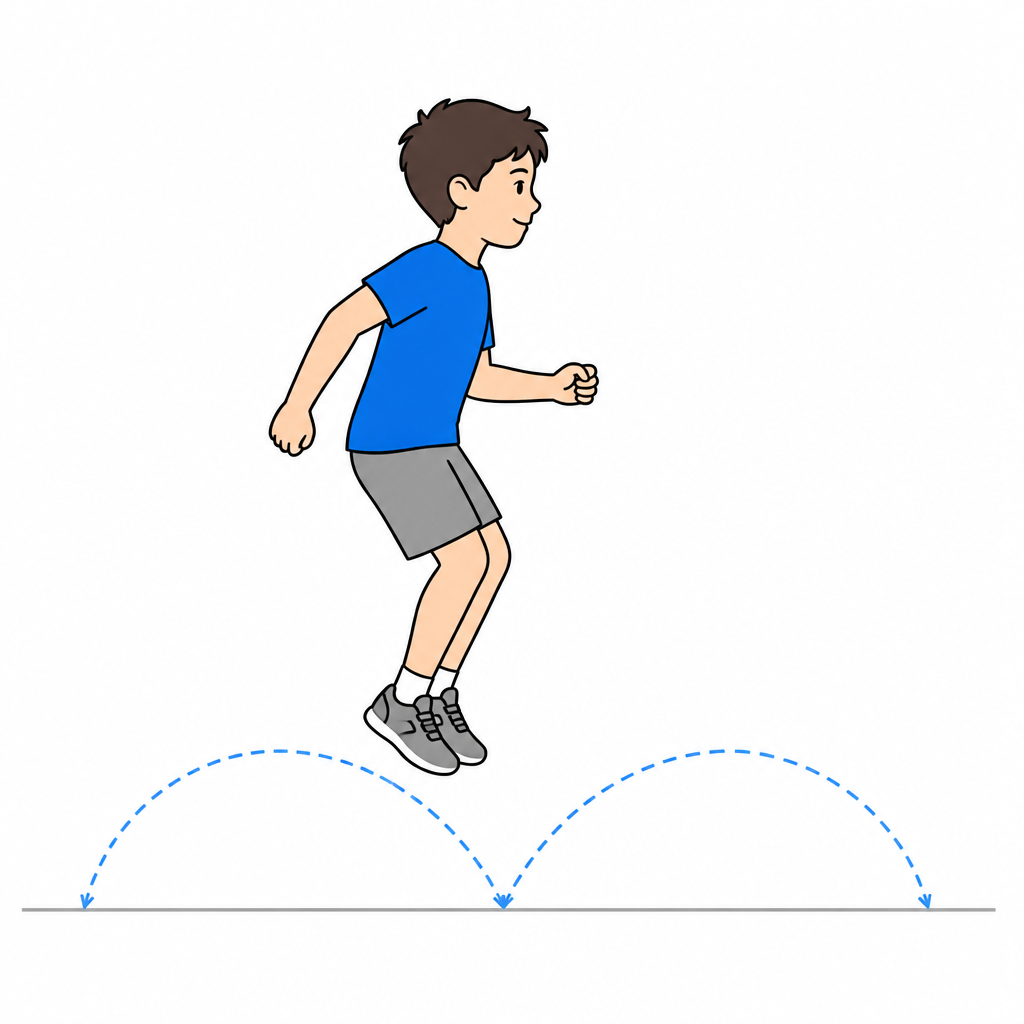
10. Progressive plyometricsAfter entering the indicated phase and receiving clearance for this exercise; respect prescribed load and range.
- •Only after clearance for impact and demonstration by your physiotherapist, start with small two-foot hops on a stable surface.
- •Increase direction, height or single-leg work only within the agreed progression; do not add several challenges at once.
- •Aim for a controlled landing with knees and feet aligned. Stop for pain, giving way or loss of control; report swelling or worsening symptoms afterwards. Landing noise alone does not measure movement safety.
Dosage: 2-3 sets of 10-20 contacts, 2-3 times a week
Ready for the next phase when
- ☐20-30 minutes of continuous running with no pain and no next-day swelling
- ☐Progressive hop tests with LSI ≥85-90%
- ☐Step landing with aligned, cushioned and symmetrical knee
- ☐Quadriceps and hamstrings ≥90%
Phase 6 — Return to sport and maintenance
Indicative timing: Months 8-12 and beyond
The time window is indicative: progression depends on the criteria listed below, not on the calendar.
Goals
- •Graded return to full training and then competition
- •Long-term cartilage protection
What to do
- •Graded reintegration: partial non-contact training → full training → part of a match → competition
- •Year-round preventive neuromuscular programme (FIFA 11+ or equivalent)
- •Body-weight management, weekly load monitoring, avoid clustered high-impact double sessions
- •Clinical review and, where indicated, MRI at 12 months for large lesions or after microfracture
No additional exercise cards are assigned here. Follow this phase’s indications and the programme selected by your physiotherapist; do not automatically continue or progress every previous exercise.
Ready for the next phase when
- ☐Test battery passed with LSI ≥90% on all items
- ☐No effusion and no pain in the preceding 4 weeks
- ☐Surgeon clearance, with consistent imaging in large lesions
- ☐Subjective confidence in the knee, assessed clinically and, if useful, with age- and context-appropriate questionnaires (KOOS Sport/Rec, Pedi-IKDC), without rigid universal cut-offs
If symptoms appear after a progression
If persistent pain, effusion or swelling, or loss of movement appears after moving to a new phase or increasing load, stop progression and contact the treating clinician or physiotherapist to review the programme. Seek prompt assessment for the red flags below. This document does not replace individual clinical assessment.
Return to sport / full activity
Indicative windows: non-contact sport at 6-8 months; pivoting and contact sport at 9-12 months. After microfracture, impact progression is often more gradual because fibrocartilage matures for up to 12-18 months; timelines nonetheless remain subject to criteria and to the surgeon’s assessment, without one technique always being faster than the other.
- ☐Quadriceps and hamstring strength with LSI ≥90% (dynamometry or comparable isometric testing)
- ☐Hop test battery (single, triple, crossover, 6 m timed) with LSI ≥90%
- ☐No effusion in the preceding 4 weeks, even after high loads
- ☐Double- and single-leg landing without dynamic valgus (video-assessed drop jump)
- ☐No deep pain or painful crepitus in squatting and stair descent
- ☐Subjective IKDC or KOOS-Sport ≥90 and adequate confidence
In the growing patient with osteochondritis dissecans, resumption of impact is authorised by the surgeon considering the clinical course together with imaging reviews where available. For large or weight-bearing lesions, long-term sporting choices should be discussed case by case with the family, including lower-impact options. The Limb Symmetry Index has known limitations: on its own it is not sufficient, because the uninjured side may also be deconditioned; it should be combined with absolute strength values, movement quality and sport-specific demands.
Red flags: stop and contact us
- •Sudden locking or the sensation of a loose body inside the knee (possible fragment displacement)
- •Effusion that returns after every session or does not settle within 48 hours
- •Deep, dull pain that increases with loading and does not settle with rest
- •Sudden loss of previously achieved extension
- •Fever, redness, local warmth or wound discharge (suspected infection)
- •Calf pain with new asymmetric swelling: urgent medical assessment. Sudden breathlessness, chest pain or fainting: call 112 immediately
Author: Dott. Daniele Priano, Paediatric Orthopaedics. Content version: 9 September 2026.
Timings are indicative: progression depends on clinical and functional criteria and on the treating clinician’s instructions.
Full introduction and references at ortopediaevolutiva.com/en/rehabilitation/knee-osteochondral-lesion
Knee Osteochondral Lesion: fragment fixation or microfracture — Dott. Daniele Priano, Pediatric Orthopaedics · Information document: it does not replace an in-person assessment.
 Latest online version
This protocol may be used and shared for clinical and informational purposes provided that attribution to the author and to the original source is kept intact. Republishing or distributing it as one’s own work is not allowed.
Other protocols

Any questions?
For information or questions, email me or view the locations and contact details.
Email: daniele.priano@ortopediaevolutiva.com